3.3. Nuclei Studio VSCode Download and Installation
The overall setup flow is: install Nuclei Studio IDE -> install the extension in VS Code -> configure the IDE installation folder -> install NPK packages -> create, build, and debug a project.
3.3.1. Install Nuclei Studio IDE
Nuclei Studio VSCode works on top of Nuclei Studio IDE: the build tools, OpenOCD, RISC-V toolchains, and Nuclei Model are all used from the IDE installation folder. Download and install Nuclei Studio IDE from the Nuclei website first. For the download and installation of Nuclei Studio IDE, see Nuclei Studio IDE.
3.3.2. Install the Extension in VS Code
Open VS Code, open the Extensions view (Ctrl+Shift+X), search for Nuclei Studio VSCode, and click Install.
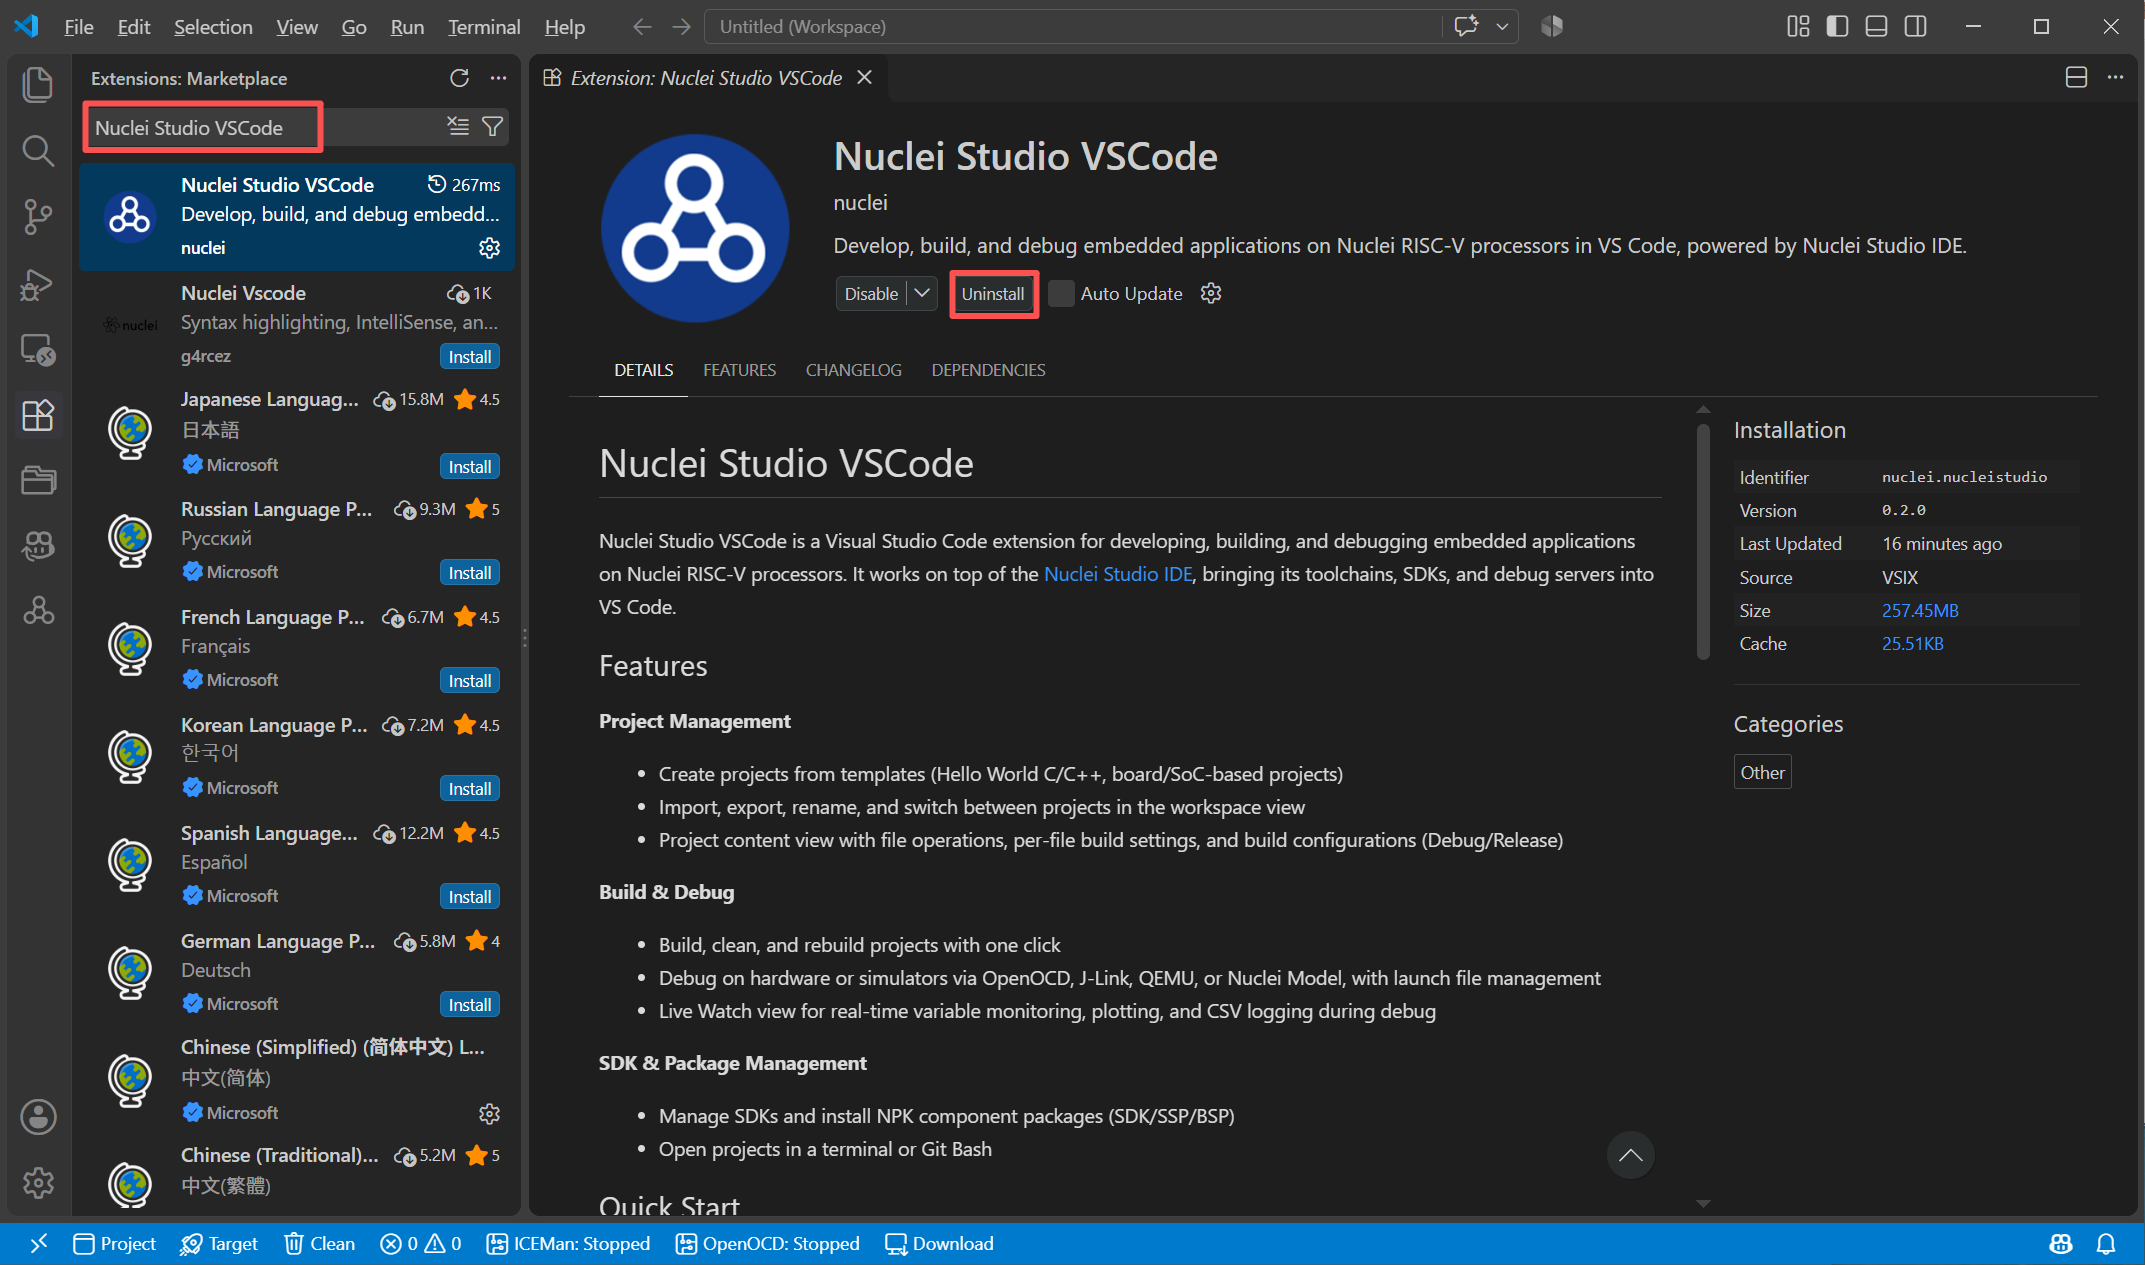
Note
If you have a local nucleistudio.vsix package of the extension (for example, a test version), you can also install it manually: select Install from VSIX... in the menu of the Extensions view and choose the package file.
Note
The extension depends on the following companion extensions, which are installed automatically from the VS Code Marketplace: Serial Monitor (ms-vscode.vscode-serial-monitor), CDT GDB Debug Adapter Extension (eclipse-cdt.cdt-gdb-vscode), Memory Inspector (eclipse-cdt.memory-inspector), and Peripheral Inspector (eclipse-cdt.peripheral-inspector). If the Nuclei Studio VSCode icon does not appear in the activity bar after installation, check whether any of these extensions was installed before but is disabled; enable them and reload the window (Ctrl+Shift+P -> Developer: Reload Window).
Note
If VS Code reports that the current workspace is in Restricted Mode, click the Manage button in the notification and choose Trust for the workspace; otherwise the extension features will not work properly.
3.3.3. The Getting Started Walkthrough
After the extension is installed, click the Nuclei Studio VSCode icon in the activity bar. On the Welcome page, click More... under Walkthroughs, type nuclei in the input box at the top, and select Get Started with Nuclei Studio VSCode to open the getting started guide. The Welcome page can also be opened via Help -> Welcome in the toolbar; if no Walkthroughs content is shown, press Ctrl+Shift+P and run Welcome: Open Walkthrough....
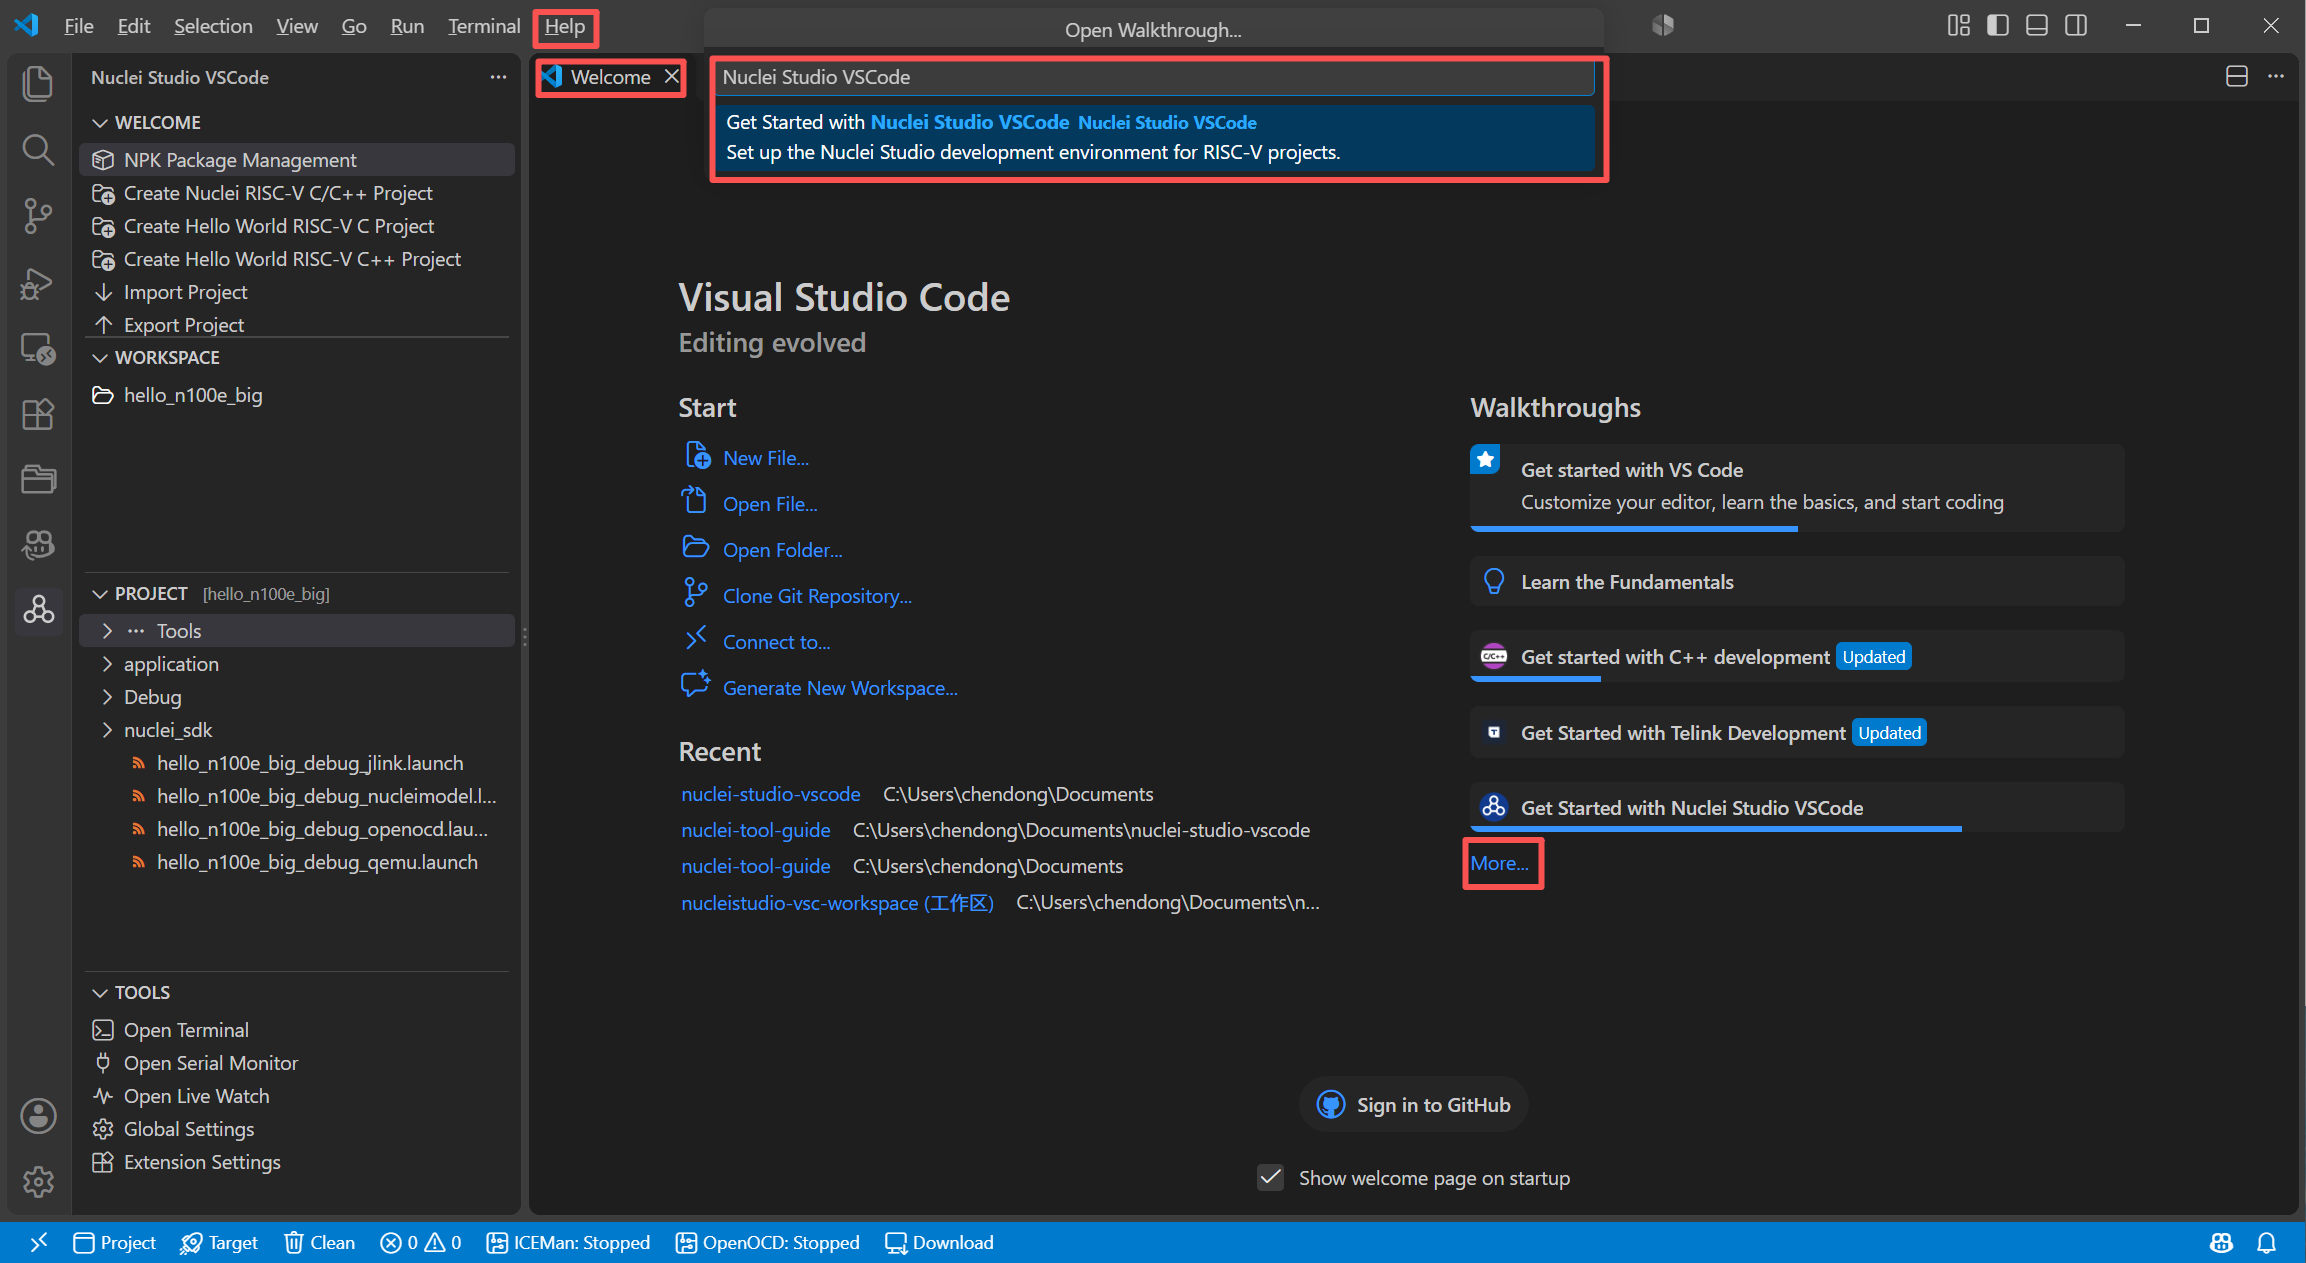
The walkthrough contains 4 steps, which correspond to the chapters of this documentation as follows:
Walkthrough step |
Related chapter |
|---|---|
Configure Install Folder |
|
Install NPK Packages |
|
Create or Import a Project |
|
Build and Debug |
Build a Project in Nuclei Studio VSCode and Debug and Run a Project in Nuclei Studio VSCode |
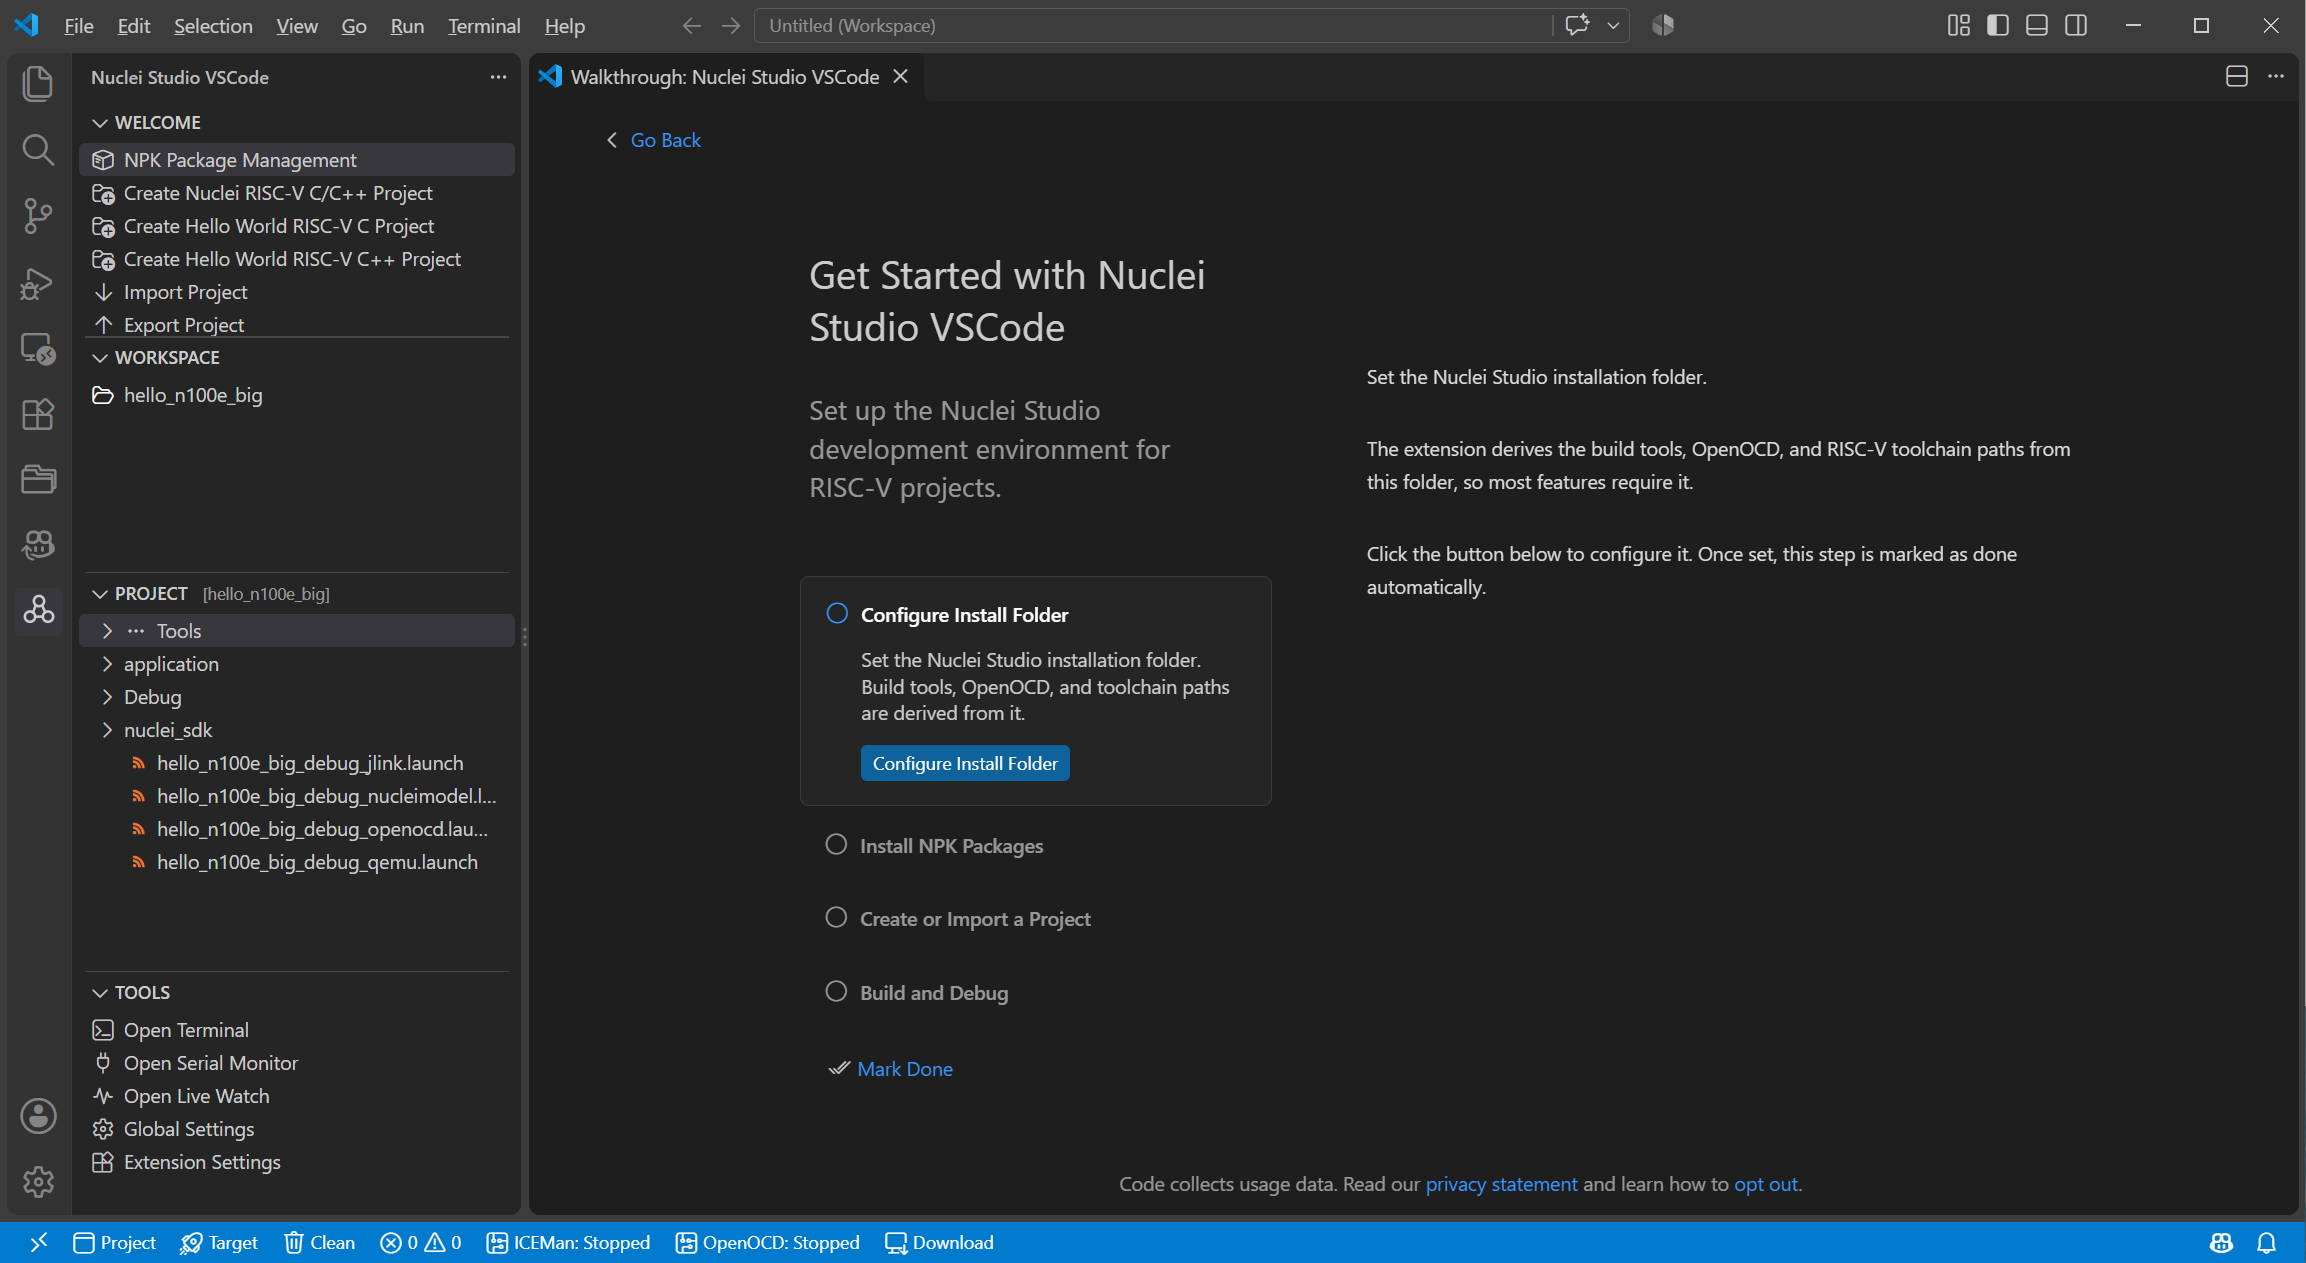
3.3.4. Configure the Nuclei Studio IDE Installation Folder
Most features of the extension depend on the Nuclei Studio IDE installation folder. When it is not configured, a warning item Configure Nuclei Studio Install Folder is shown at the top of the WELCOME panel. Click it and select the folder where Nuclei Studio IDE is installed, or set nucleiStudio.installFolder in the VS Code Settings page.
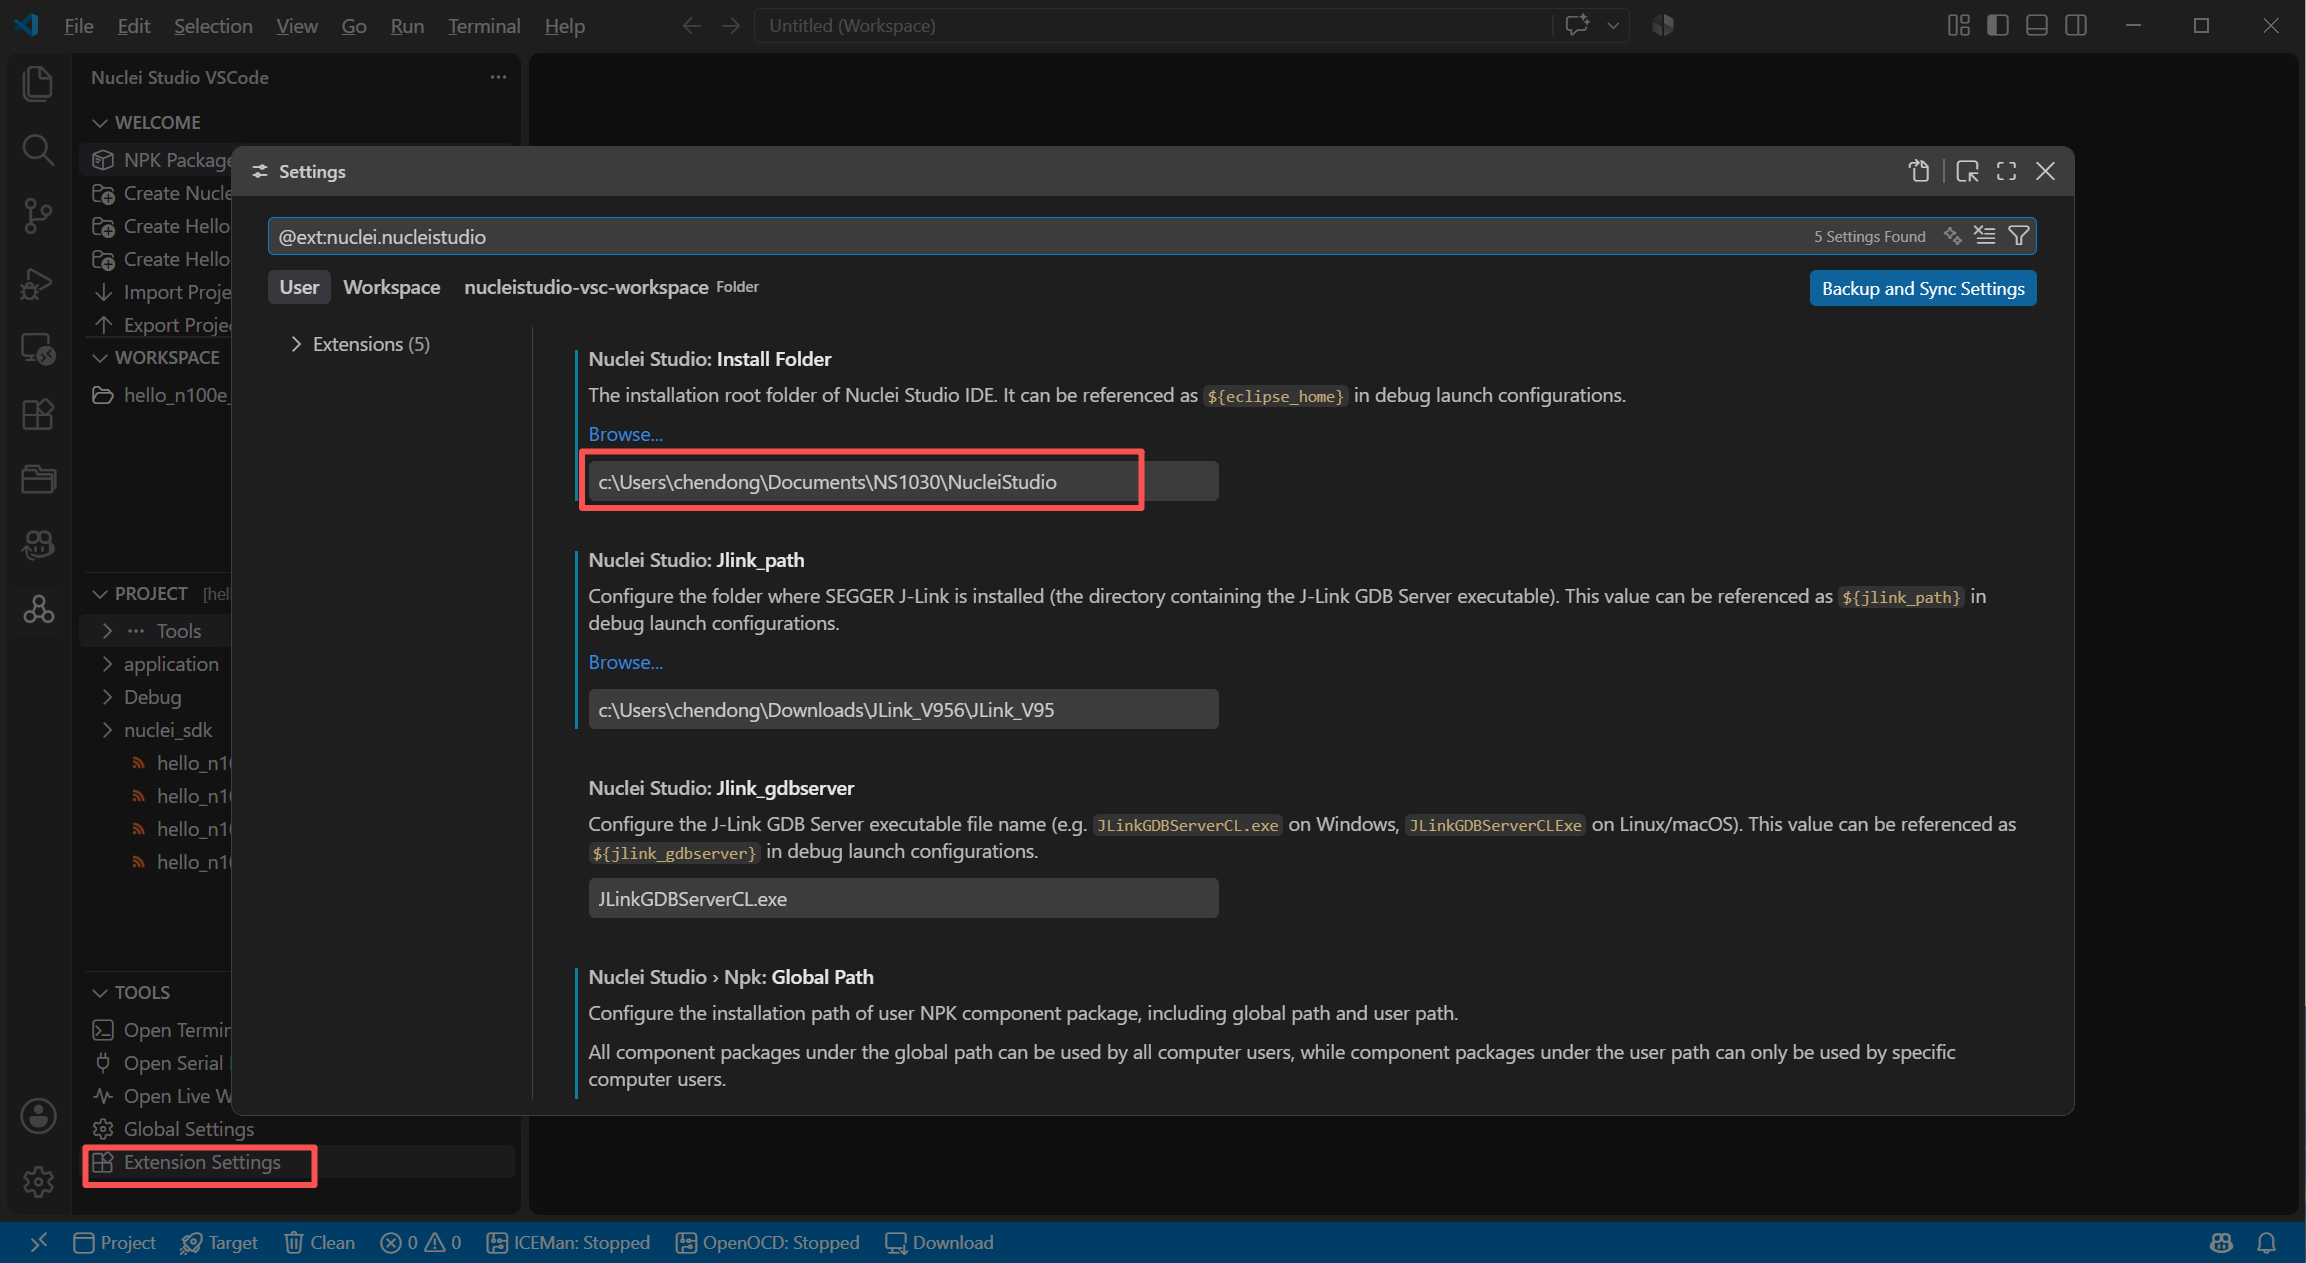
Once the installation folder is configured, the following settings are derived and written into the user settings.json automatically:
Build tools:
<NucleiStudio>/toolchain/build-tools/bin(Windows only)OpenOCD:
<NucleiStudio>/toolchain/openocd/binNuclei Model:
<NucleiStudio>/toolchain/nucleimodel/binRISC-V GCC/Newlib and Clang toolchains:
<NucleiStudio>/toolchain/gcc/binRISC-V Big Endian GCC/Newlib toolchain:
<NucleiStudio>/toolchain/gccbe/binRISC-V Nuclei GCC toolchain:
<NucleiStudio>/toolchain/gcc10/binTerapines ZCC toolchain:
<NucleiStudio>/toolchain/zcc/binNPK package paths: the global path defaults to
<NucleiStudio>/Packages, and the user path defaults to the user home directory
If any derived path does not exist on disk, a warning message lists the paths that could not be resolved; check that the selected folder is a complete Nuclei Studio IDE installation.
The installation folder can be referenced as ${eclipse_home} in debug launch configurations, which keeps .launch files interchangeable with Nuclei Studio IDE.