2.6. Nuclei Studio NPK Applications
Nuclei Studio provides full built-in support for the Nuclei Package (NPK) feature, making it easy for developers to create software development packages and import them into Nuclei Studio through Nuclei Package Management. CPU IP customers can adapt their own chip SDK to support NPK and import it into Nuclei Studio; SoC IP customers can package the provided SDK into a Zip package and import it; developers can also build a BSP package or APP package on top of a specific NPK and distribute it to third parties. For a detailed introduction to the NPK feature and its update notes, see https://github.com/Nuclei-Software/nuclei-sdk/wiki/Nuclei-Studio-NPK-Introduction. Adding NPK support and an npk.yml file to an existing SDK also enables partial customization of the Project Wizard functionality.
To create projects with Nuclei Studio, developers must first install the corresponding SDK NPK Zip package into the IDE. They can then quickly create template projects for different boards, include the required SDK source code based on the selected template, and generate the corresponding compile and link options based on the selected options.
2.6.1. NPK Package Management
2.6.1.1. Import a Local NPK Package
Import a zip package
When you have a software package in zip format, import it through Nuclei Package Management as follows:
Click the Nuclei Package Management button on the Nuclei Studio IDE toolbar to open the NPK package management page, where you can browse and manage installed packages and import new ones. On this page, click Import to select a zip package from the local file system.
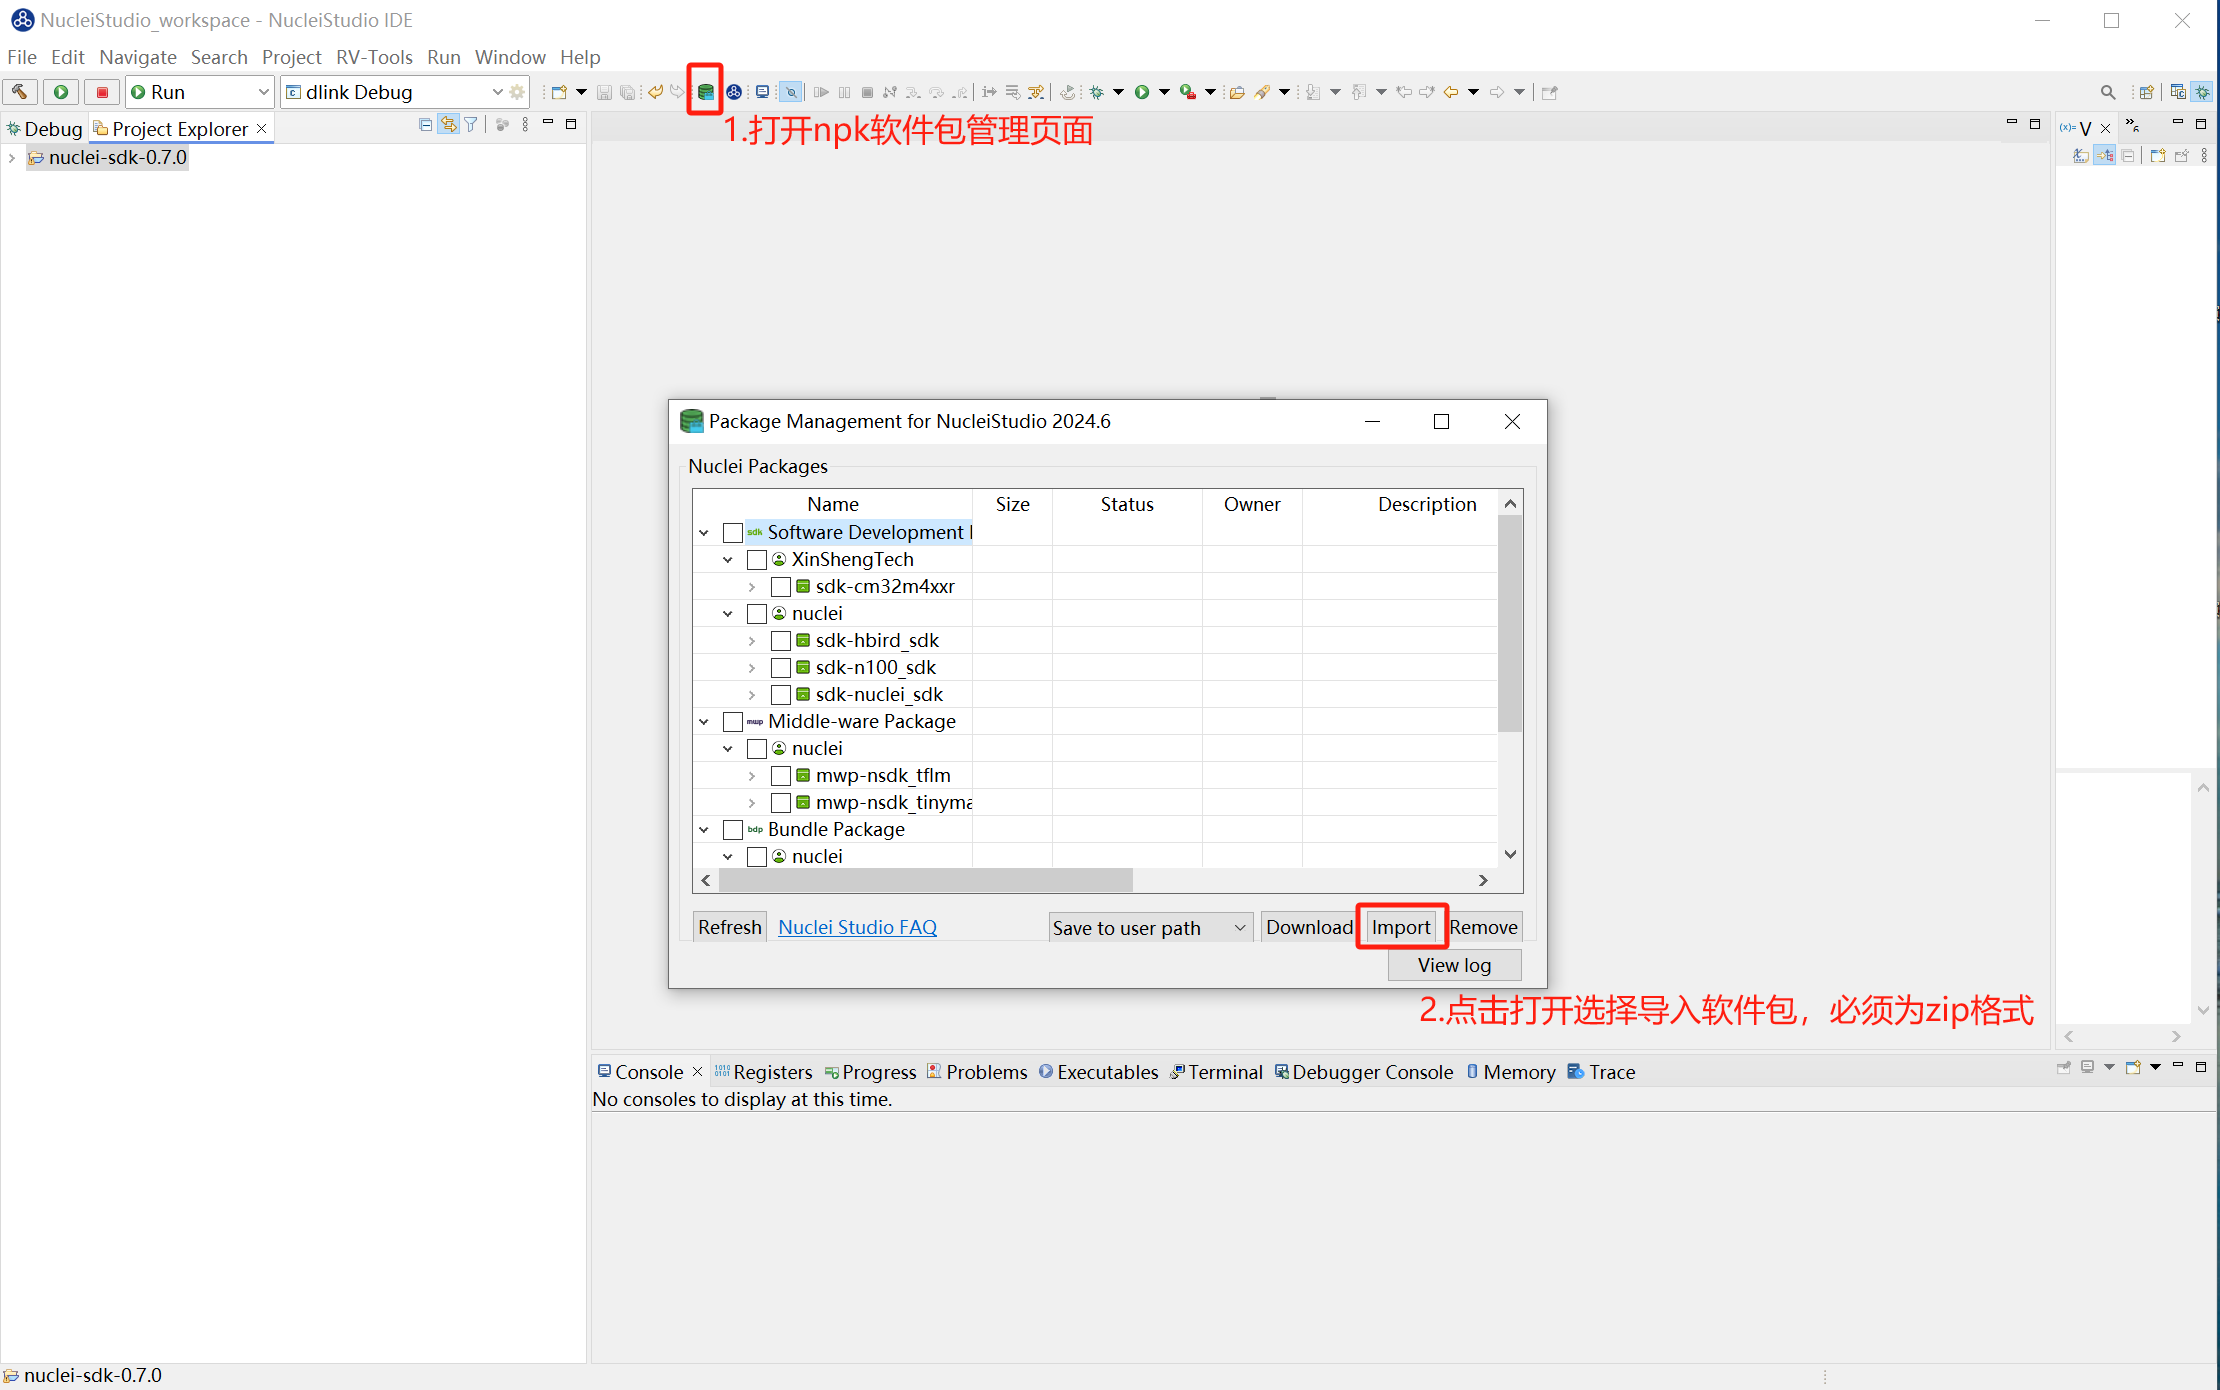
After you click Import, the system prompts you to select a package file to import. Browse to the directory containing your zip package and select it. Make sure a valid zip package is selected, then click Open. Nuclei Studio starts processing and importing the package.

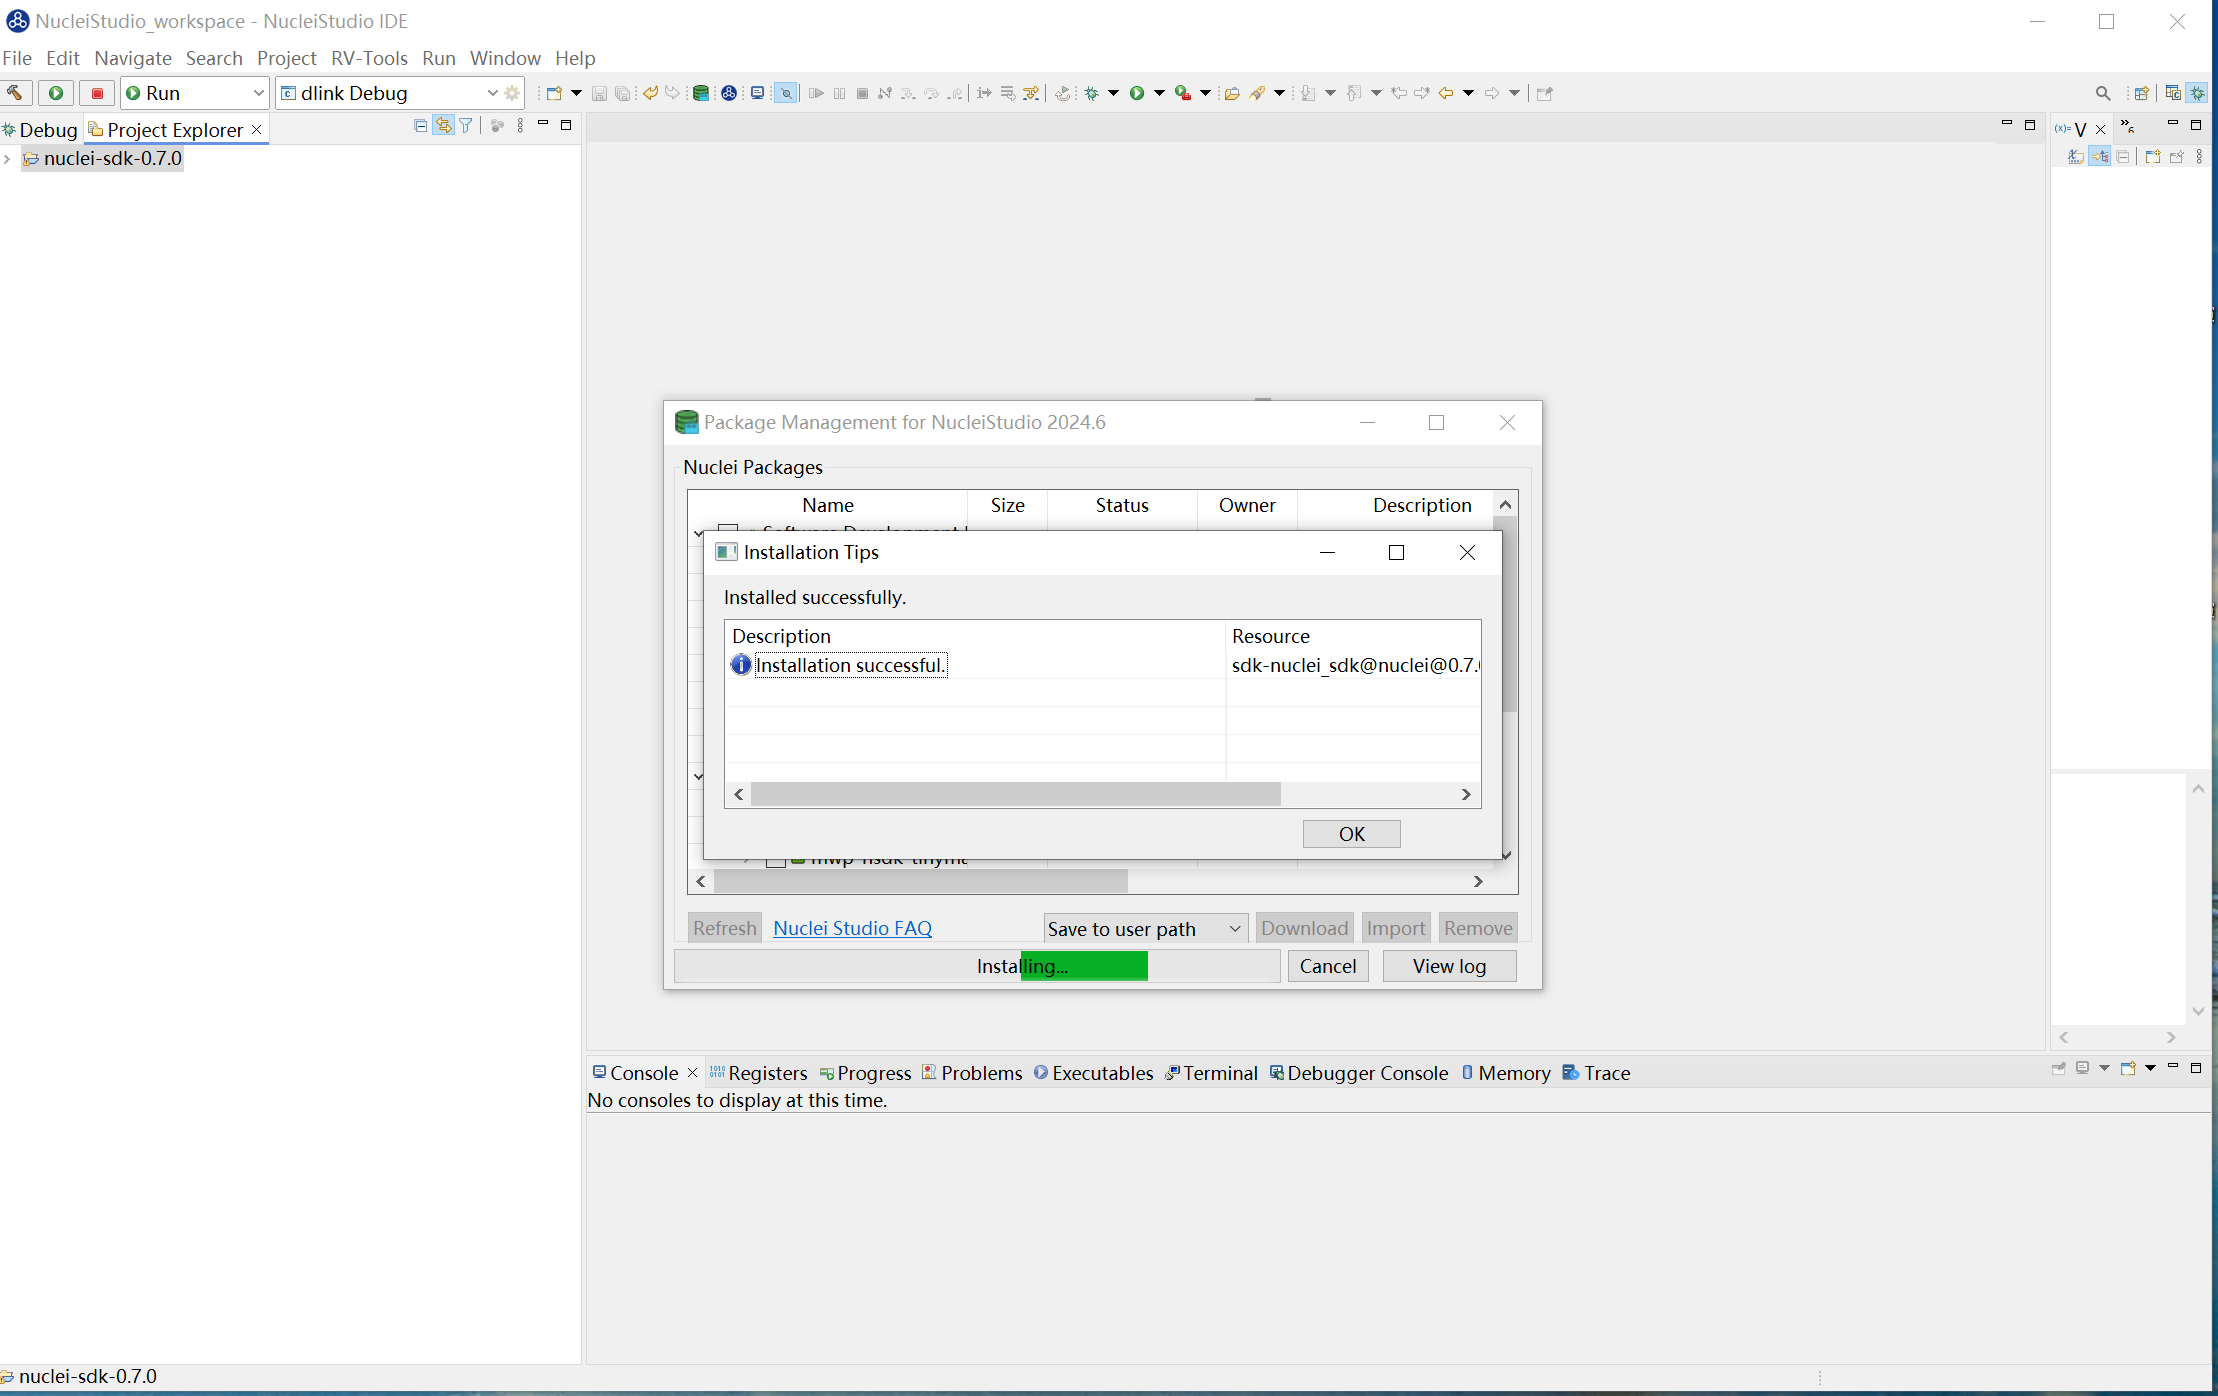
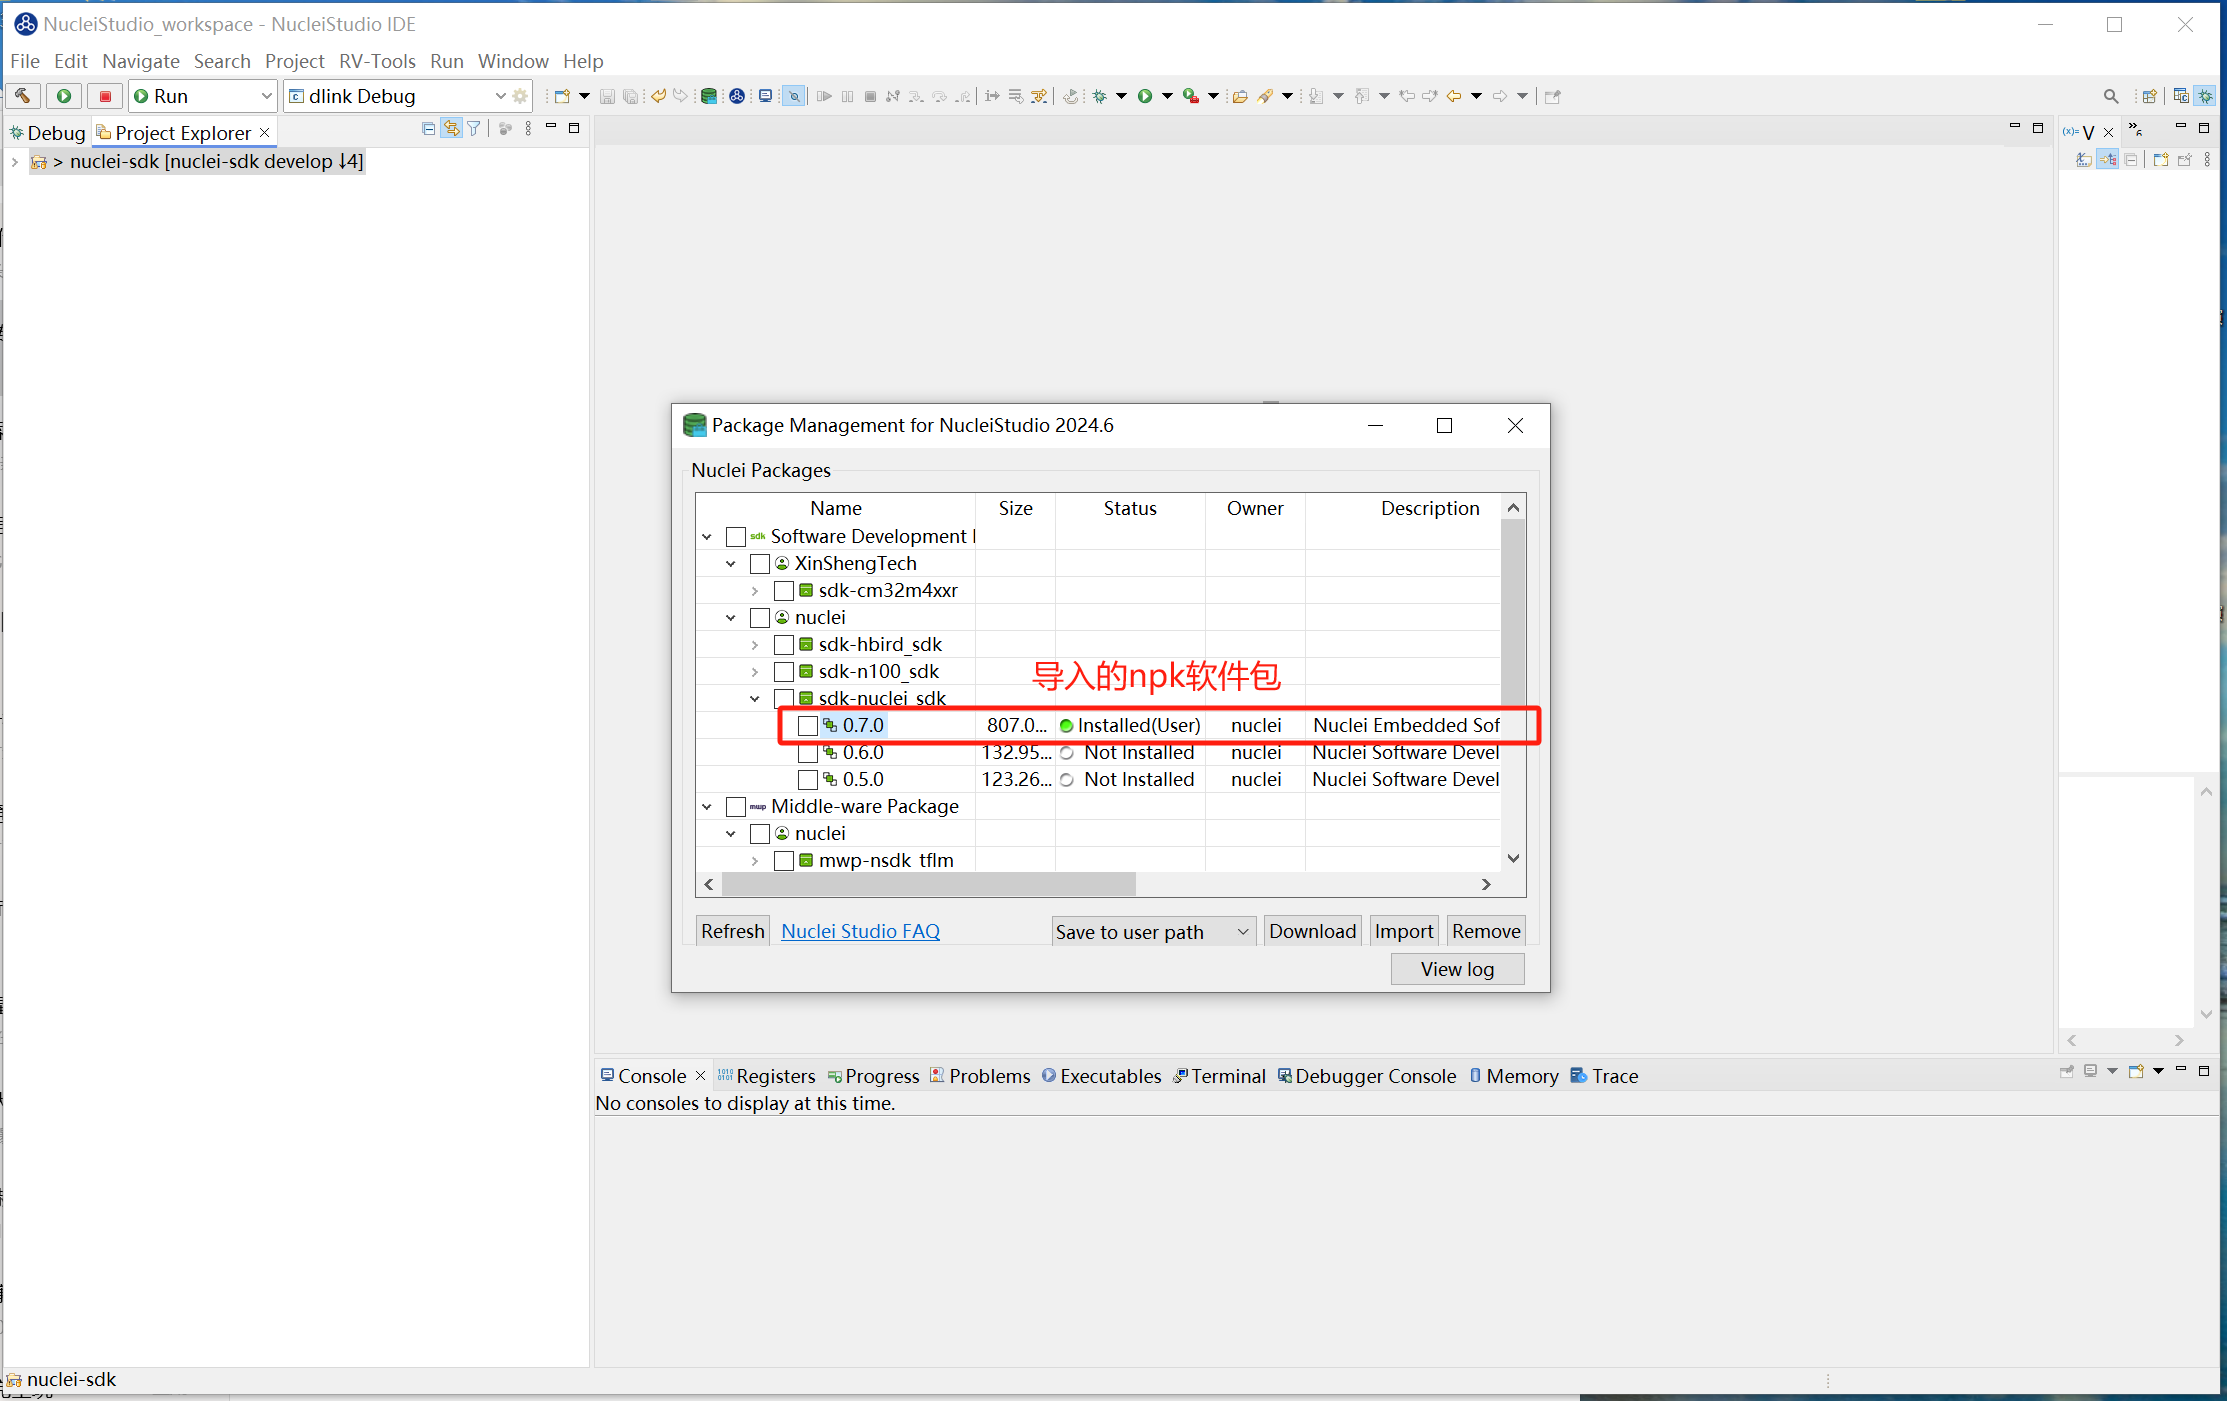
After the import is complete, the newly imported package appears on the Package Management page of Nuclei Studio IDE.
Import an uncompressed NPK package
When you have an uncompressed NPK package project to import into Nuclei Studio, the simplest way is to compress it into a .zip archive and import it using the procedure above. If you want to modify the NPK package project and quickly re-import it into Nuclei Studio for testing after each modification, do the following instead.
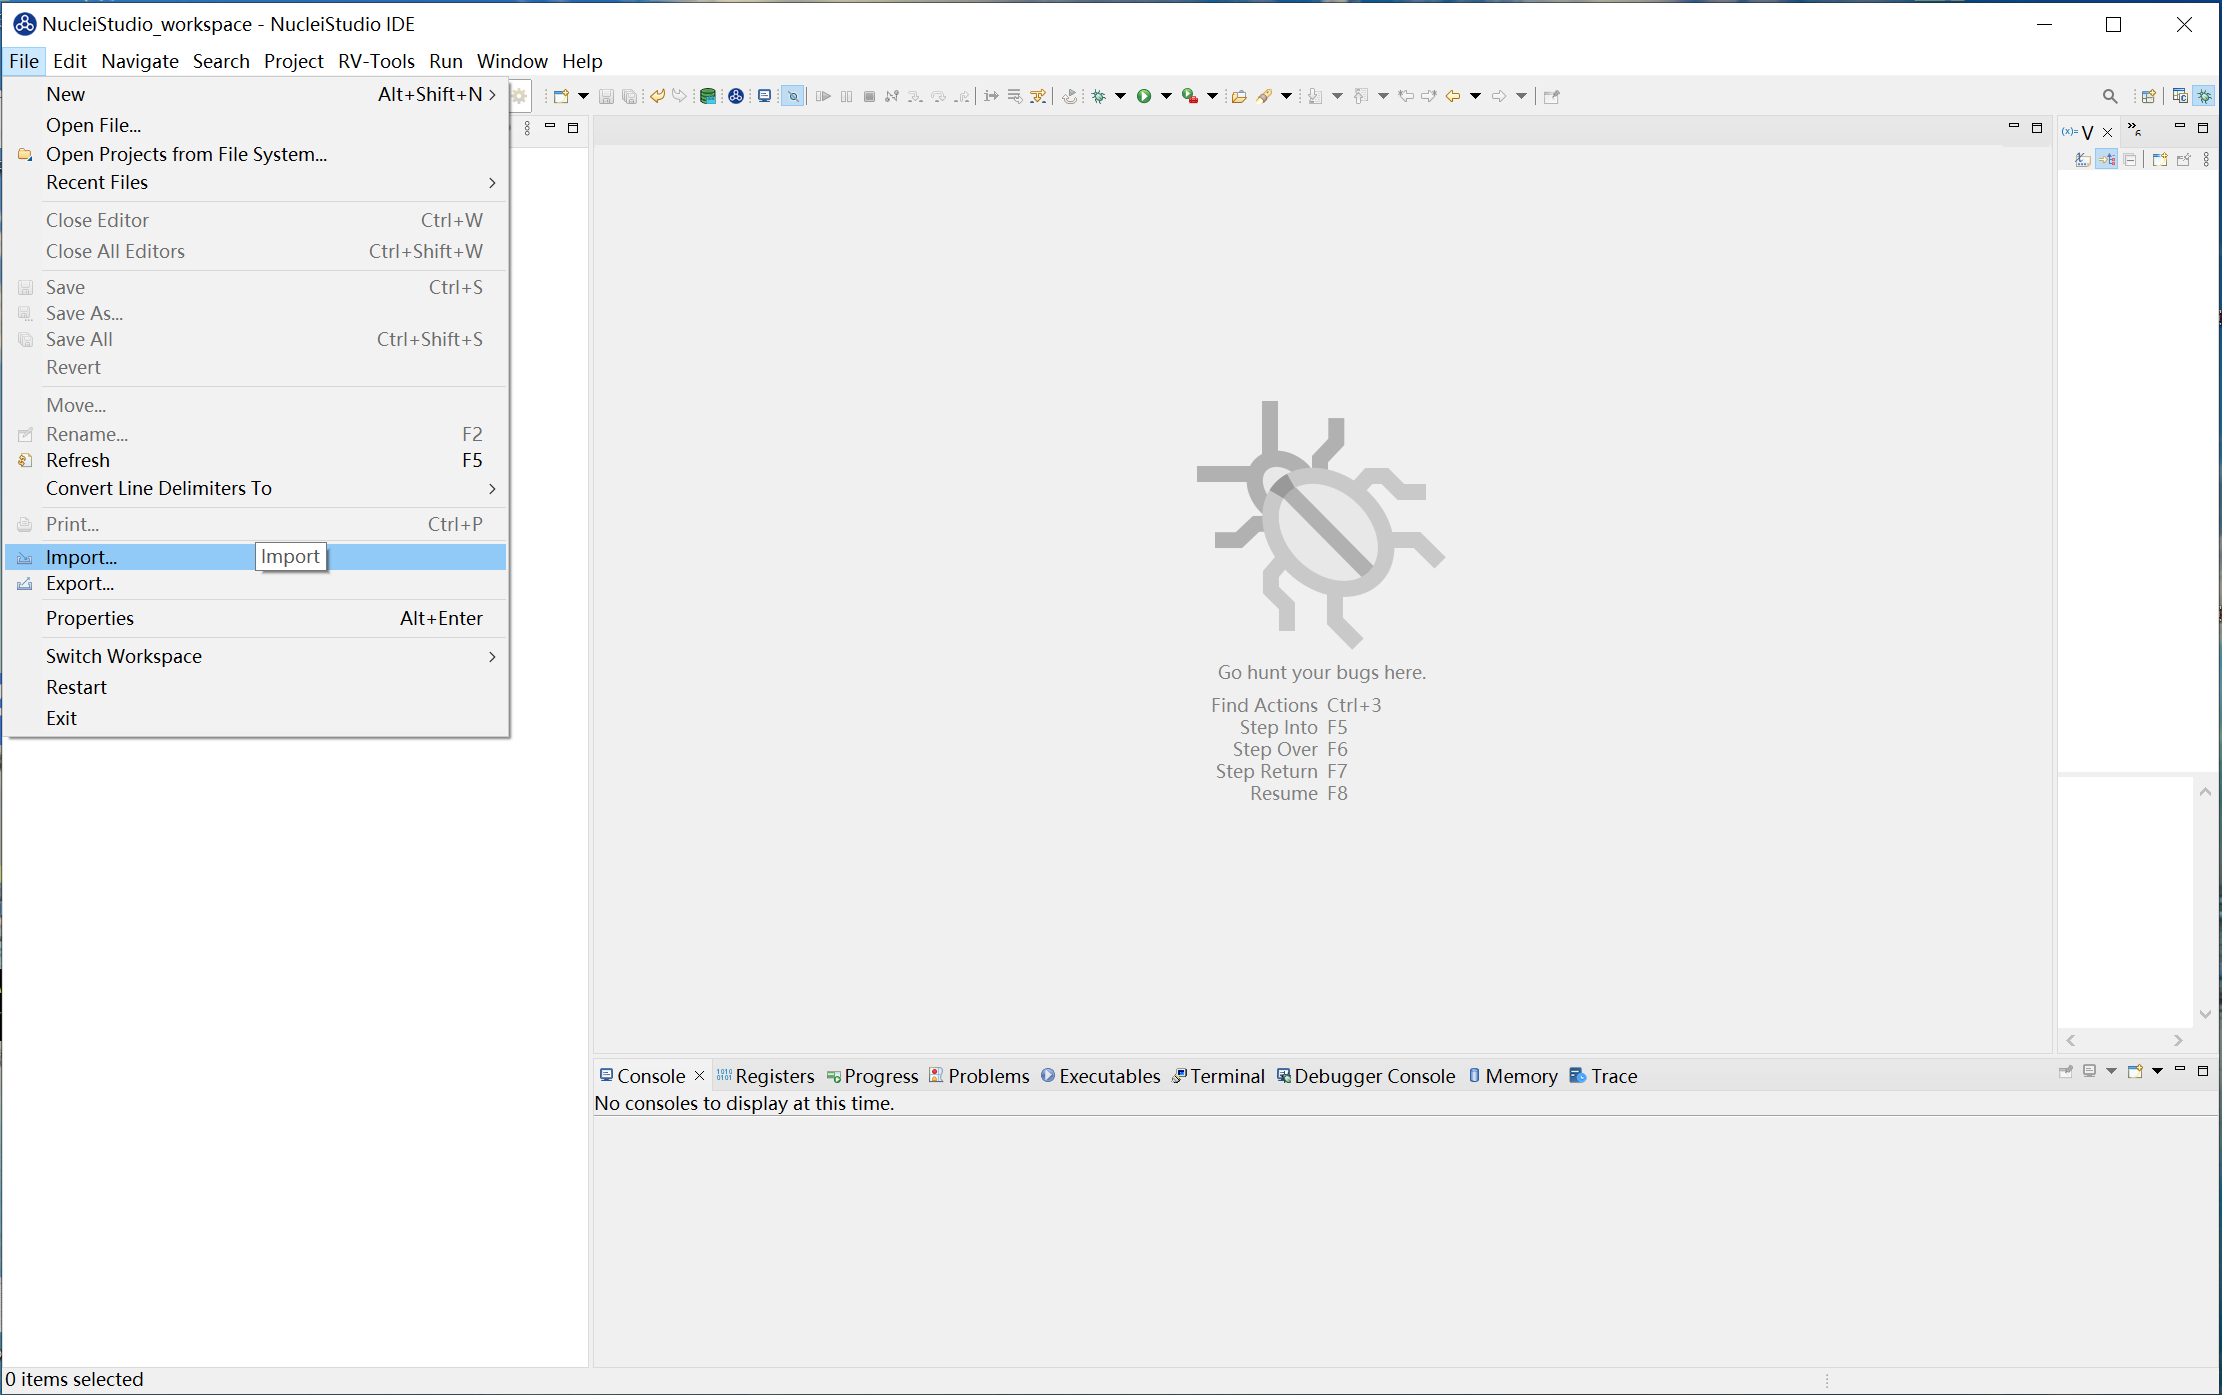
To import an uncompressed package directly, first import it into the Project Explorer view. Click File in the menu bar and select Import… from the drop-down menu. This opens the import wizard, which imports projects or files from the local file system or other sources.
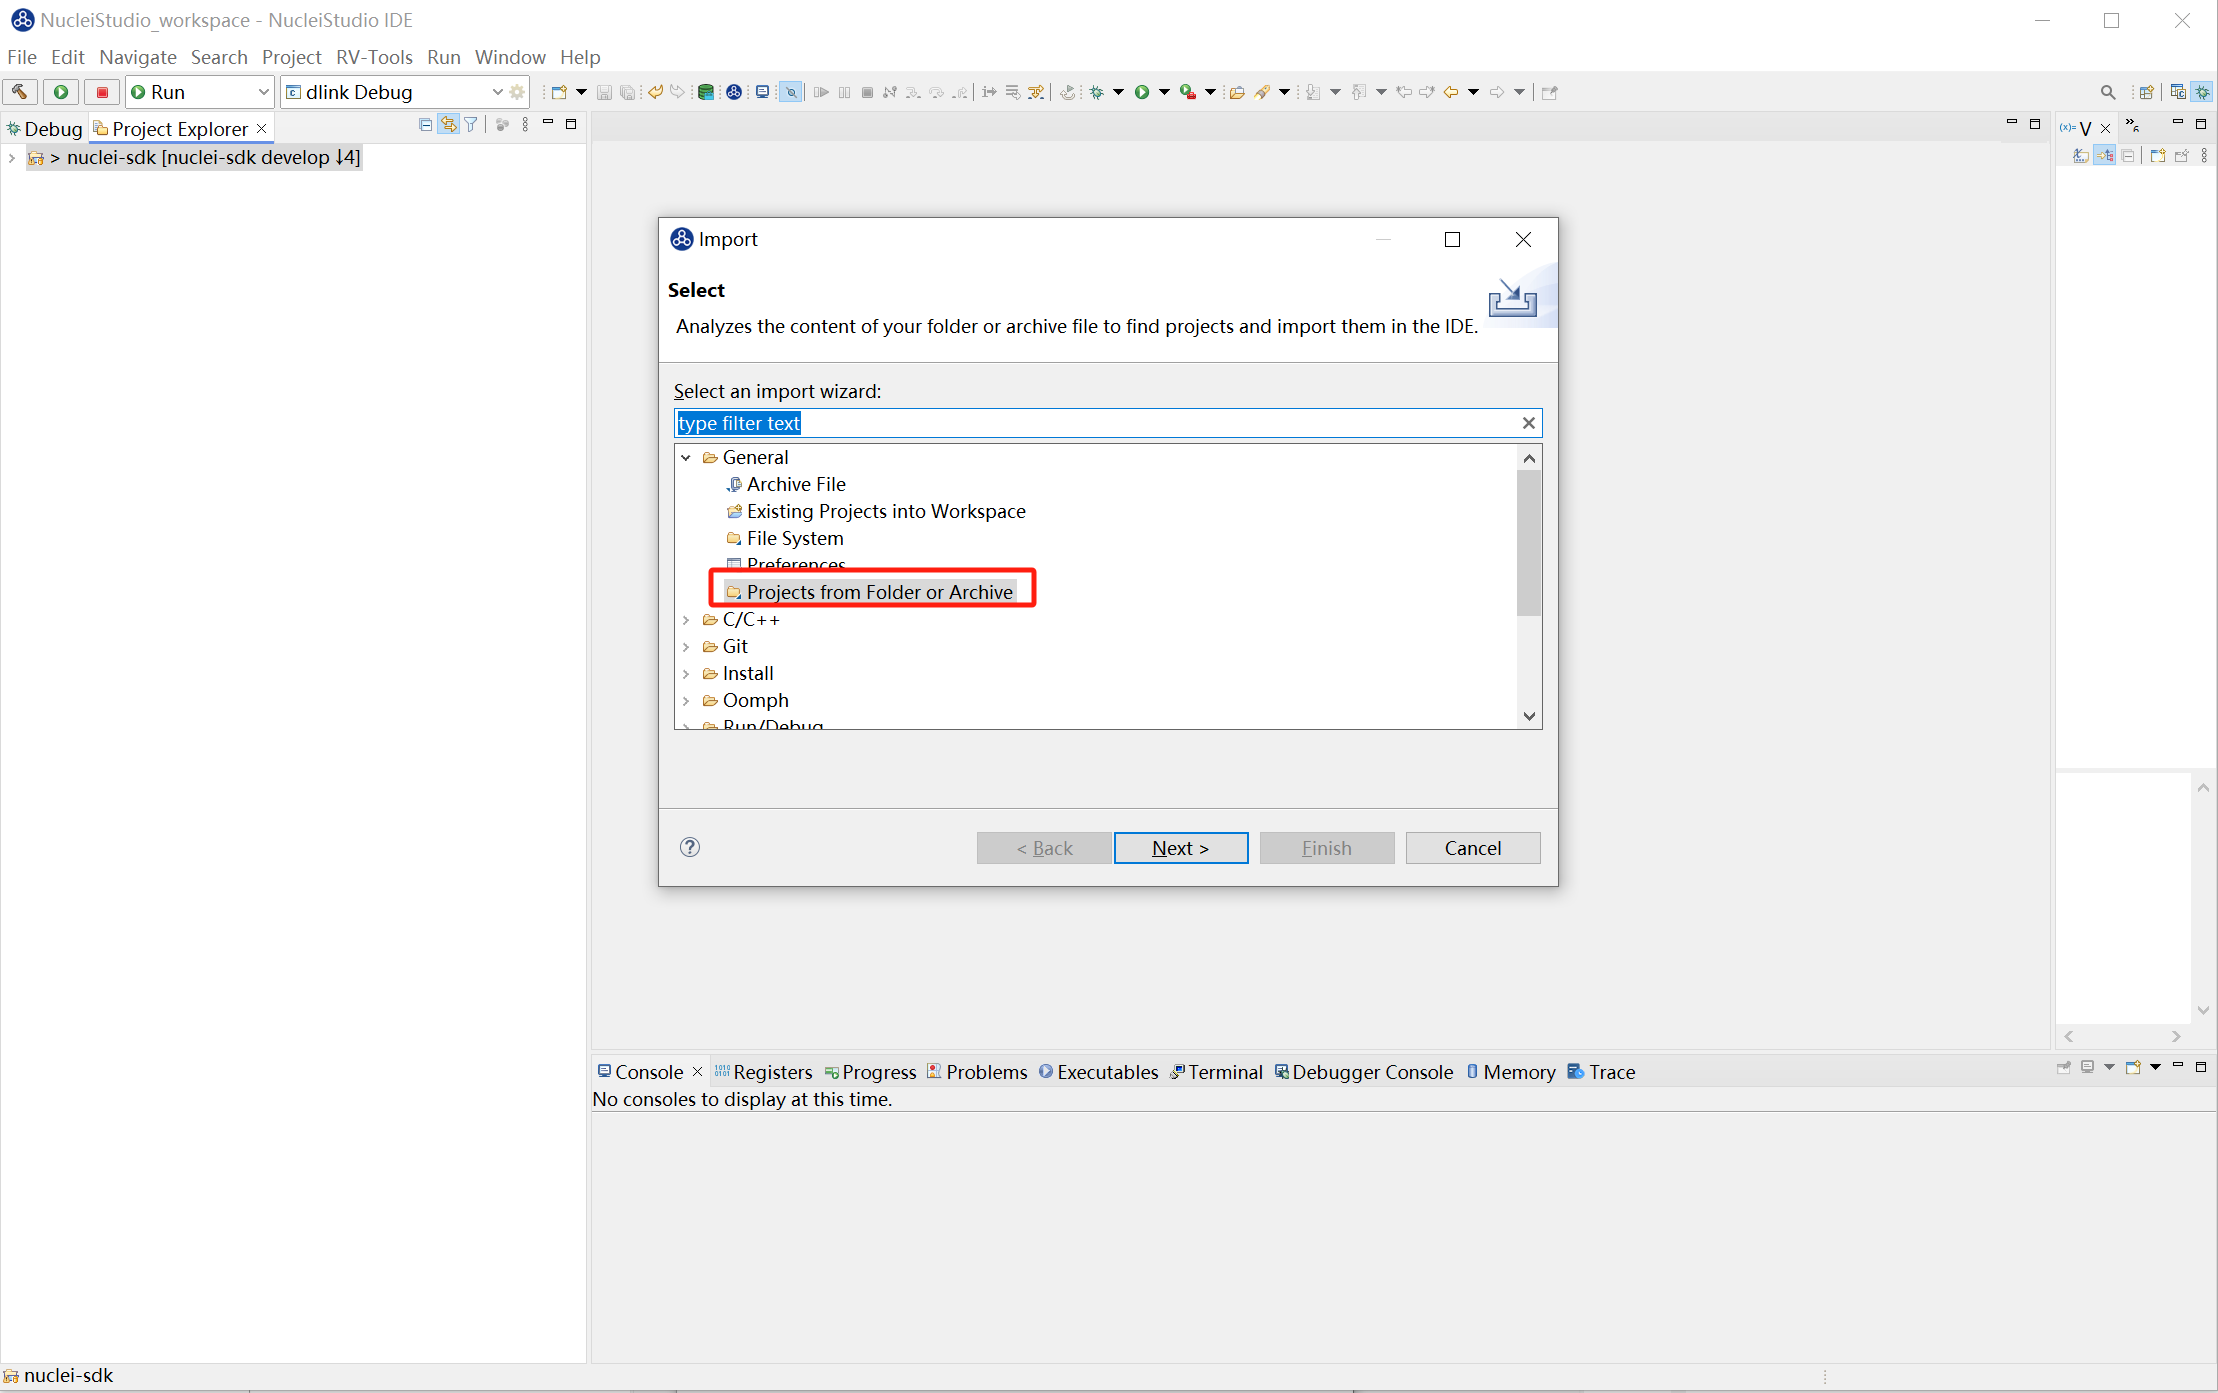
Select the Projects from Folder or Archive option under General, and click Next.
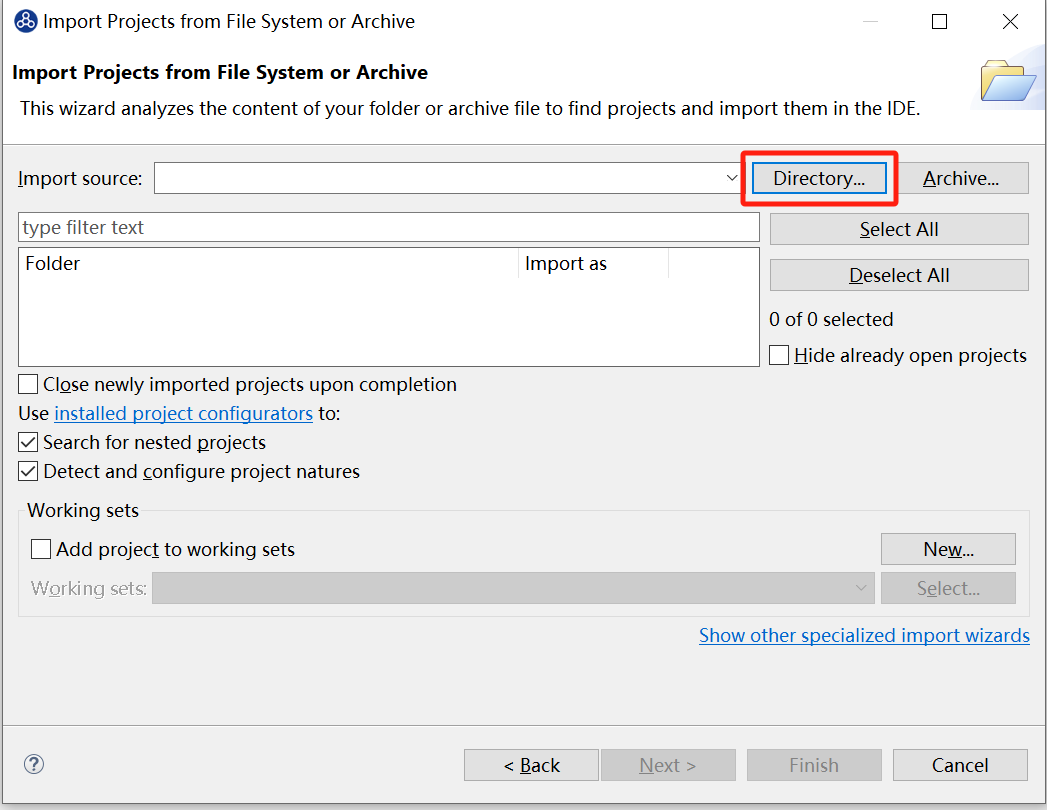
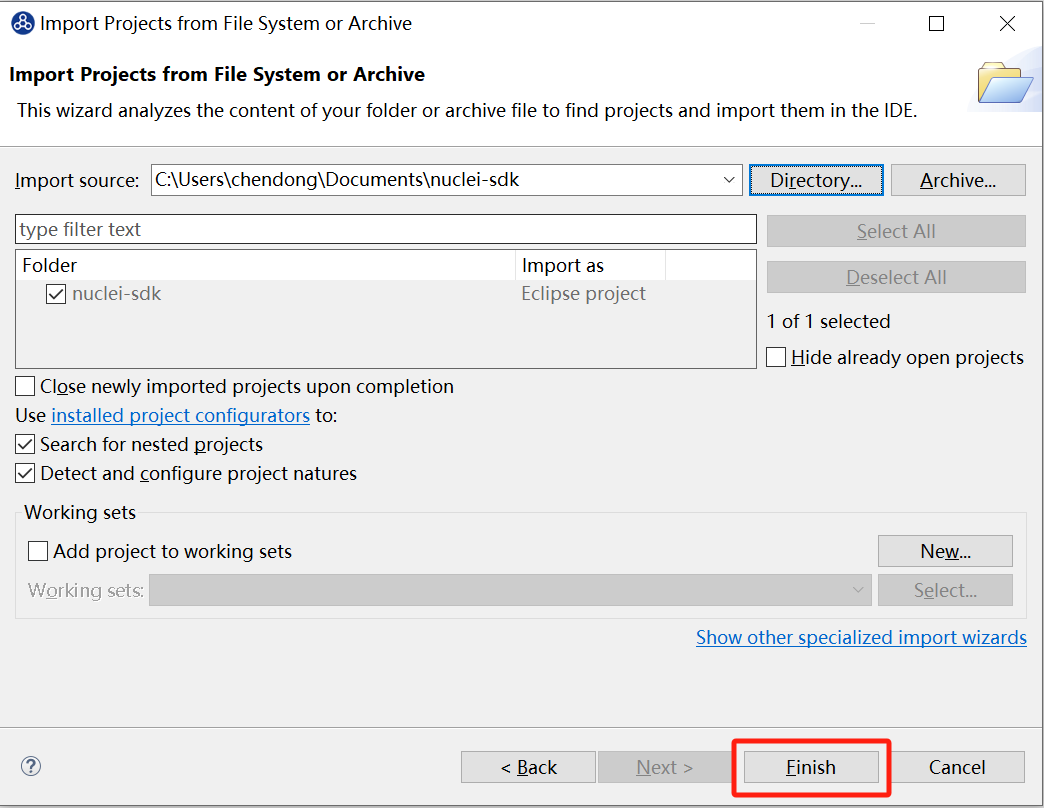
Click Directory…, browse to the directory containing your package, and select the file or folder to import. Verify that the correct path and files are selected, then click Finish.
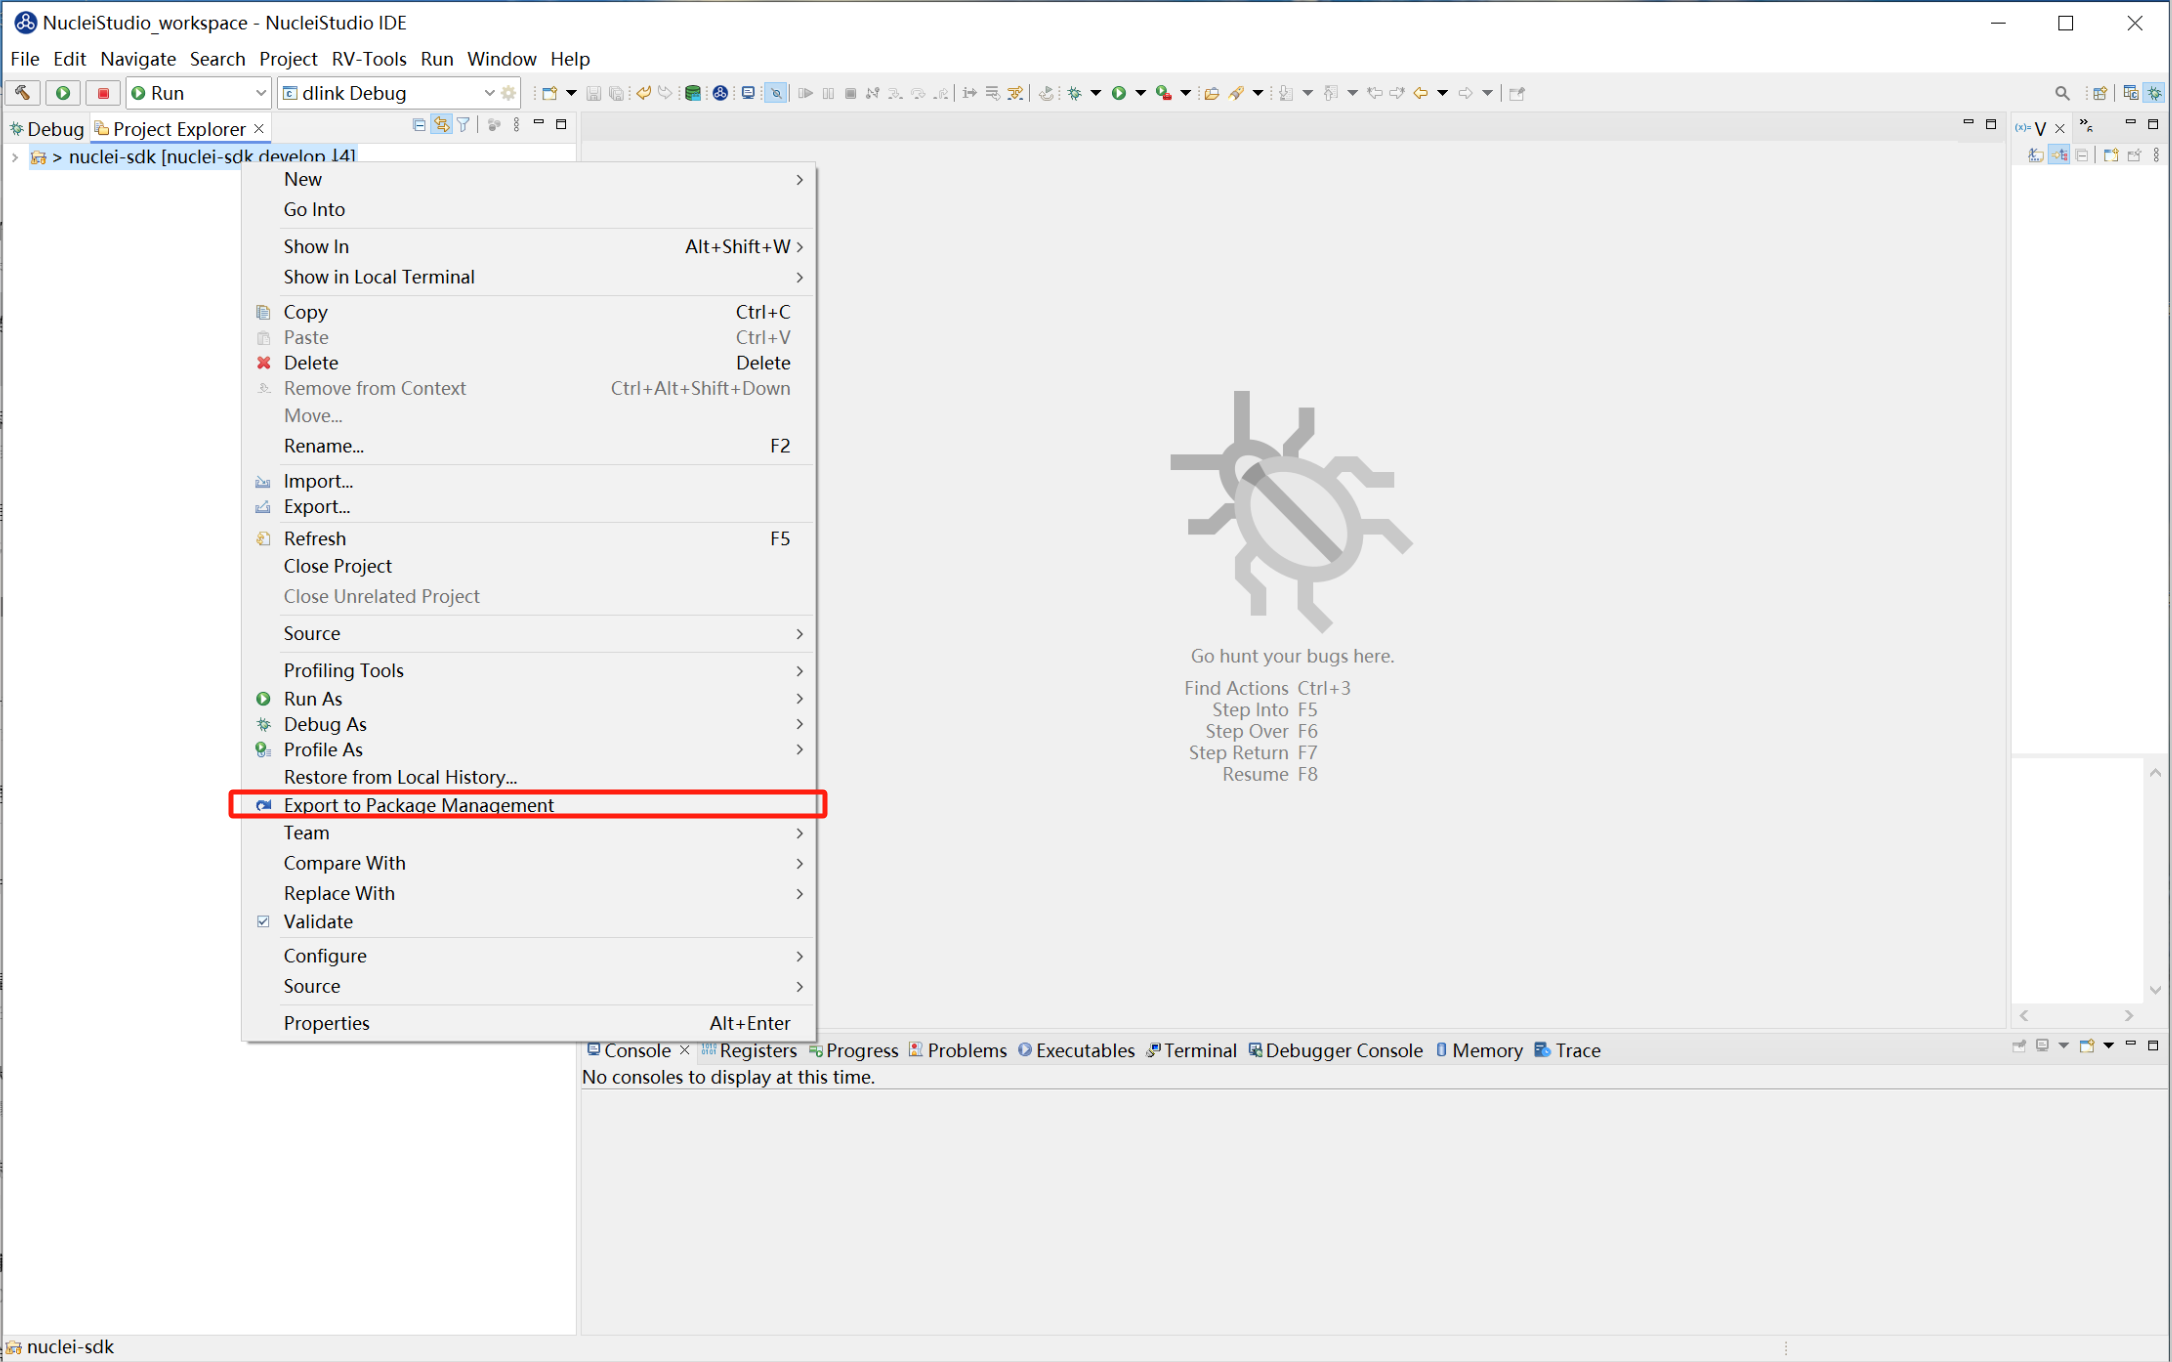
The package is now imported into the Project Explorer view. Right-click the folder representing your package and select Export to Package Management from the context menu. Nuclei Studio starts processing and importing the package.
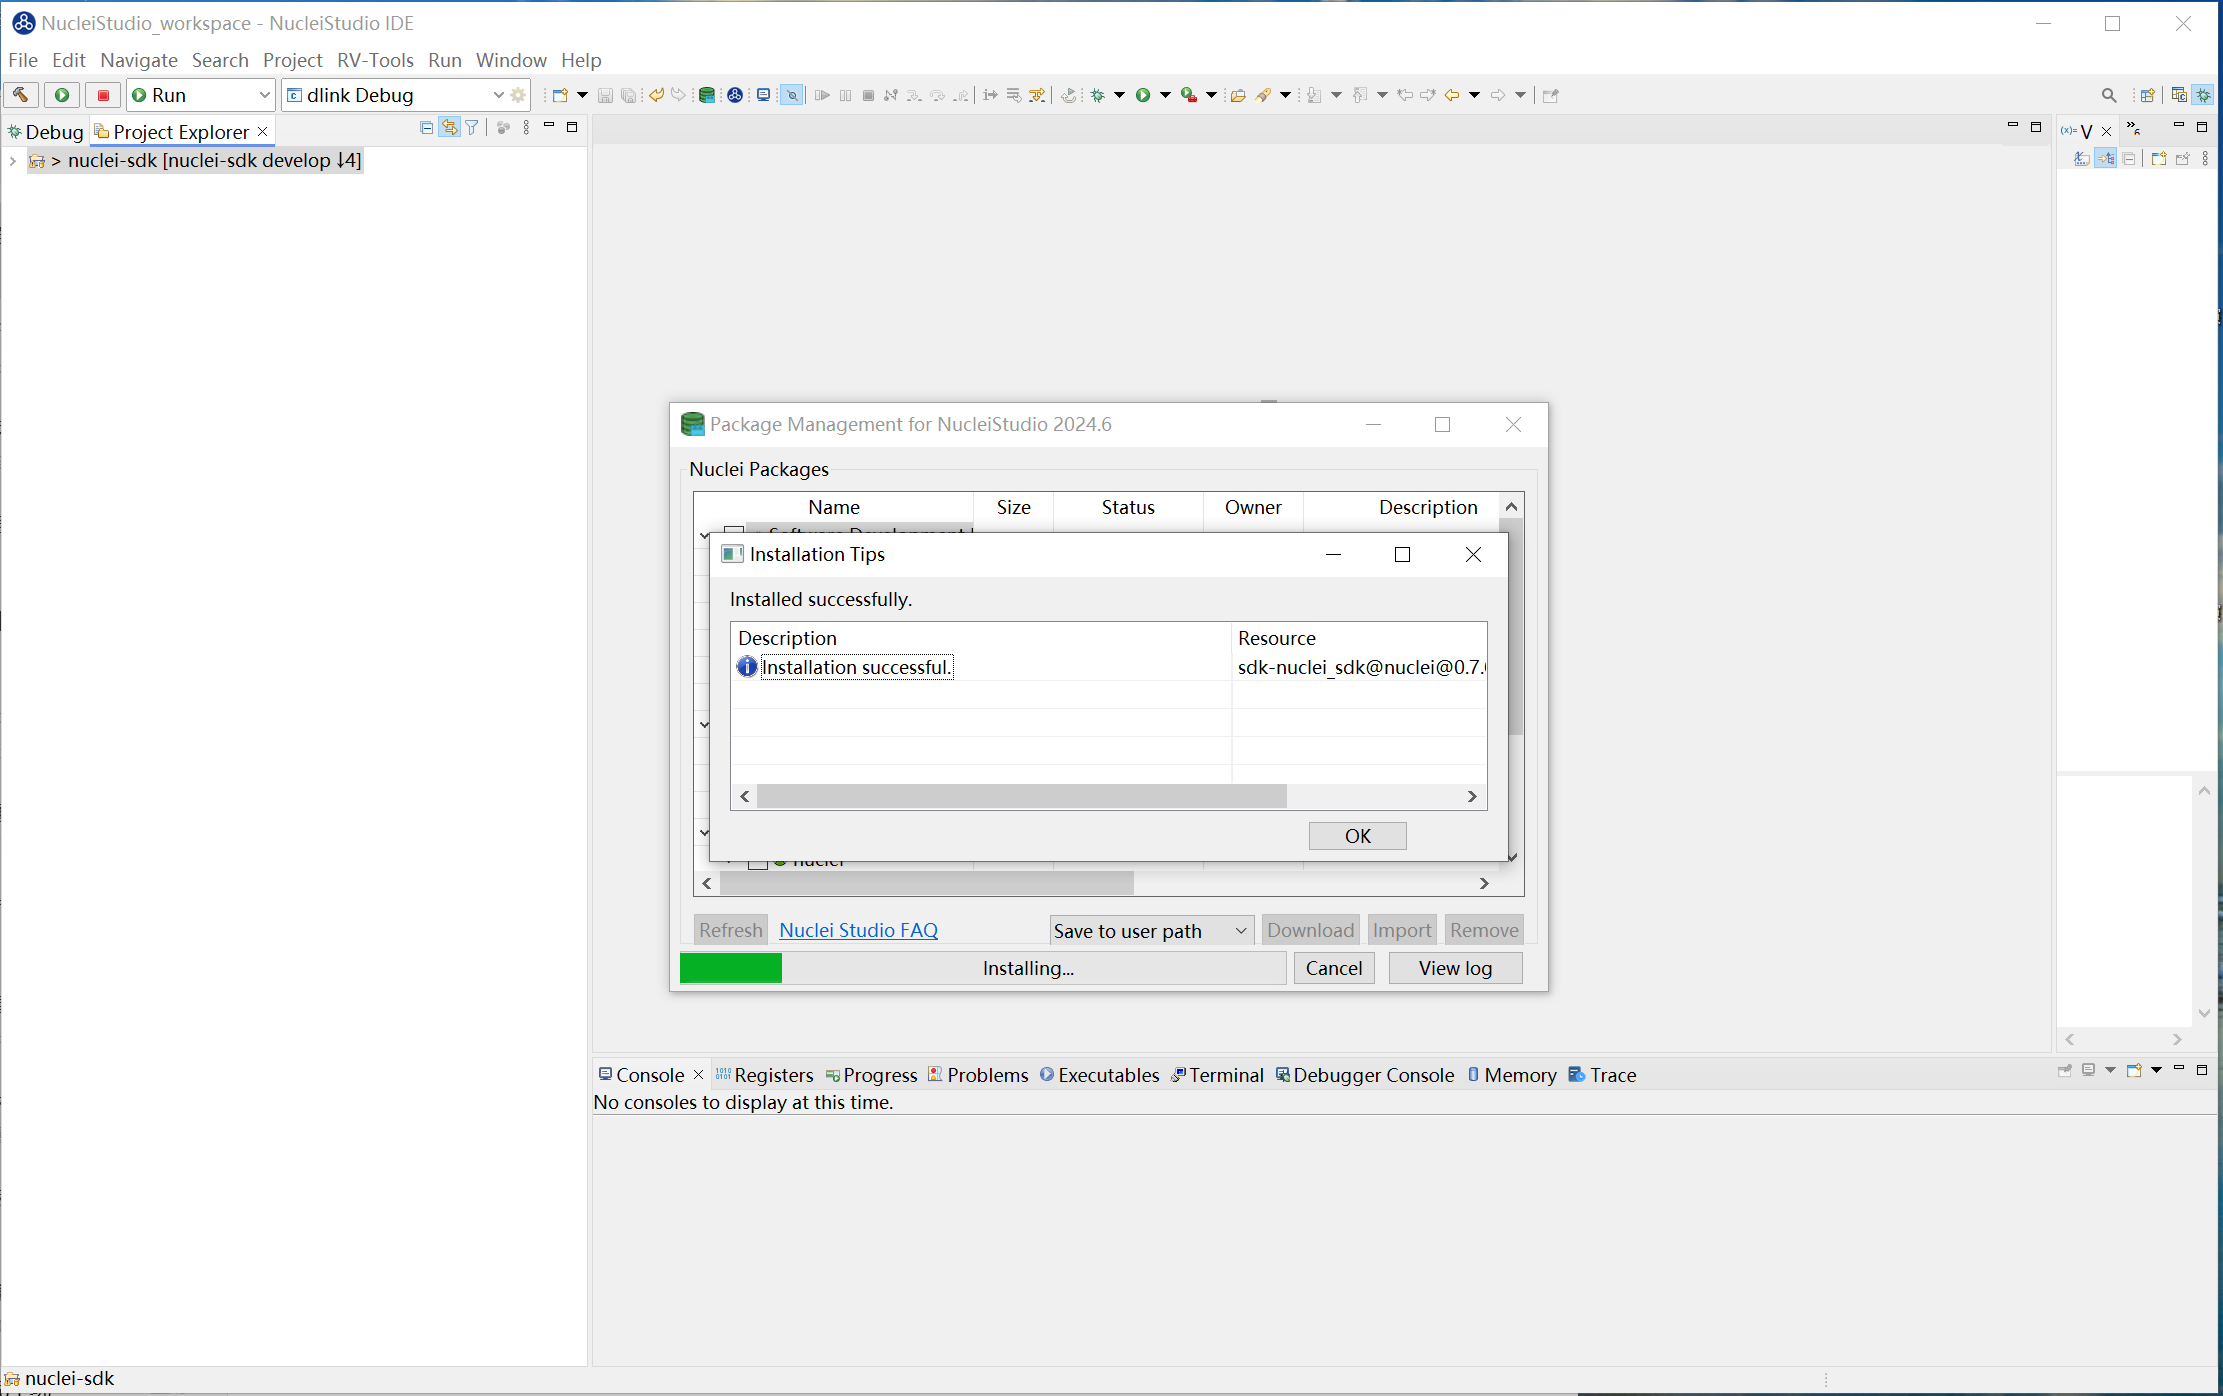
During the import, the Package Management page opens automatically. After the import is complete, the newly imported package appears on the Package Management page of Nuclei Studio IDE.
2.6.1.2. Download a Cloud NPK Package
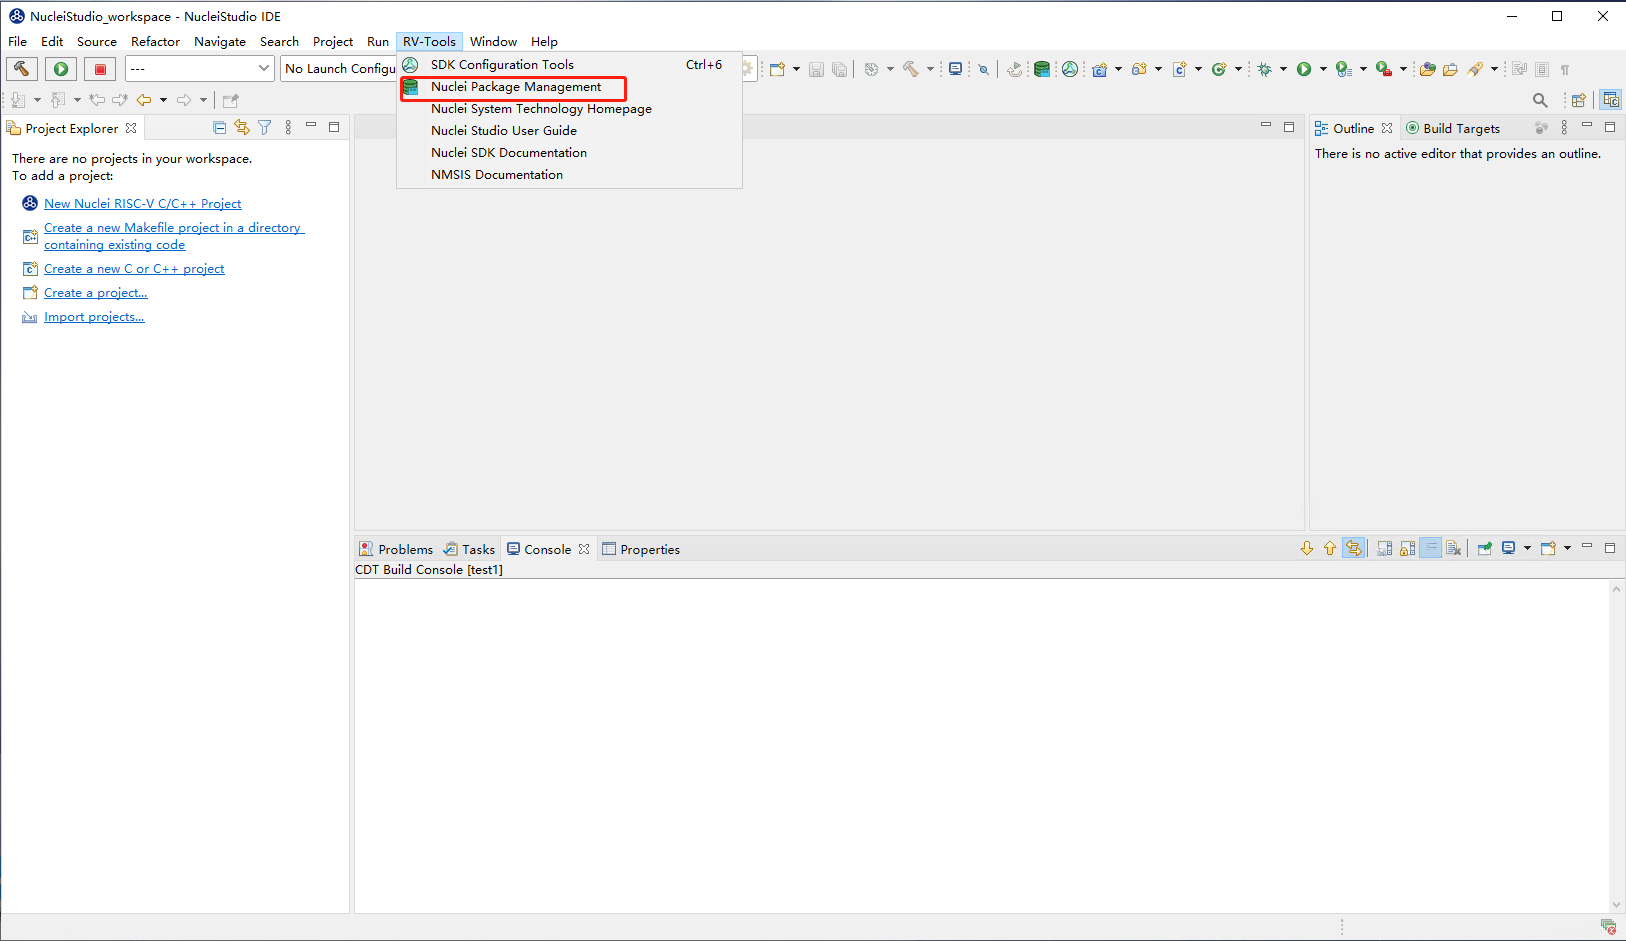
The biggest update in Nuclei Studio is moving NPK to the cloud. You can view all available NPKs directly in Nuclei Studio and install them yourself. Select RV-Tools-->Nuclei Package Management in the menu bar to manage NPKs on the Nuclei Package Management page.
On the Nuclei Package Management page, click Refresh to get the latest NPK information. Before installation, the NPK status is Not Installed.
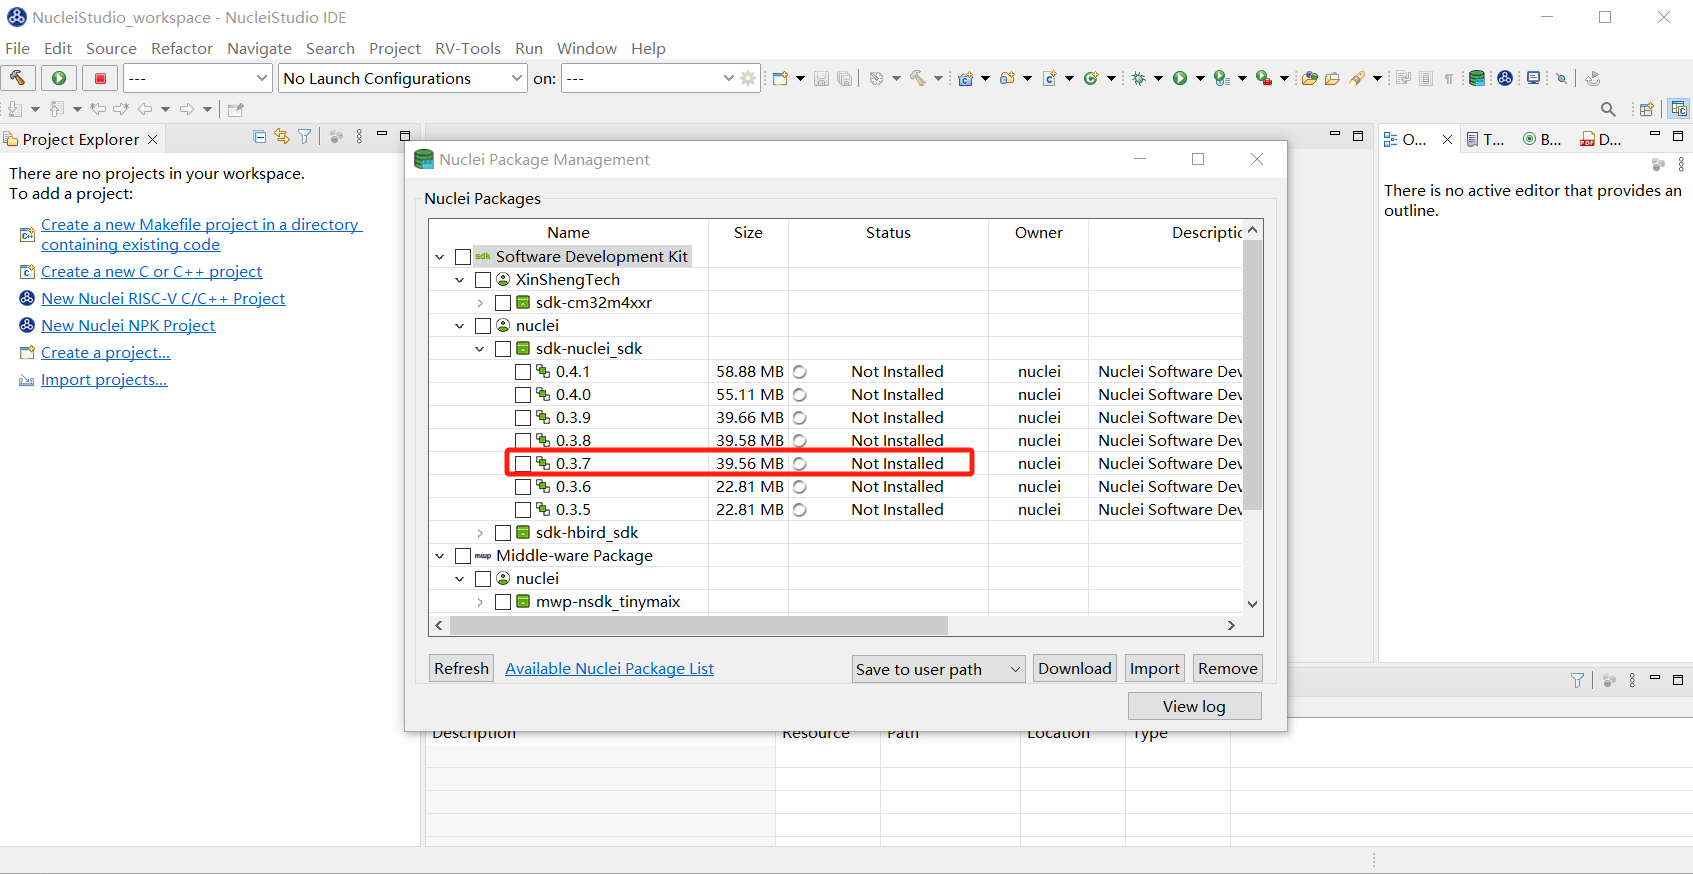
Select the NPK you want to install and click Download to install it. This example installs version 0.8.0 of sdk-nuclei_sdk. Use the latest version of Nuclei Studio for installation; the latest version supports the gcc14 toolchain, while previous versions supported gcc13/gcc10.
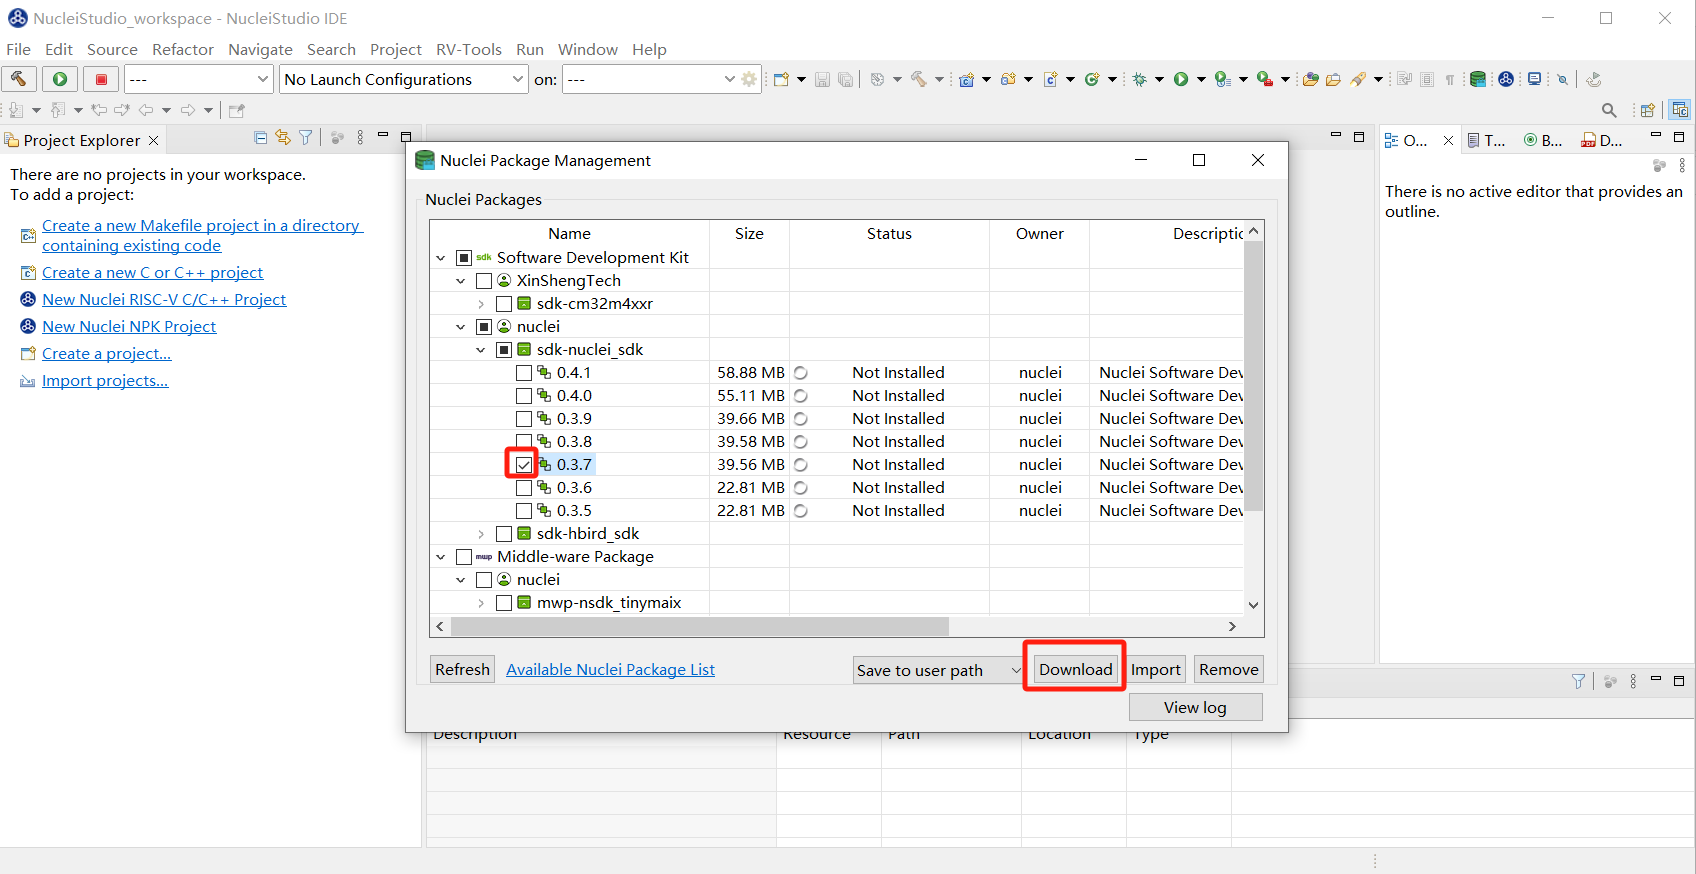
After installation, the NPK status changes to Installed.
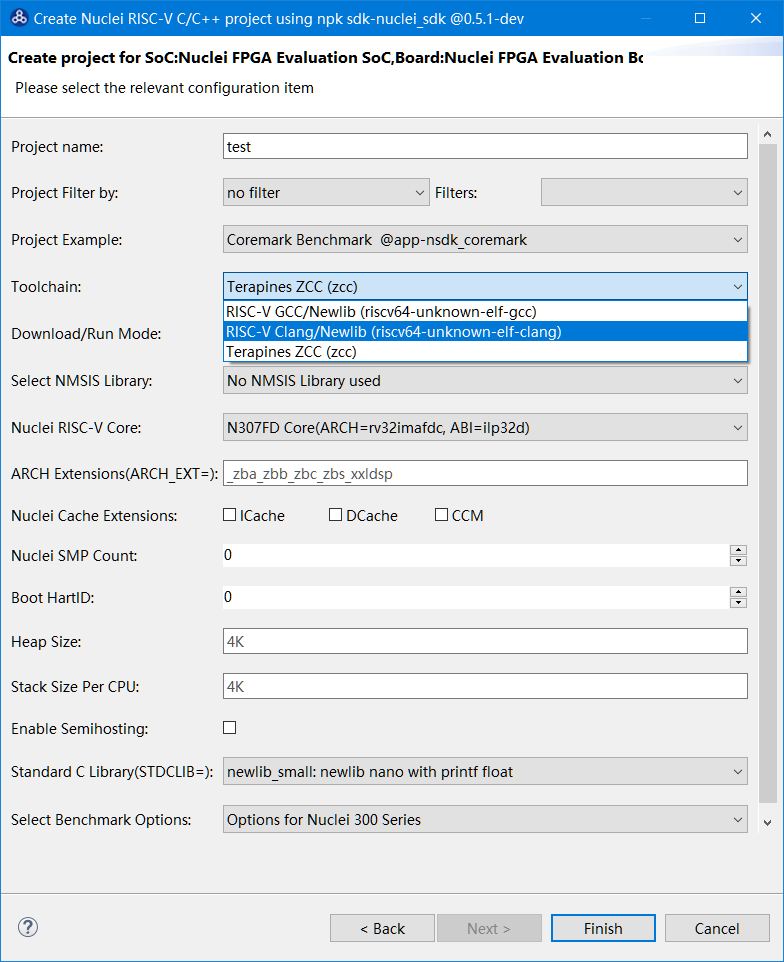
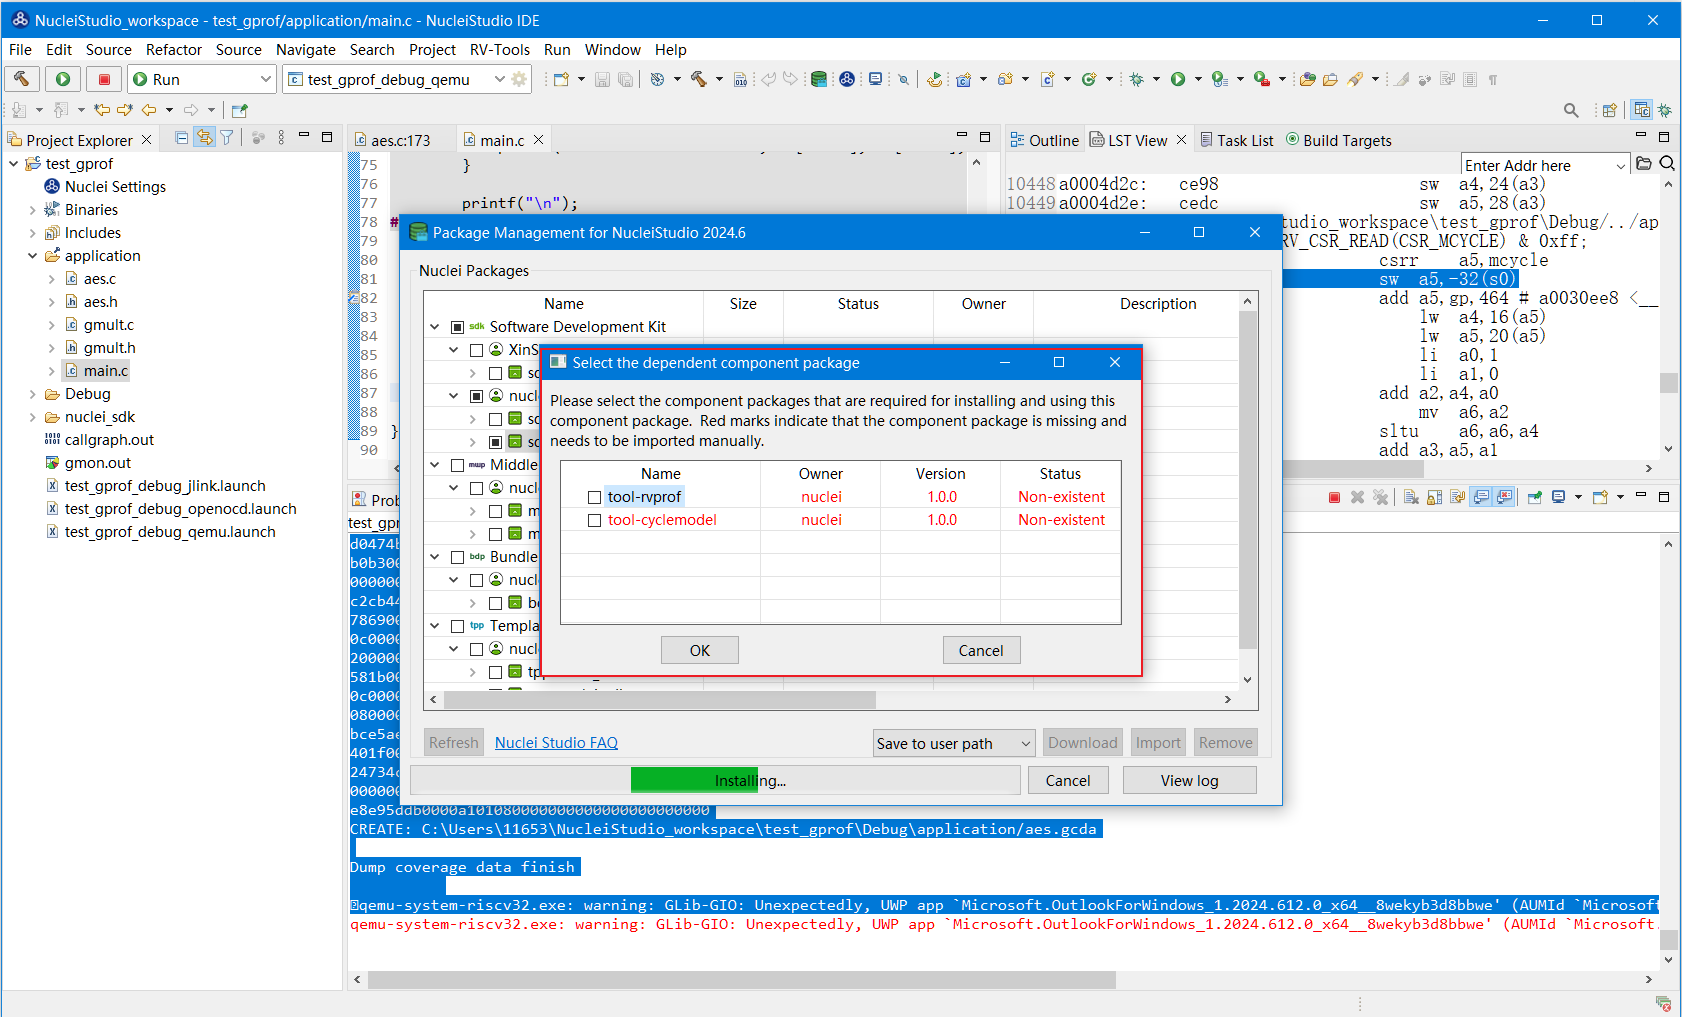
Nuclei Studio 2024.06 and later upgrades dependency management on the Nuclei Package Management page, greatly simplifying NPK package dependency handling.

When you download or install an NPK package, Nuclei Studio determines all of its dependencies based on the dependency relationships in the current NPK package information, combined with locally installed package information and NPK information shared in the cloud, and prompts you to download and install them together.
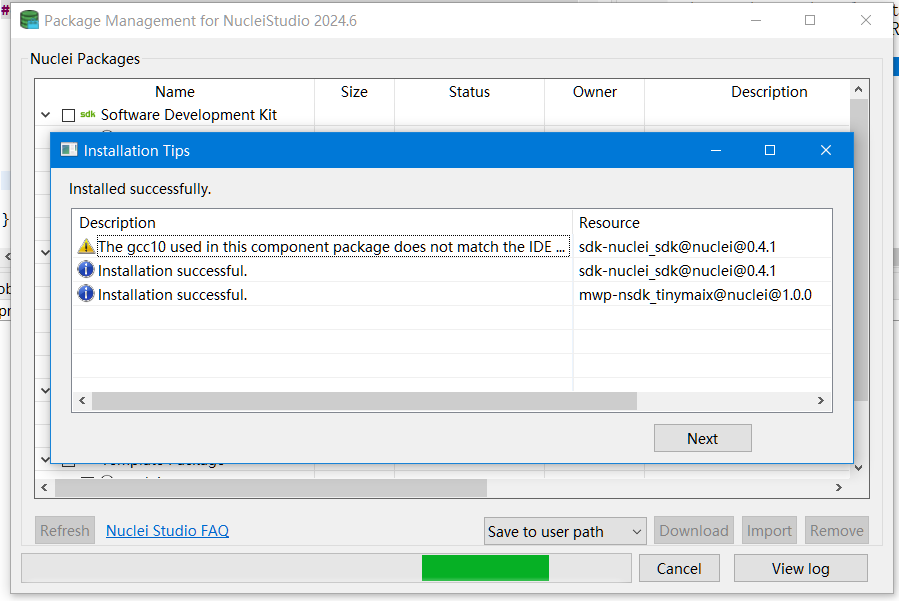
After the NPK packages are installed, Nuclei Studio reports how many packages were installed in total, the status of each package after installation, and the reason for any errors, making it easy to troubleshoot problems. This largely resolves the problem in previous versions where incorrect dependencies prevented NPK packages from being used.
2.6.2. Create a Project via NPK
This chapter uses creating and modifying a GD32VF103 project for the RVSTAR board as an example to introduce Nuclei Studio features. Developing with the RVSTAR board requires the nuclei_sdk NPK package; for details, see the following chapters.
2.6.2.1. Create an NPK Example Project
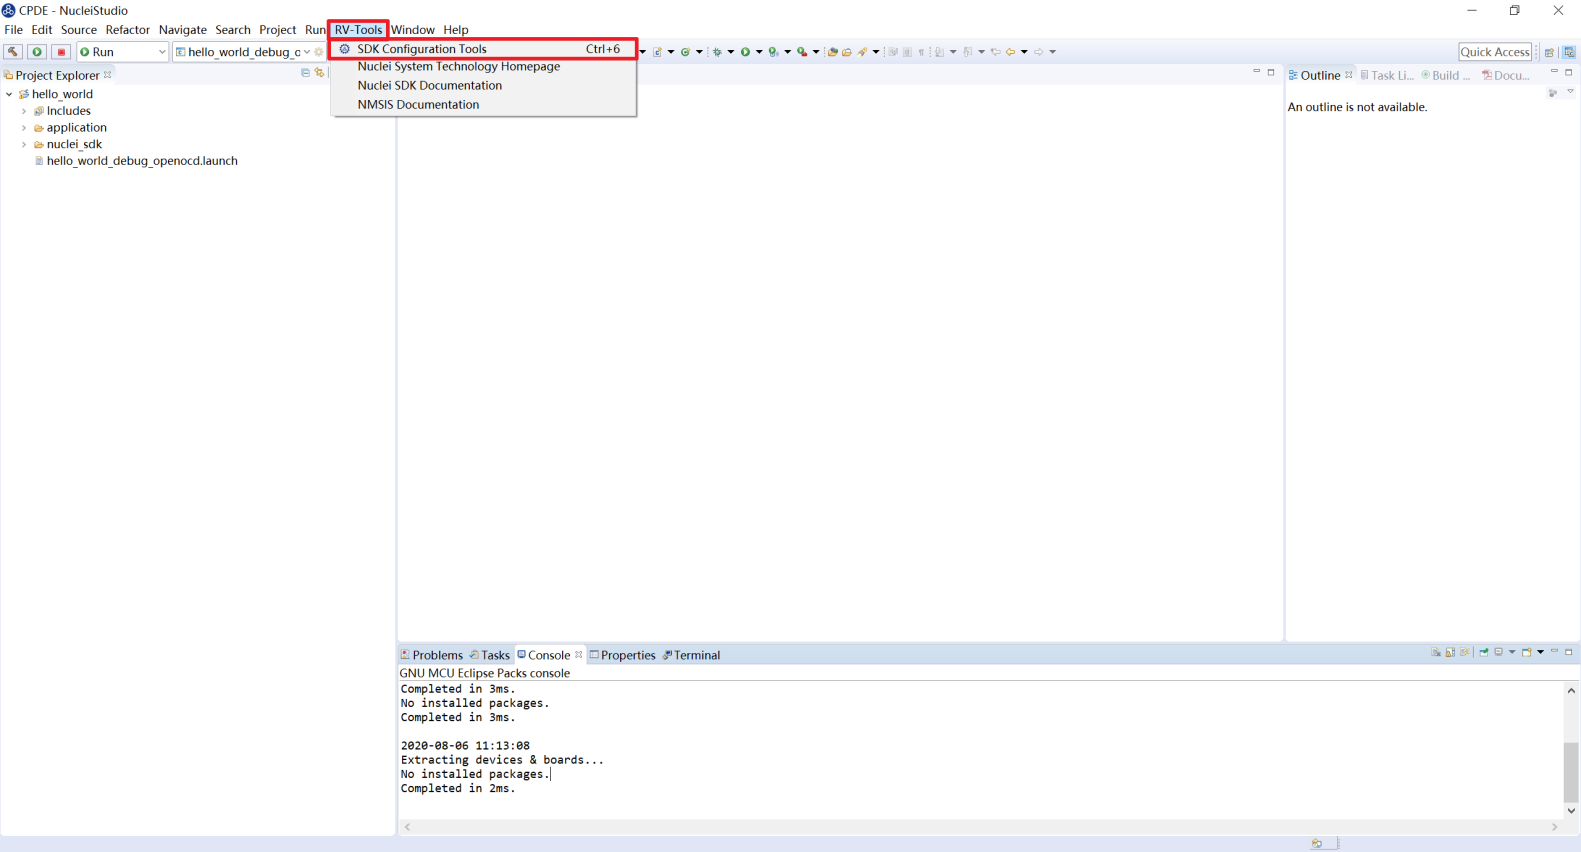
To create a new project, select File --> New --> New Nuclei RISC-V C/C++ Project in the menu bar.
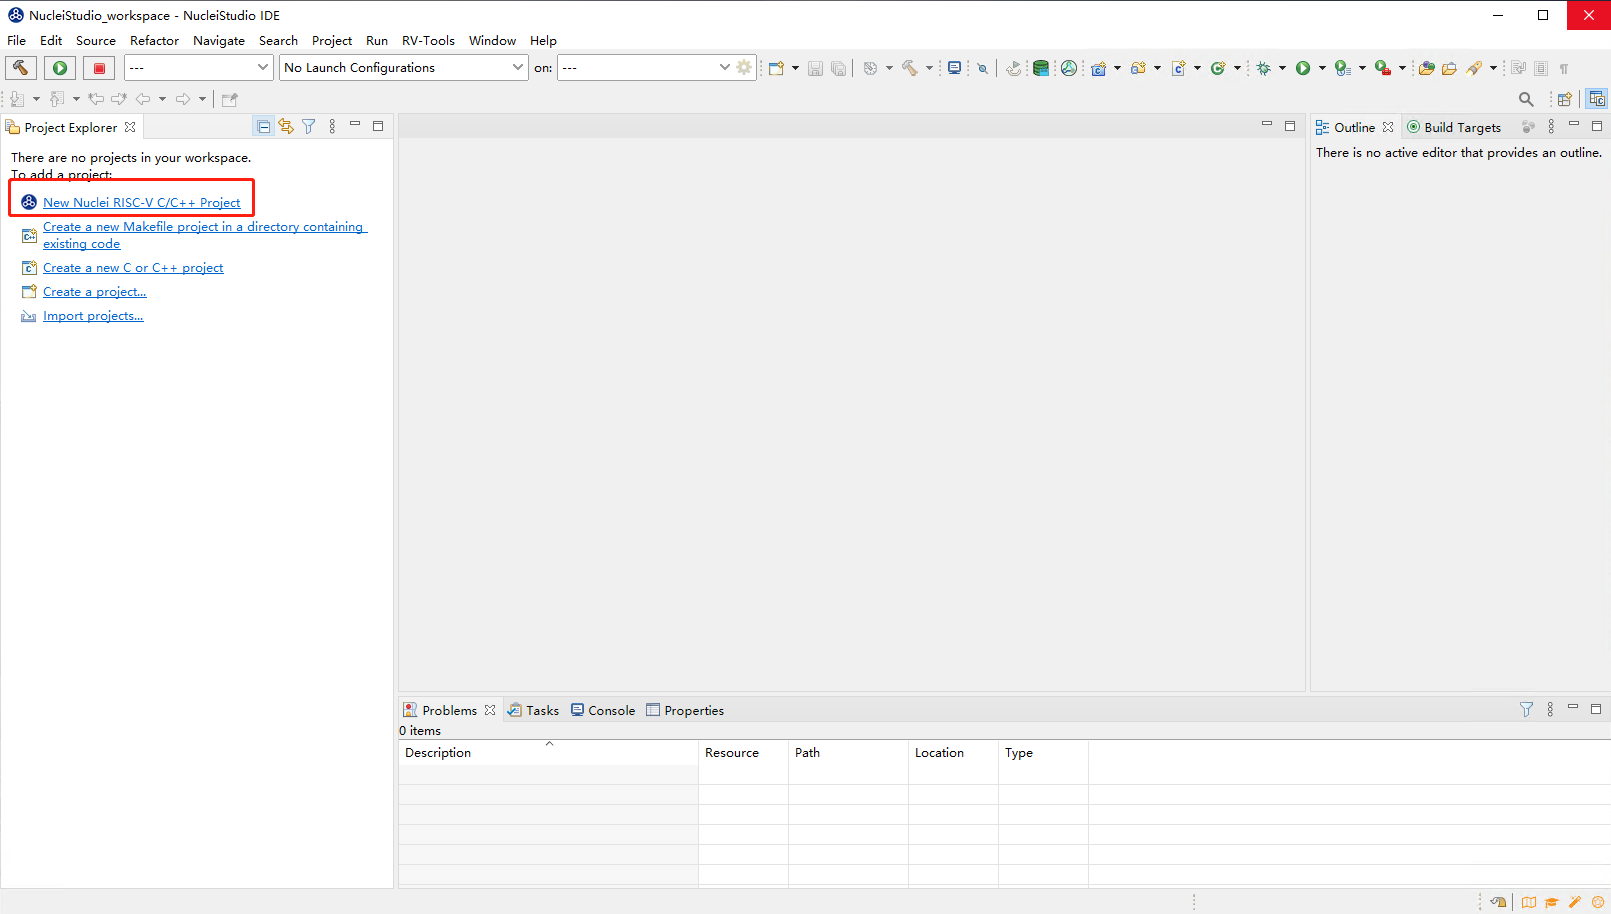
Alternatively, select New Nuclei RISC-V C/C++ Project in the Project Explorer view.
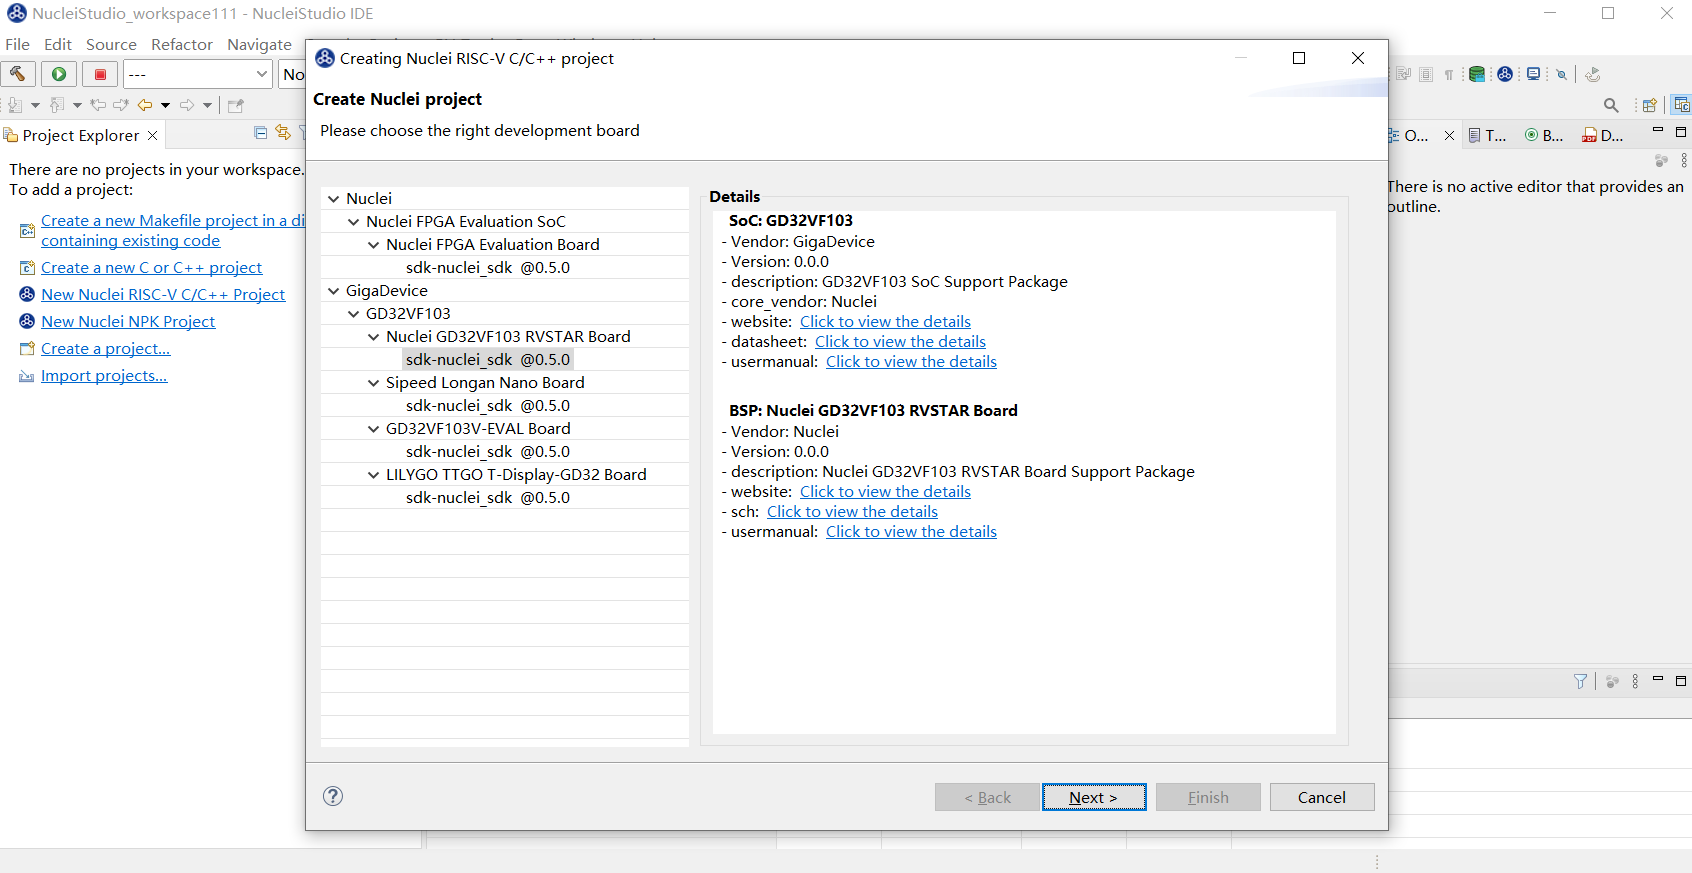
In the pop-up window, you can see different versions of SDKs provided by different vendors. Select an SDK under a Board to view an introduction to the related SoC and Board. This example uses the RVSTAR board, so select GigaDevice->GD32VF103->Nuclei GD32VF103 RVSTAR Board->sdk-nuclei_sdk@0.5.0. Click Next to continue.
Note
Note: The SDK version number shown here changes as versions iterate and may also depend on a specific version of Nuclei Studio.
The project configuration page opens as shown in the figure. Because the RVSTAR core is fixed at N205 and its corresponding arch and abi are rv32imac and ilp32 respectively, the Core option cannot be modified. Similarly, the RVSTAR board supports only the FLASHXIP download mode, so the DOWNLOAD option cannot be modified either. Click Finish to complete project creation. Version 2023.10 adds support for Arm projects.
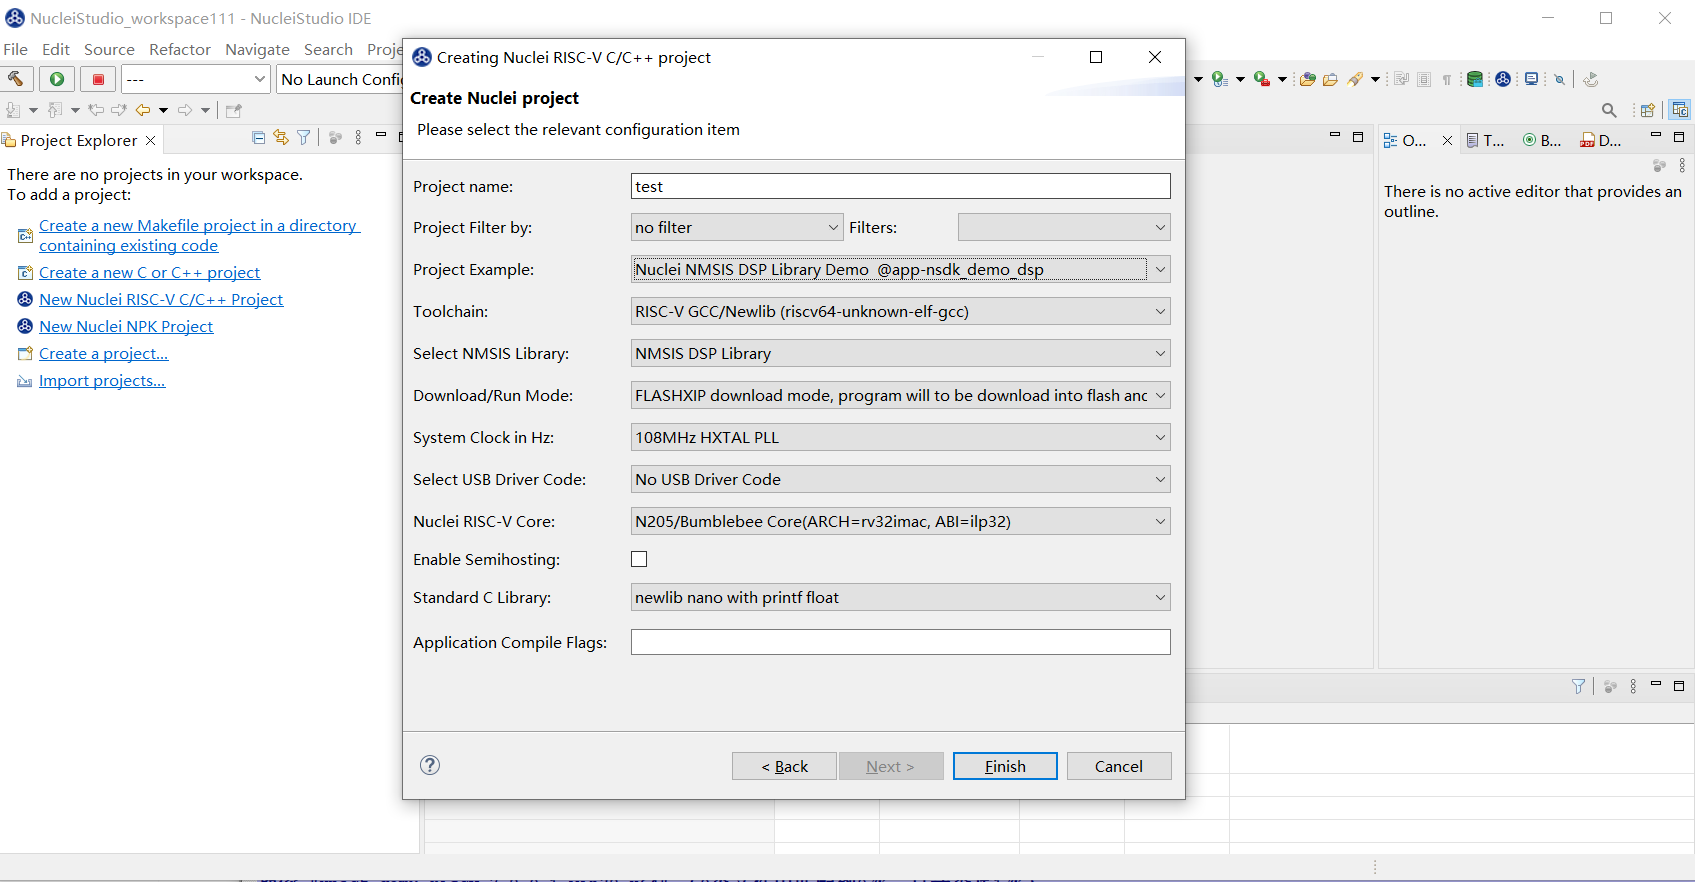
Nuclei Studio adds different SDK source code depending on the selected project template. For example, the FreeRTOS template project adds the corresponding OS content, and the Demo_dsp template project adds NMSIS library files. For detailed information about NMSIS, refer to (https://doc.nucleisys.com/nmsis/index.html). This example uses Demo_dsp: select Nuclei NMSIS DSP Library Demo for Project Example. Because the DSP project requires the NMSIS library, select NMSIS DSP Library for Libraries.
Nuclei Studio automatically sets project options based on the options selected during project creation. This example uses floating-point printing, so select newlib nano with printf float for NEWLIB. Then keep clicking Next until Finish.
2.6.2.2. Change Project Configuration with SDK Configuration Tools
In Nuclei Studio, you can quickly modify project settings using the SDK Configuration Tools tool. Starting with Nuclei Studio IDE 2022.12, the SDK Configuration Tools tool was refactored into the Nuclei Settings menu, which provides a better user experience.
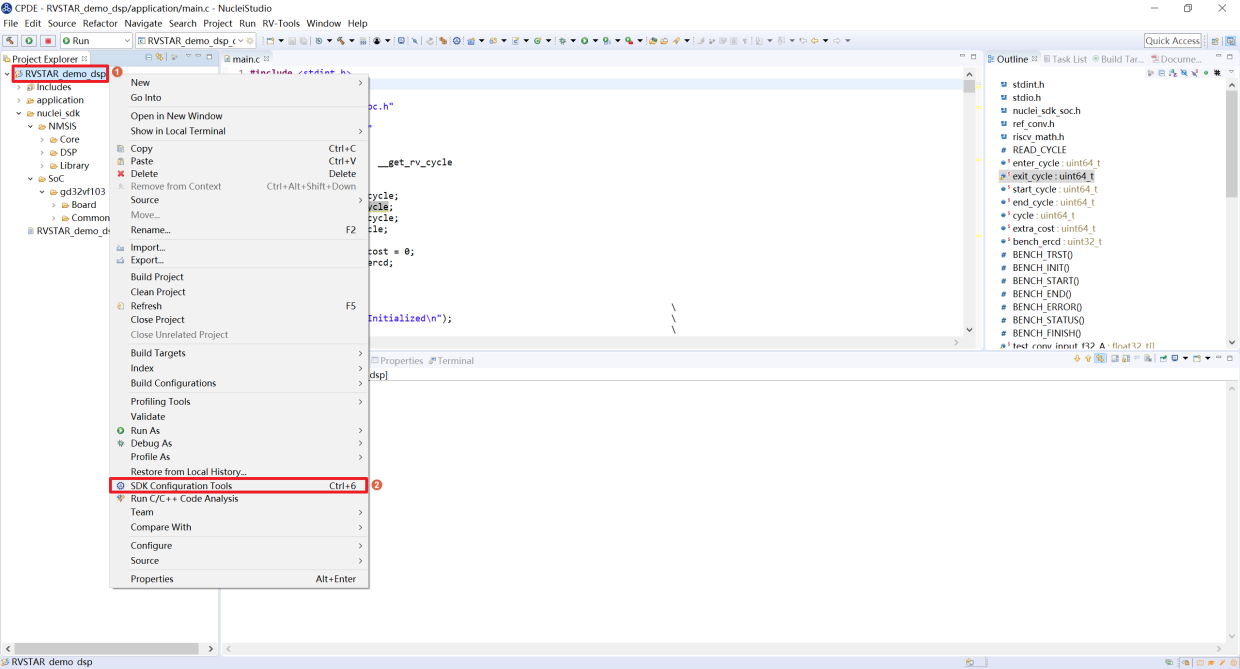
For a newly created project, click the project name, right-click to open the context menu, and select SDK Configuration Tools to open the settings tool.
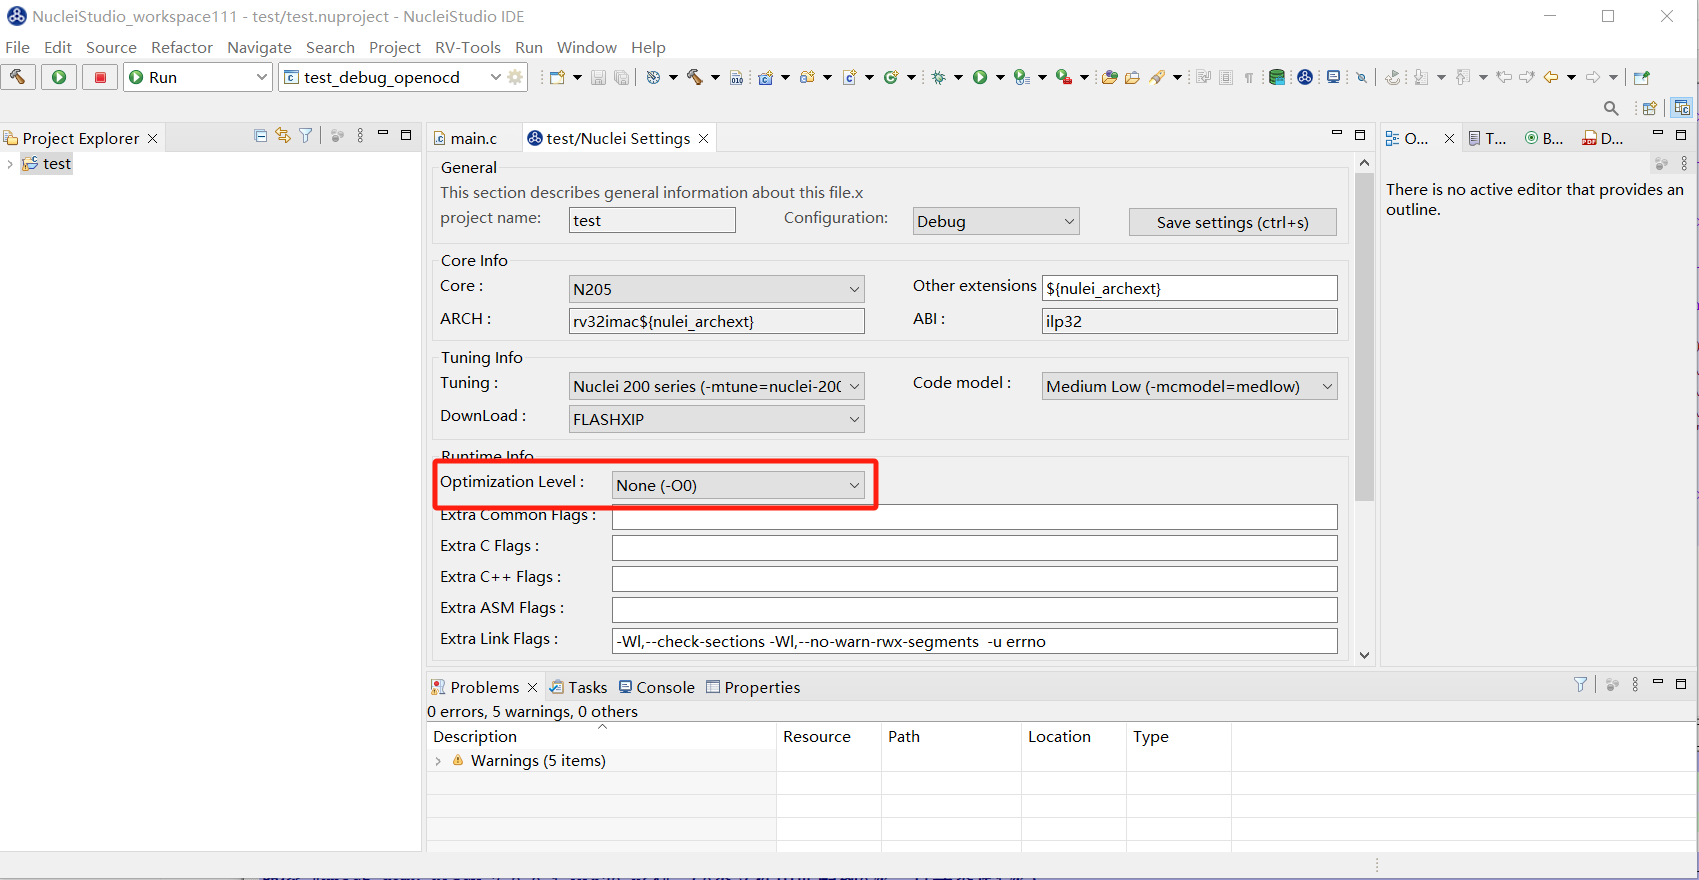
To change the compile optimization level, set Optimization Level to None (-O0) and click Save to apply the change.
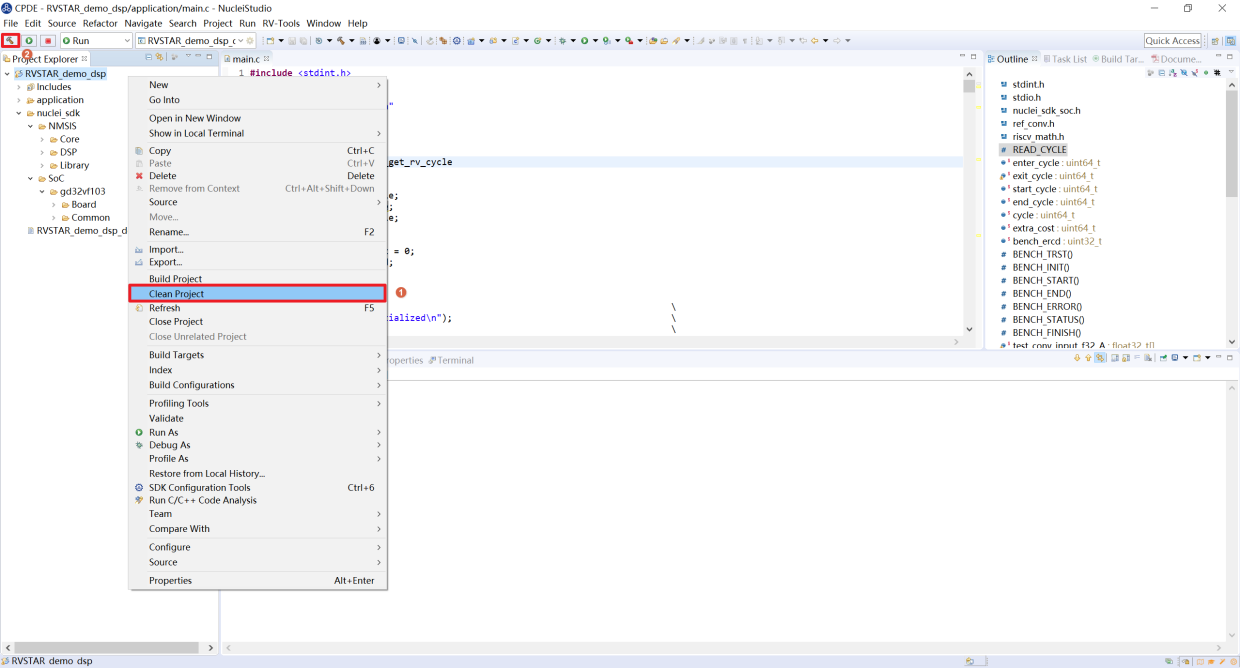
After the modification succeeds, right-click the project, select clean in the context menu to clean the project, and then click the hammer icon to build the project.
Note
Note: After SDK Configuration Tools modifies the compile configuration, the debug configuration (Debug Configurations) is not affected; modify the corresponding debug configuration manually.
Note: In later versions, the
SDK Configuration Toolsfeature is no longer maintained and has been replaced by the Nuclei Settings menu feature.
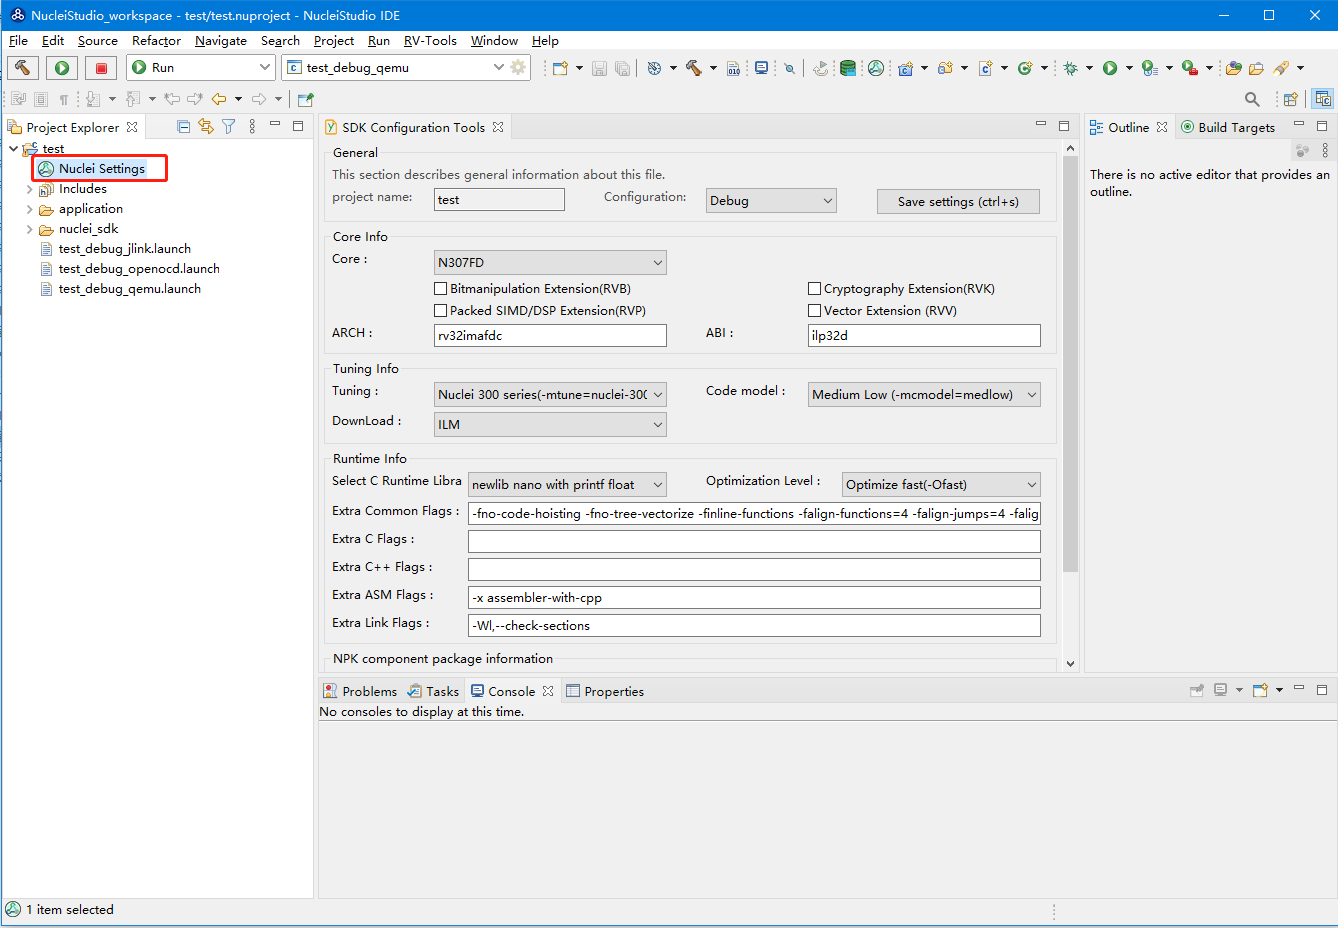
For a better user experience, Nuclei Studio IDE 2022.12 refactored SDK Configuration Tools. Newly created projects have an additional Nuclei Settings menu. Double-clicking the Nuclei Settings menu opens the project configuration tool, which is functionally identical to SDK Configuration Tools. In version 2023.10 and later, SDK Configuration Tools opens this Nuclei Settings page directly.
2.6.3. Import Tools via NPK
In addition to SDKs, NPK packages can also import various tool packages to extend the capabilities of Nuclei Studio. Nuclei Studio 2022.08 added support for NPK Tools. To improve the extensibility of component packages and make compilation and debugging more convenient, an NPK component package of type tool was introduced. A tool component package can contain gcc, qemu, cmlink-gdb, and other content, and is imported into the IDE as a zip package.
Take the tool-cmlink package as an example. A tool package contains the tool’s executable files and an npk.yml file. In the npk.yml file, the developer provides a brief description of the tool, such as the tool package’s developer, version, supported operating systems, and the path of the executable files. The package structure and npk.yml content are shown in the example below. Compress the tool package into a zip file, then refer to Import a Local NPK Package to import the NPK tools into the IDE, or share them on the www.rvmcu.com website.
binbin\cmlink_gdbserver.exenpk.yml
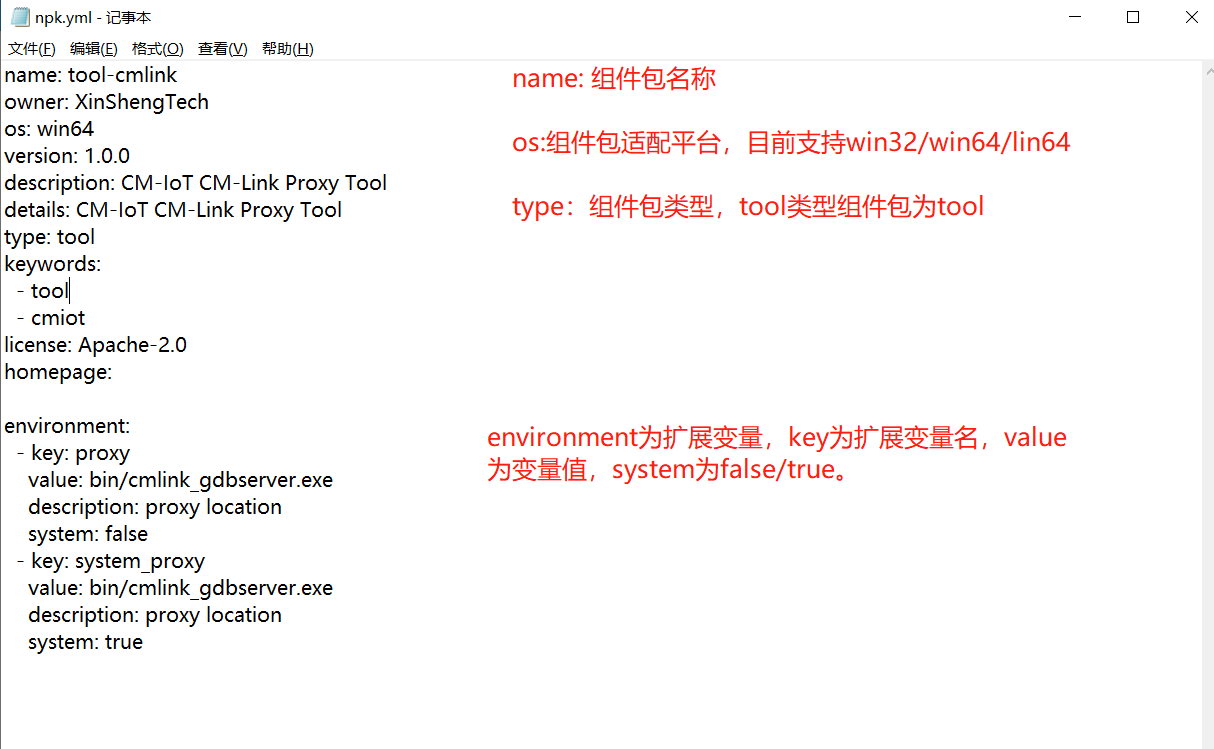
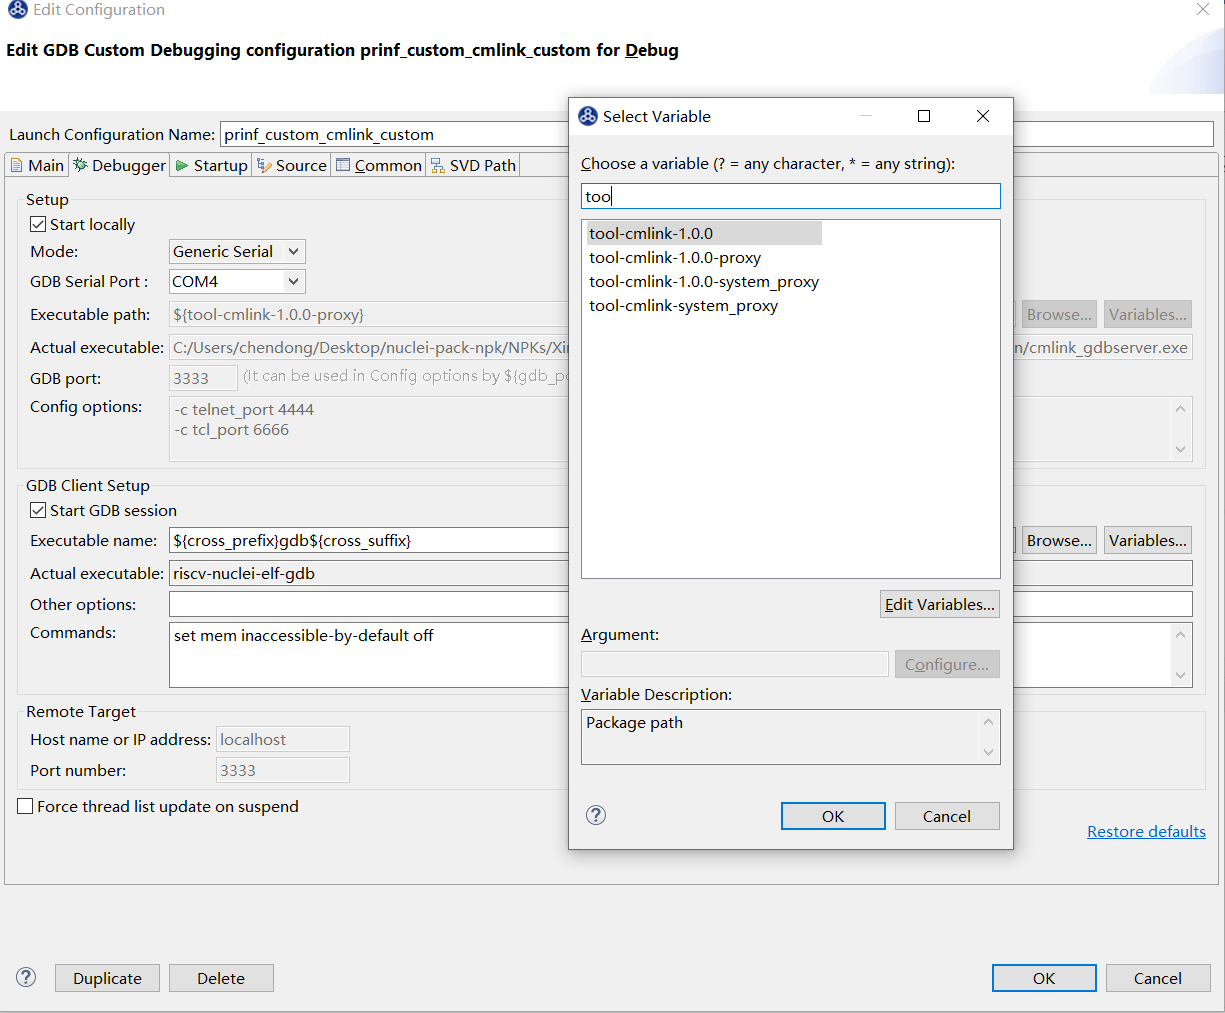
NPK tools can also be managed on the Nuclei Package Management page. After downloading the component package, open any debug page and click Variables to view the parameters corresponding to the NPK tools; selecting the corresponding parameter lets you use the tool.
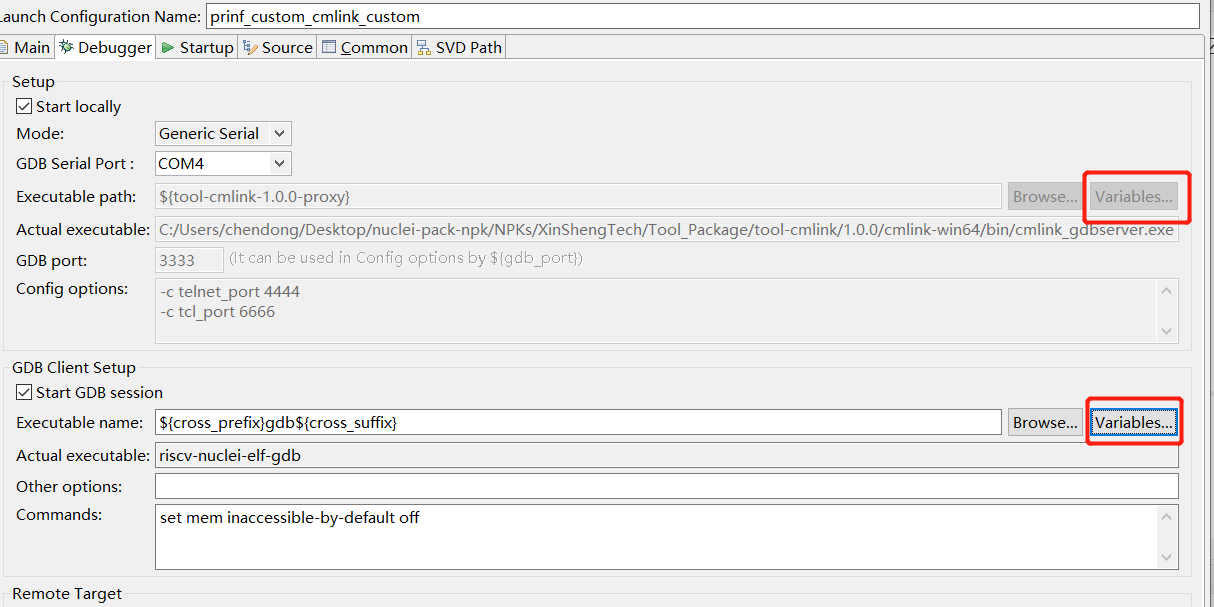
Generally, four extended variables are defined for the component package in an NPK tool. Each package has a package path, referenced as npk name-version number, for example ${tool-cmlink-1.0.0}. Other variables are referenced as npk name-version number-variable name, for example ${tool-cmlink-1.0.0-proxy} and ${tool-cmlink-1.0.0-system_proxy}. When the system value of a variable is true, an additional variable without a version number is added, which resolves to the highest version of that variable, for example ${tool-cmlink-system_proxy}.