4.5. How to develop with Nuclei Studio(Ver.2022-04)
This chapter will introduce how to run Hello World demo on HBirdv2 E203 SoC with Nuclei Studio.
4.5.1. Nuclei Studio introduction
Nuclei Studio is an integrated development environment(IDE) developed by Nuclei System Technology to support its self-developed processors(including commercial Nuclei series processors and open source HBird E203 processor). It’s implemented based on the open source Eclipse framework, and fully integrated with Nuclei SDK(for commercial Nuclei series processors) and HBird SDK(for open source HBird E203 processor). Users could easily create new projects and modify project settings based on their requirements with Nuclei Studio.
4.5.2. Install Nuclei Studio
Nuclei Studio could be downloaded from Nuclei Download Center.
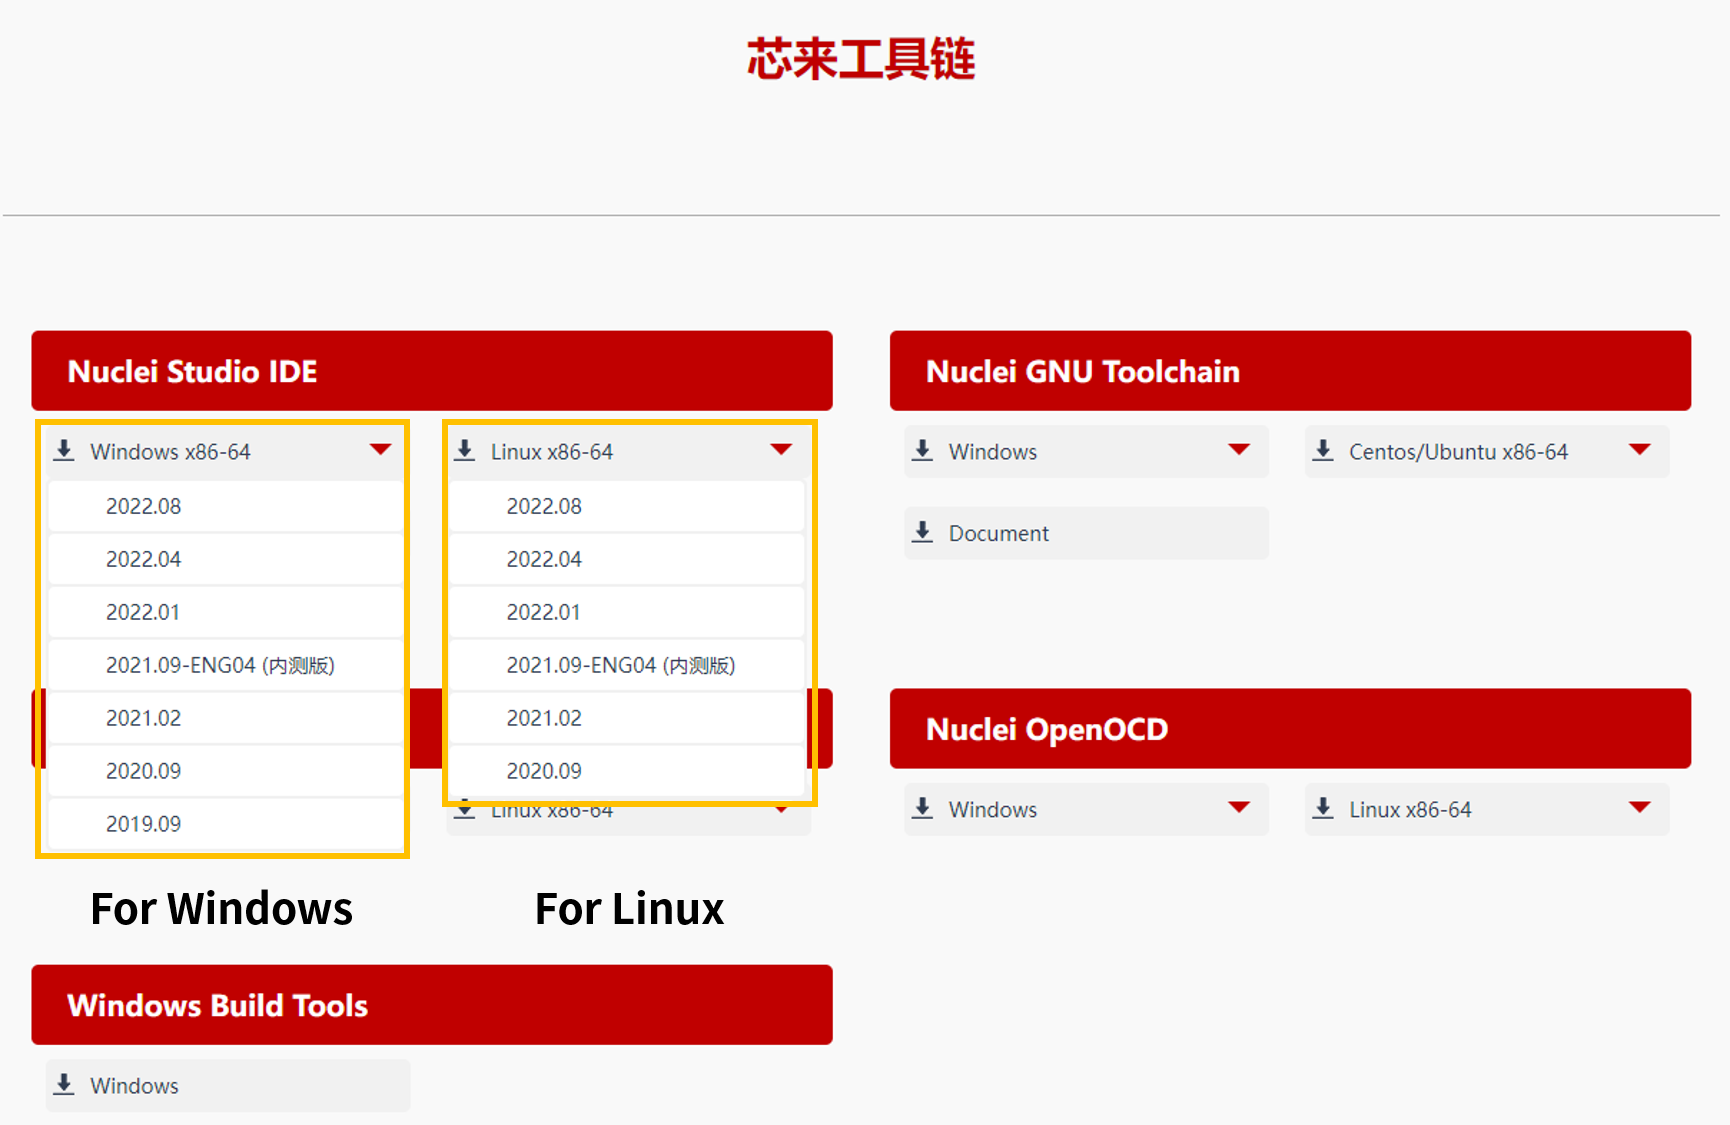
Fig. 4.57 Nuclei Studio download
Note
Nuclei Studio is available in Windows and Linux, here just take Nuclei Studio(Ver.2022-04) for Windows as example.
Nuclei Studio Ver.2022-04 and subsequent verison support new features(NPK), and the development flow is different with old verison, so if using Nuclei Stuido wite 2021-02 or eariler verison, please refer to How to develop with Nuclei Studio(Ver.2020-09).
4.5.3. Install Hbird SDK Package
1. Lanuch Nuclei Studio
Extract the downloaded Nuclei Studio package, doubel-click NucleiStudio.exe under NucleiStudio directory, shown in the figure below.
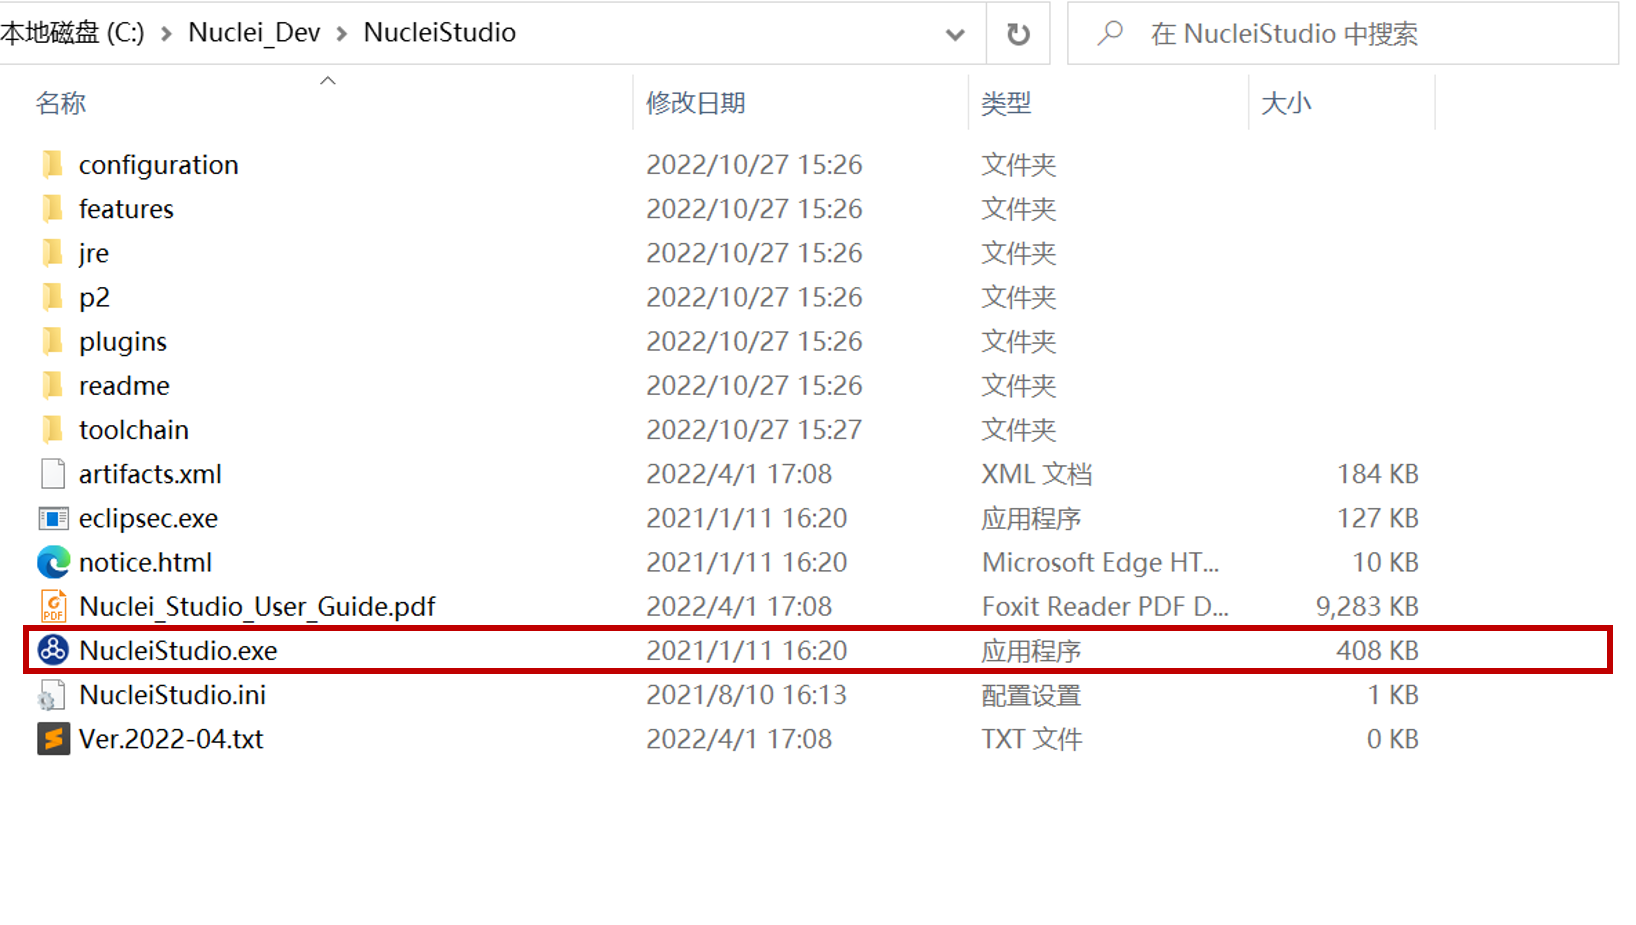
Fig. 4.58 Lanuch Nuclei Studio
Then setting workspace in the next window, shown in the figure below.
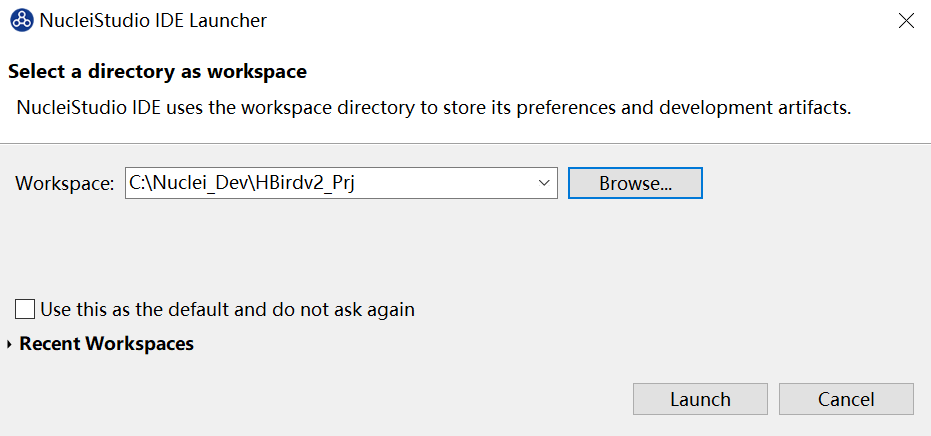
Fig. 4.59 Set Workspace
Note
Workspace is the directory used to store the projects you will create, so you can choose any directory in your working PC as you like.
After workspace set, click the “Launch” button, Nuclei Studio will be launched, shown in the figure below.
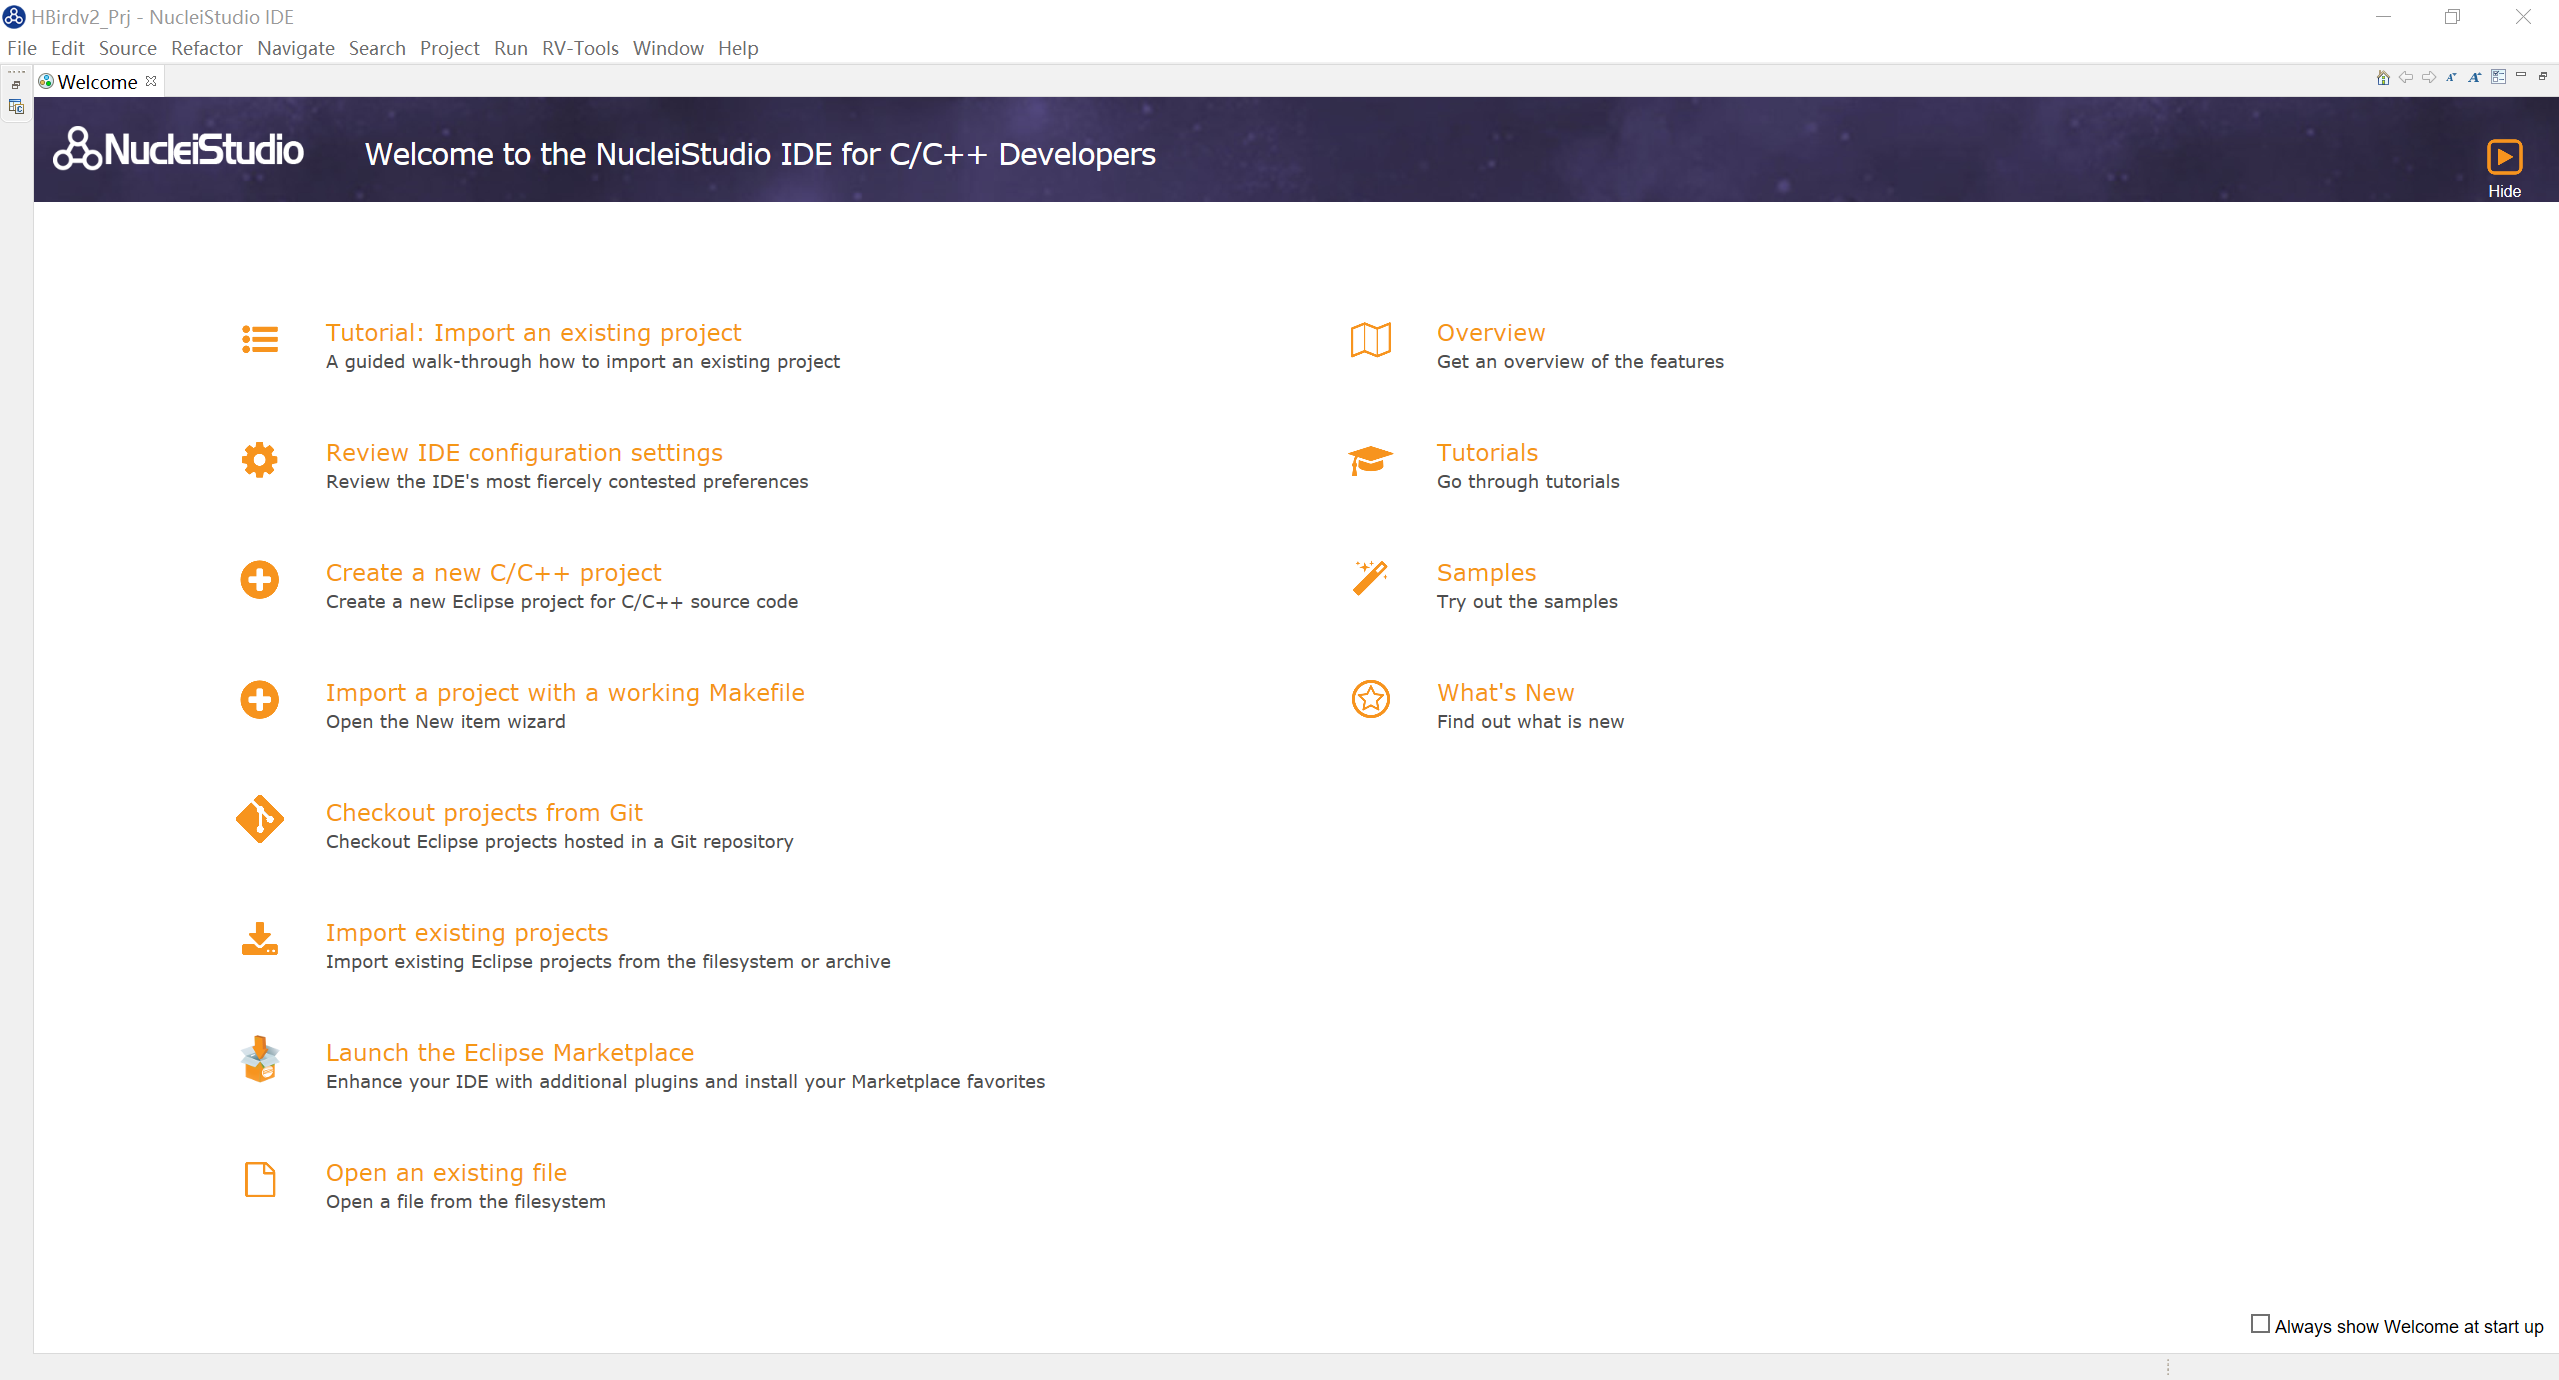
Fig. 4.60 Welcome page
2. Download Hbird SDK Package
In the manu bar, select “RV-Tools -> Nuclei Package Management”, shown in the figure below.

Fig. 4.61 Open Nuclei Package Management
In the pop-up window, select “sdk-hbird_sdk”, then click “Download”, shown in the figure below.
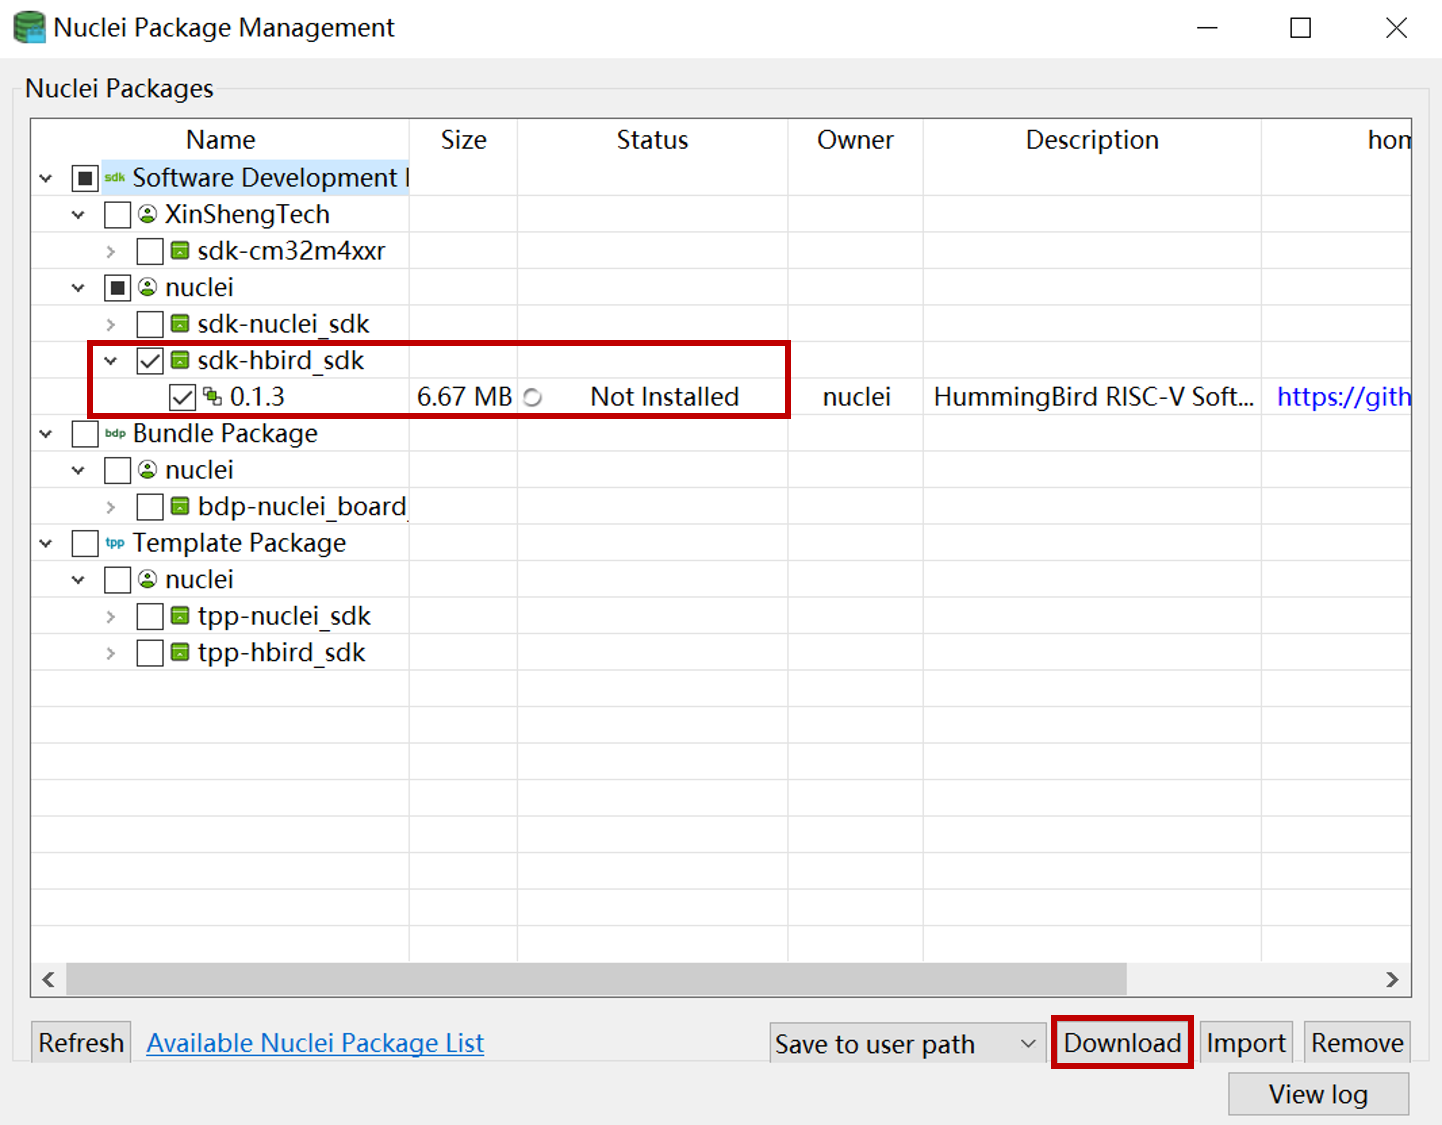
Fig. 4.62 Download Hbird SDK Package
After the package downloaded (shown as the figure below), you can close Nuclei Package Management Window.
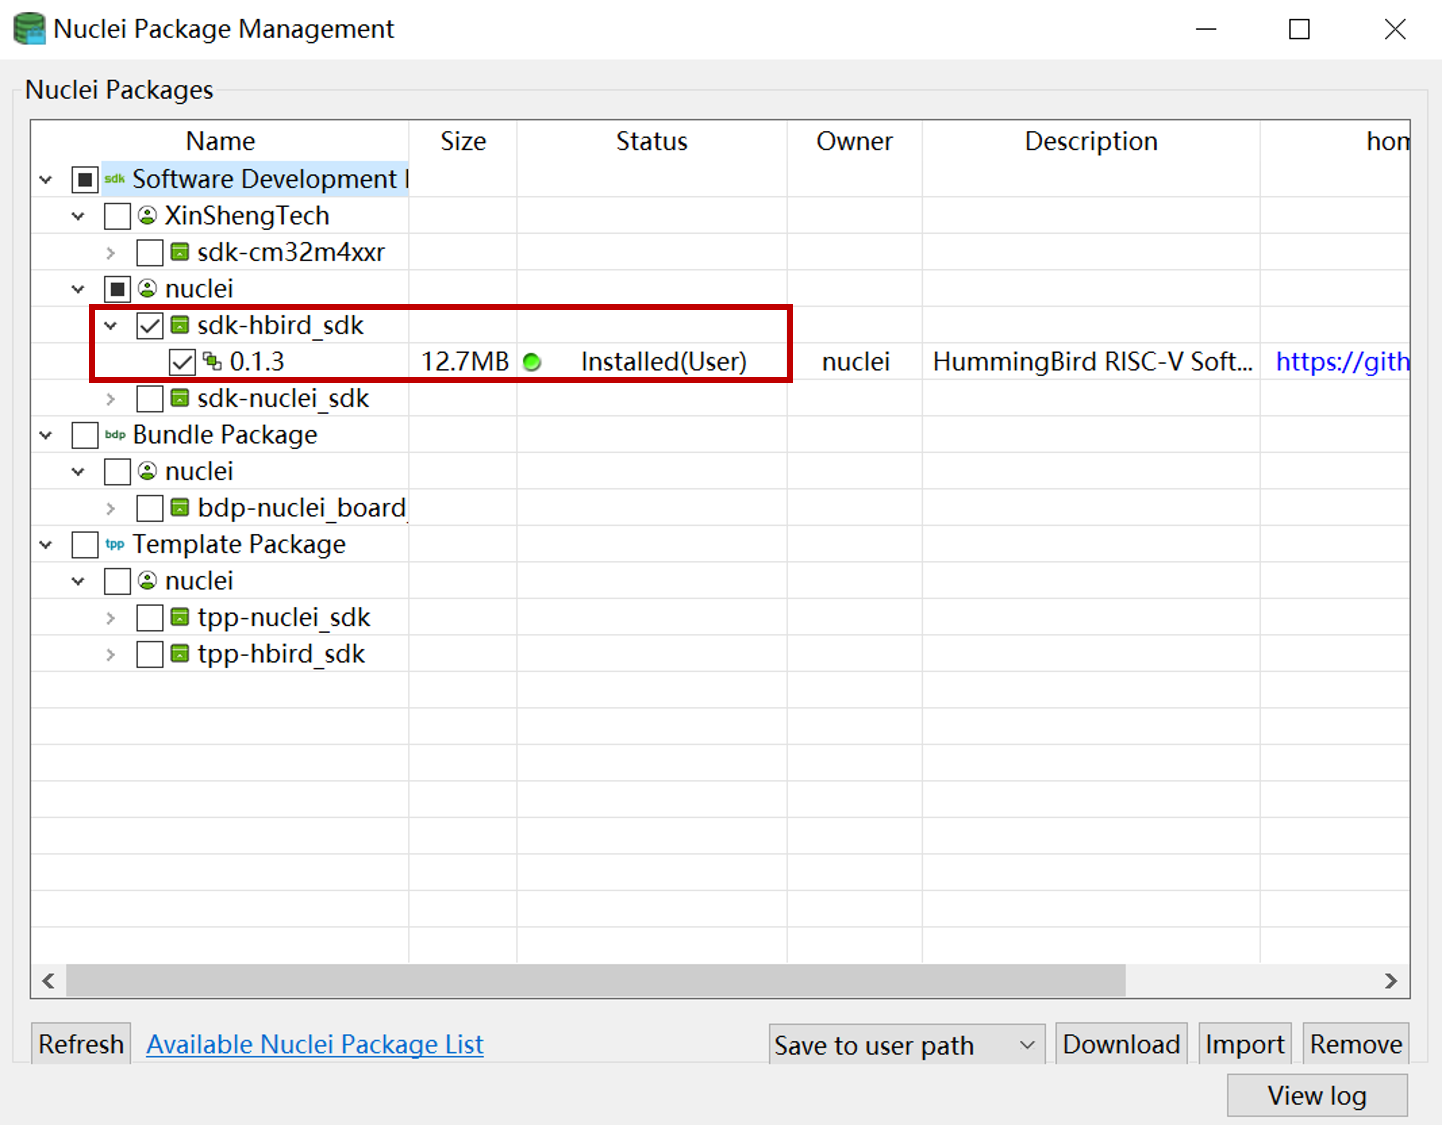
Fig. 4.63 Hbird SDK Installed
Note
If Hbird SDK has been installed successfully, don’t need to install it again.
4.5.4. Creat Hello World Project
In the menu bar, select “File -> New -> New Nuclei RISC-V C/C++ Project”, shown in the figure below.
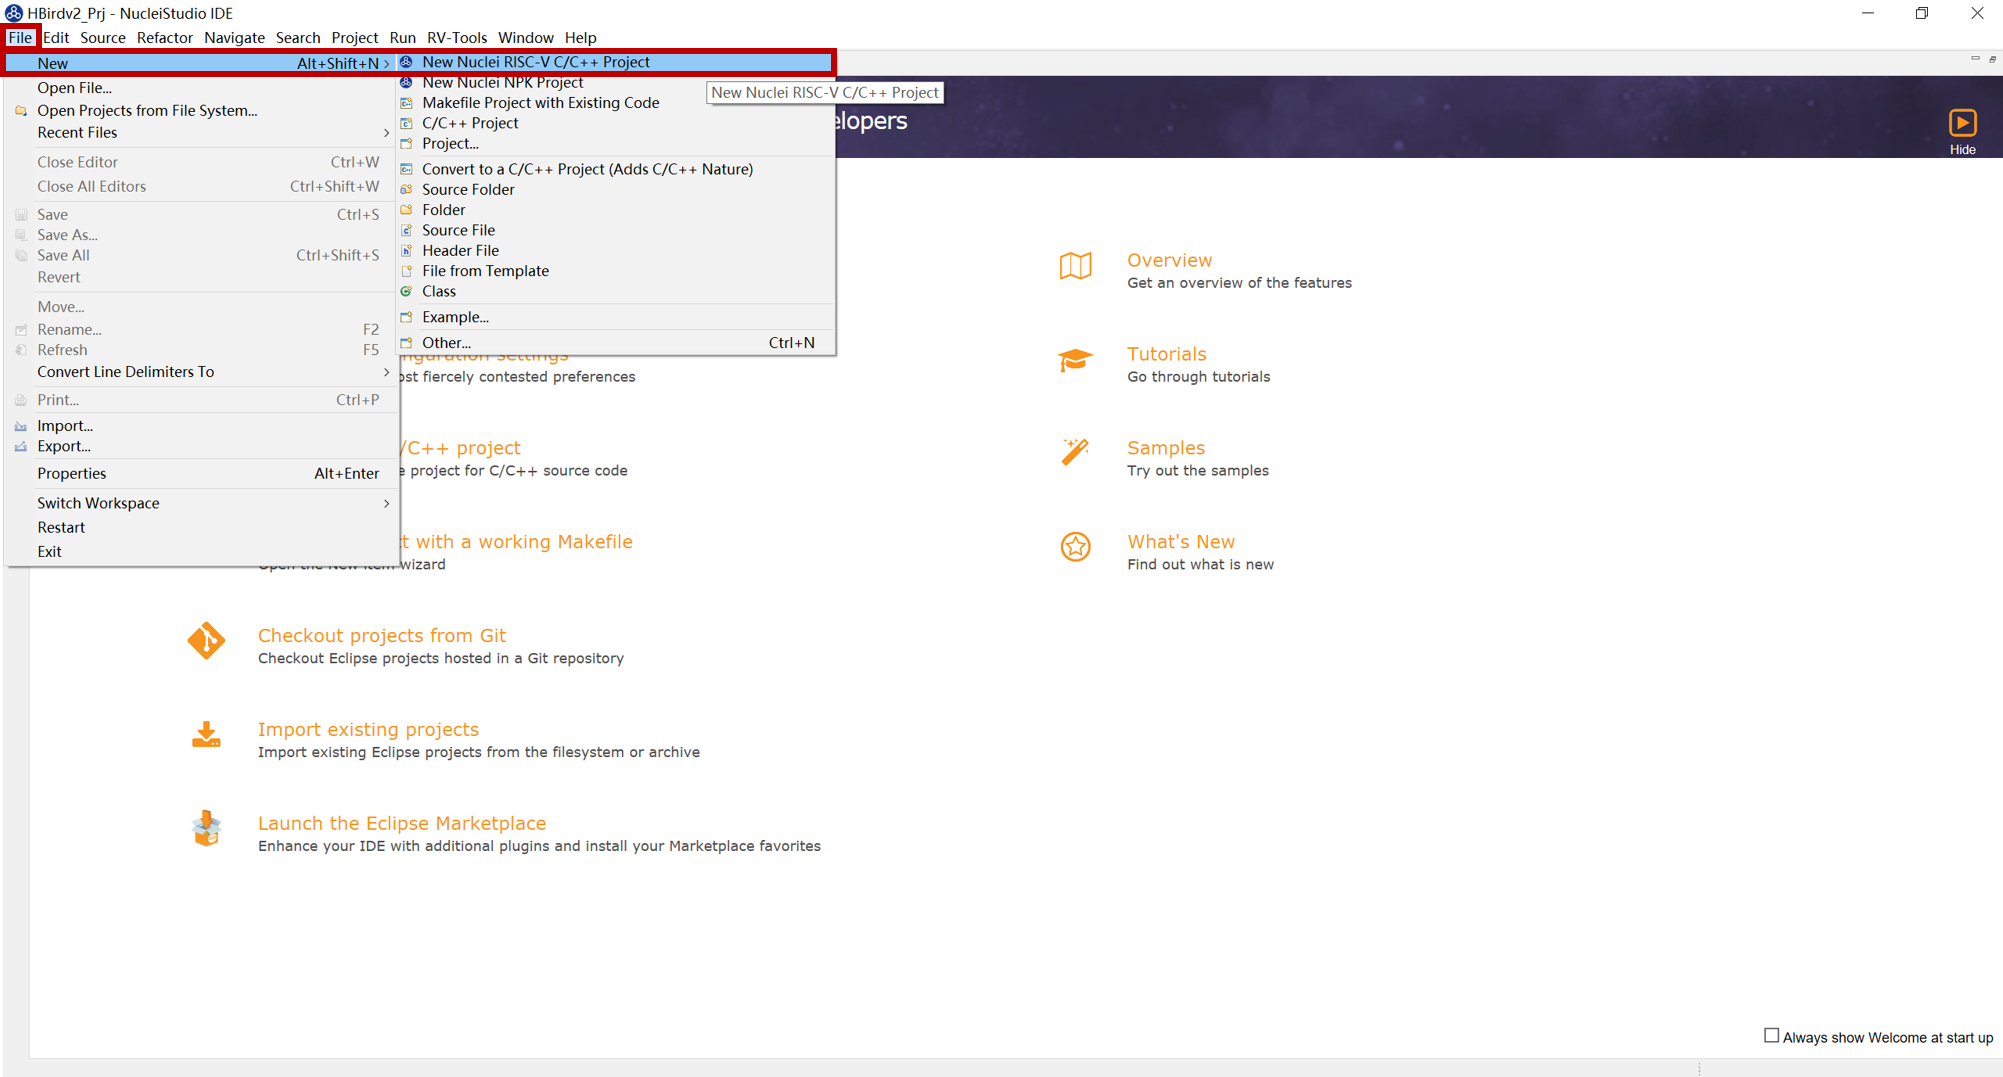
Fig. 4.64 New Project
In the pop-up window, select “Nuclei DDR200T FPGA Evaluation Board sdk-hbird_sdk”, then click “Next”, shown in the figure below.
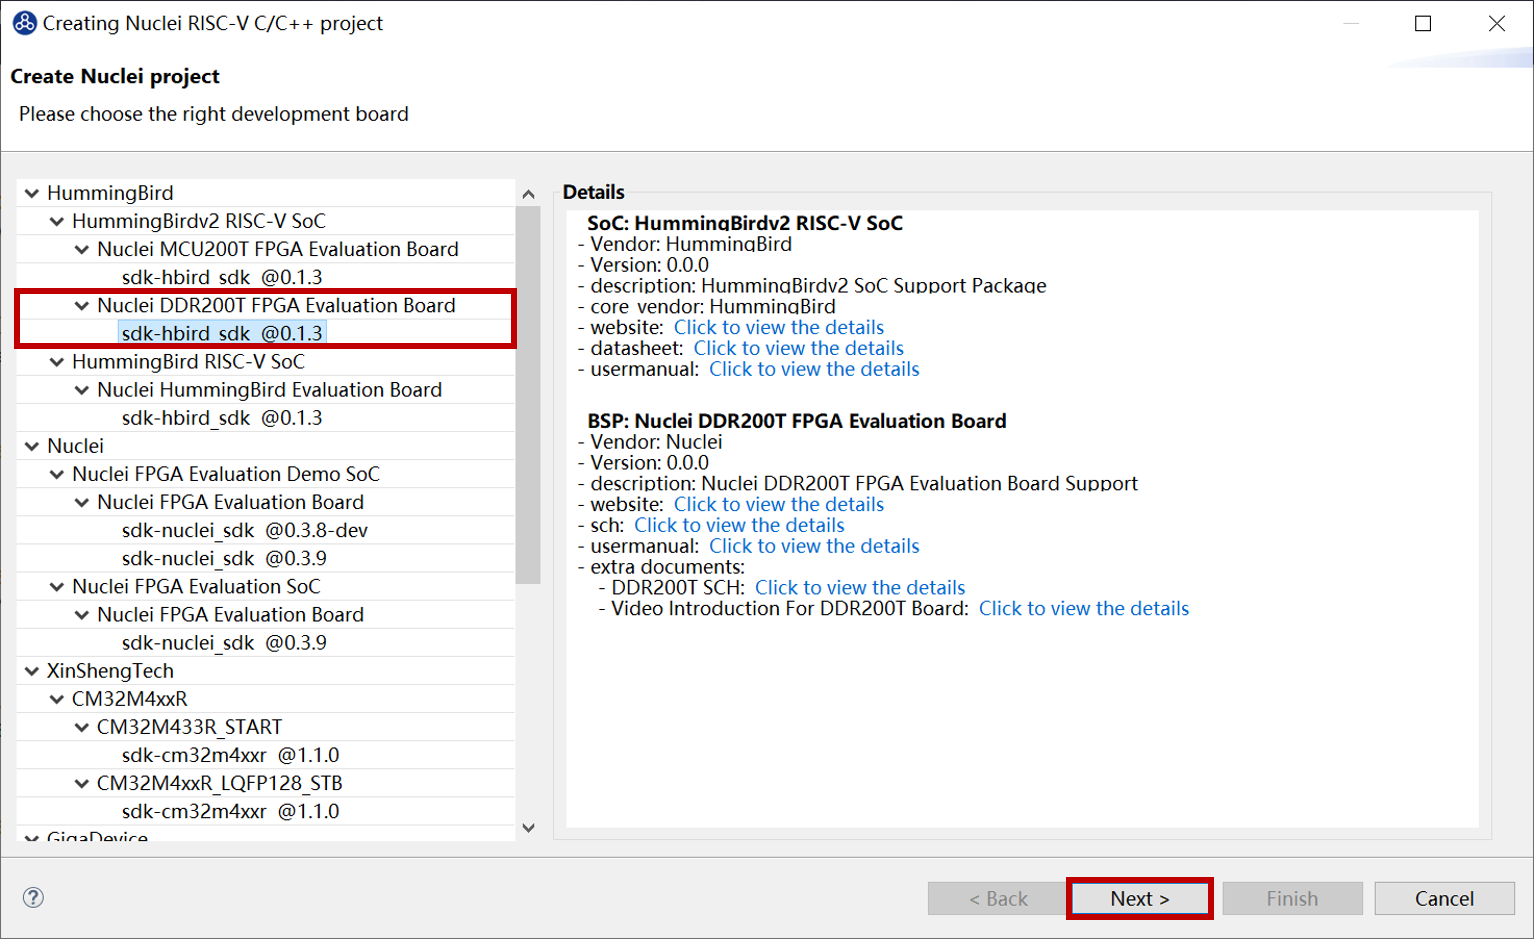
Fig. 4.65 Select SoC and Development Board
Note
DDR200T and MCU200T FPGA Evaluation Boards are both supported in Hbird SDK for Hbirdv2 SoC, here just take DDR200T FPGA Evaluation Board for example.
In next window, input “HelloWorld” as Project name, select “Helloworld” as Project Example, and about other options just keep them as default, finally click “Finish”, shown in the figure below.
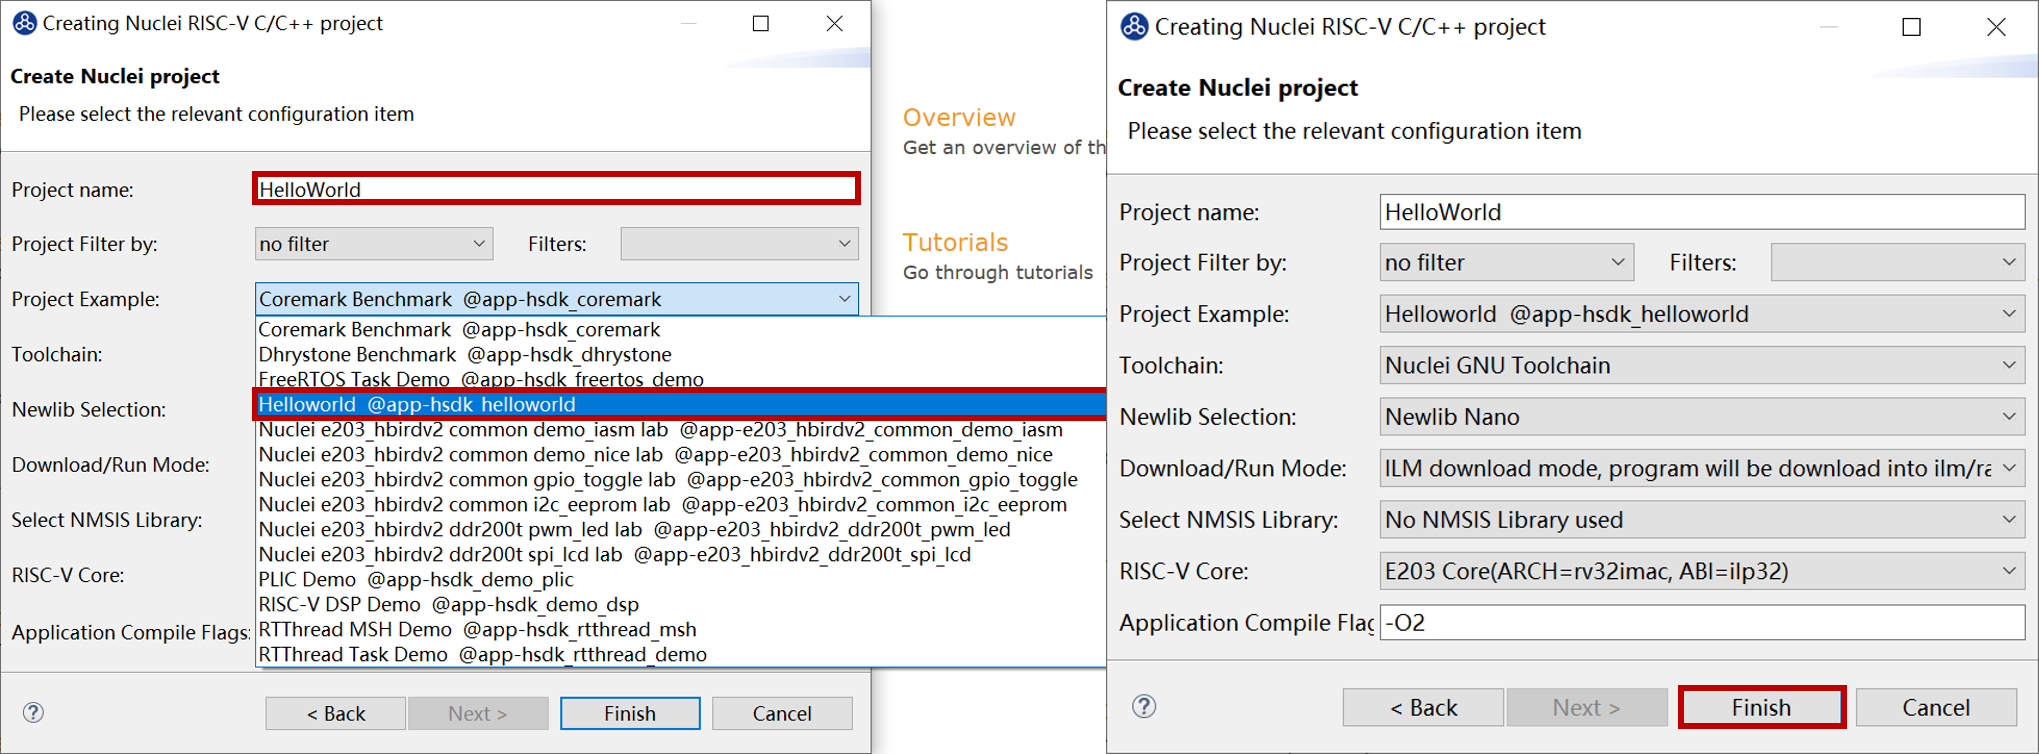
Fig. 4.66 Select Project Example
The created project is shown in the figure below.

Fig. 4.67 Created HelloWorld Project
Note
From the Project Explorer on the left side of the figure, we can find that, the created project already includes HBird SDK, so users could develop other applications easily based on the created baremetal demo.
4.5.5. Compile Hello World Project
1. Compile options setting
In the menu bar, select “RV-Tools -> SDK Configuration Tools”, shown in the figure below.
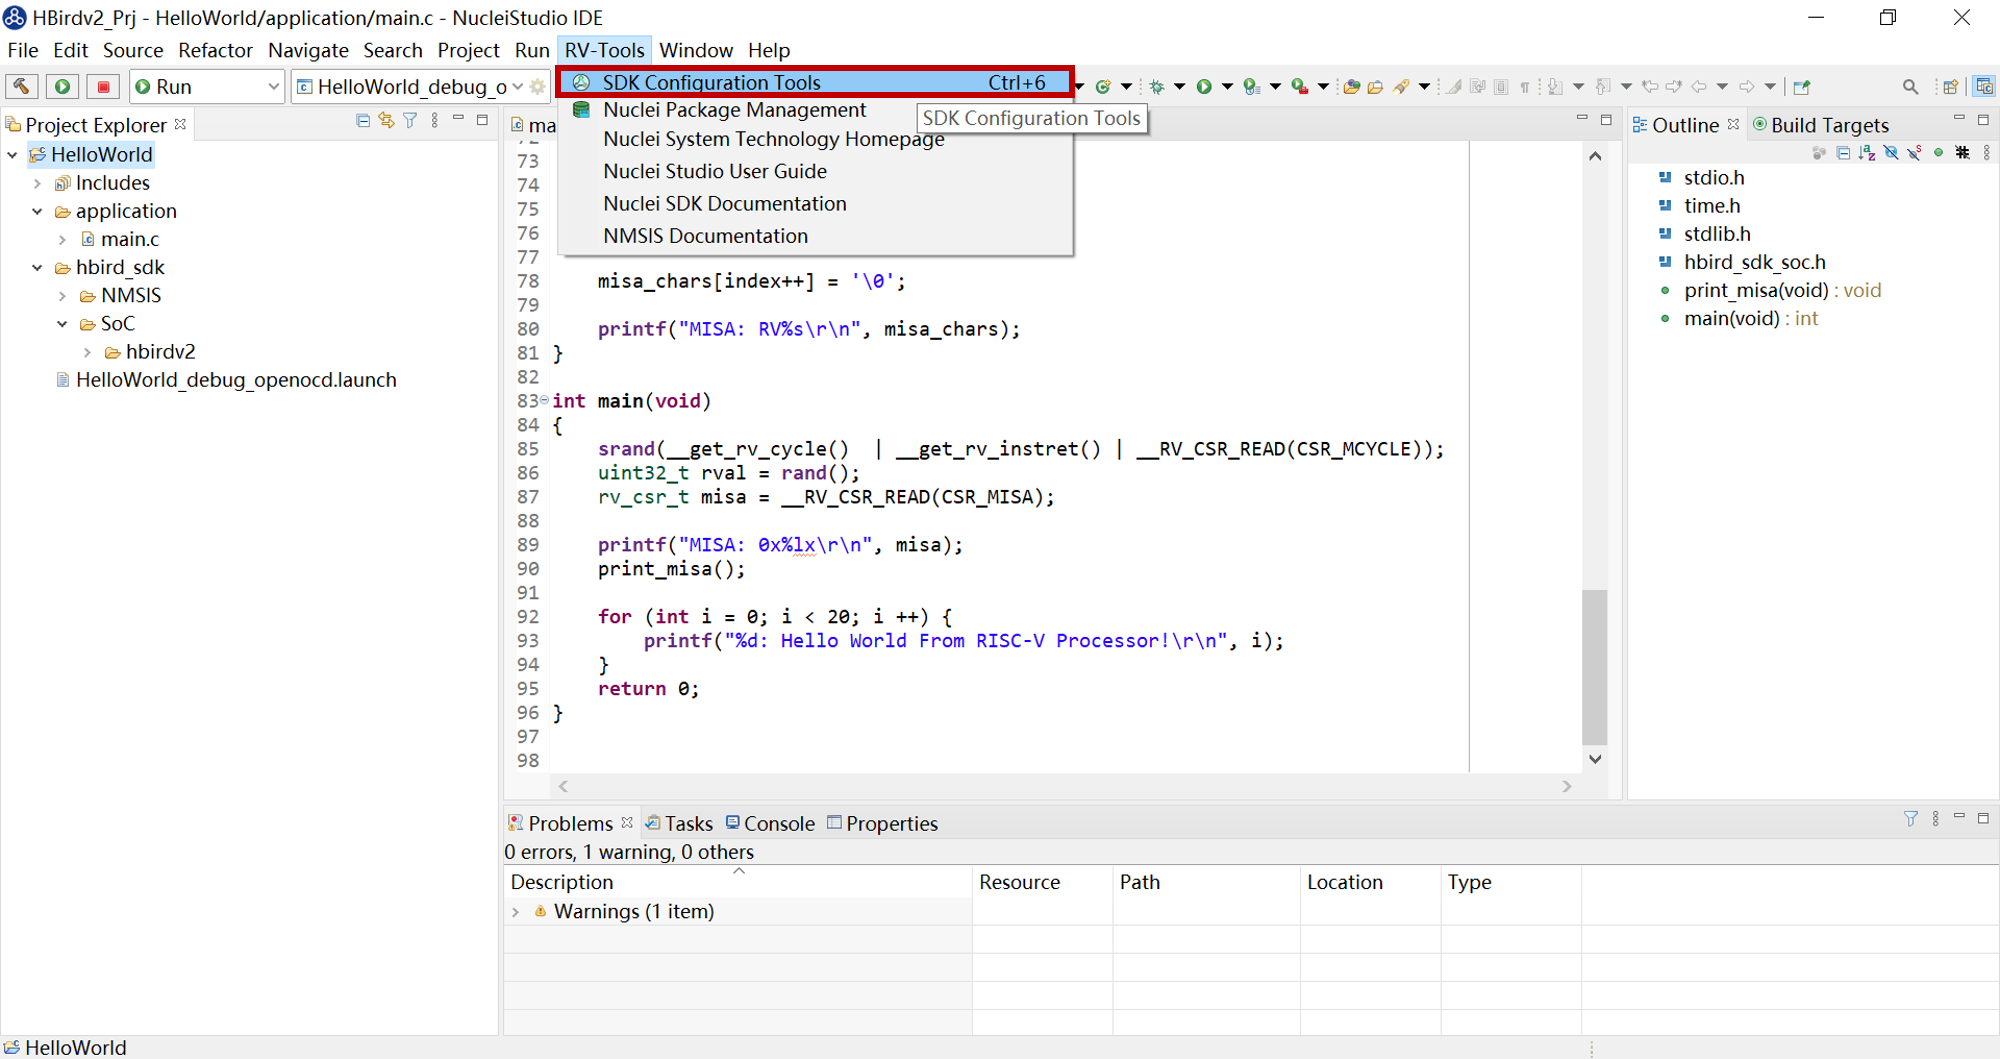
Fig. 4.68 SDK Configuration Tools
In the pop-up window, you can choose the download mode as you need, then click “Save” button, shown in the figure below.
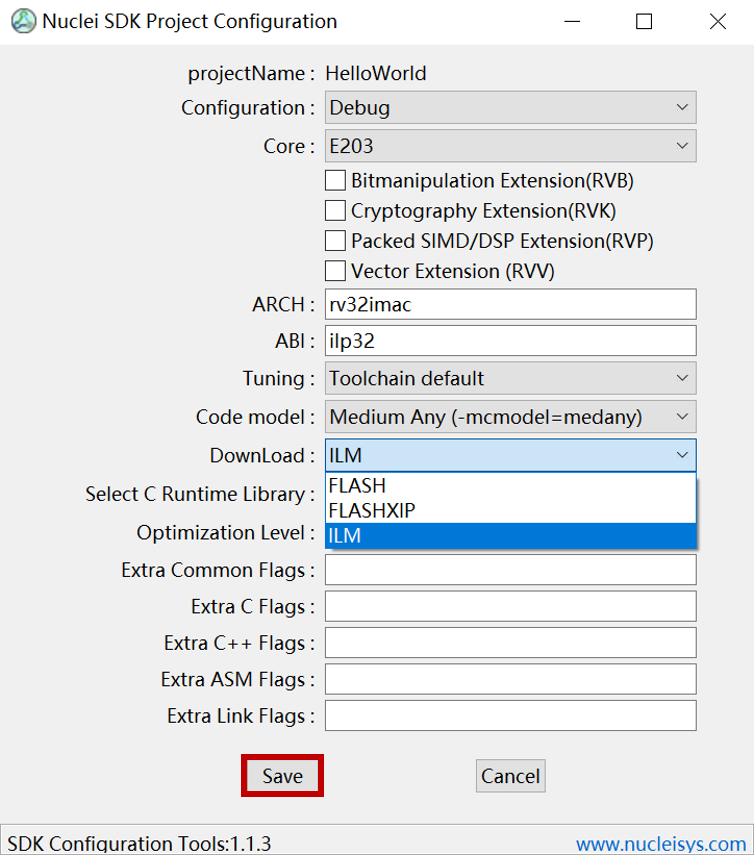
Fig. 4.69 Compile Options
2. Compile HelloWorld demo
Click the “Build” button, the icon of this button is a hammer, shown in the figure below.

Fig. 4.70 Build Project
After the project compiled successfully, it will shown as the figure below.

Fig. 4.71 Build finished
Note
The generated executable file named “HelloWorld.elf” is located in Debug directory.
The code size and data size is also printed in the Console window.
4.5.6. Run Hello World Project
1. Hardward connection
Same as Step1 in Run Hello World demo with HBird SDK.
2. Debugger driver install
Same as Step2 in Run Hello World demo with HBird SDK.
Note
If the Debugger driver has been installed successfully, don’t need to install it again.
3. Download and run
Open the created Hello World project, select “RV-Tools -> SDK Configuration Tools”, choose “FLASH” as download mode, then click “Save” button, shown in the figure below.
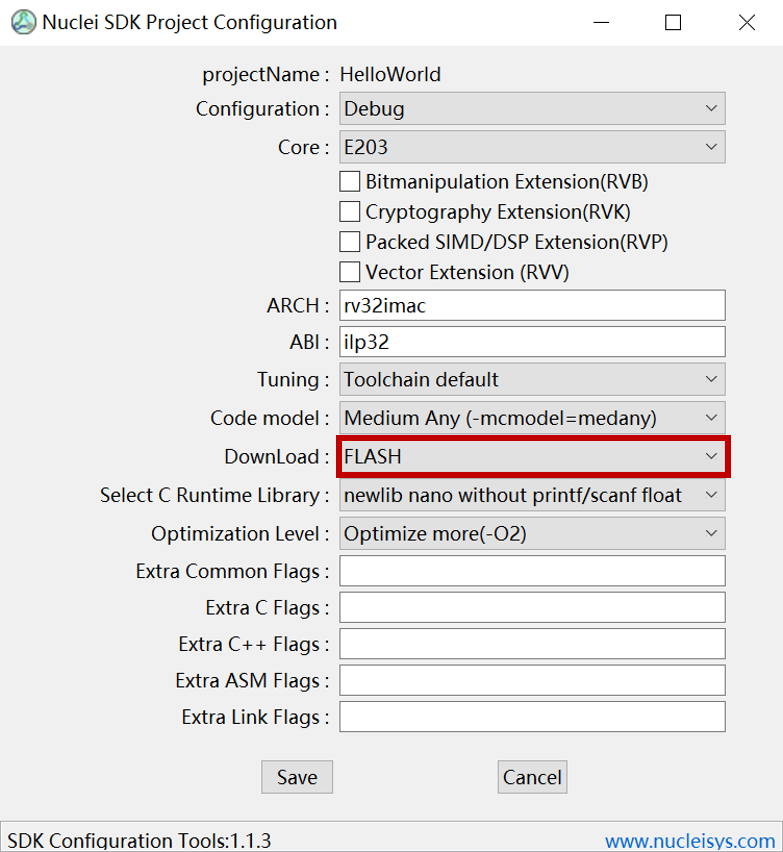
Fig. 4.72 Download Mode Setting
Click the “Build” button, compiling the project.
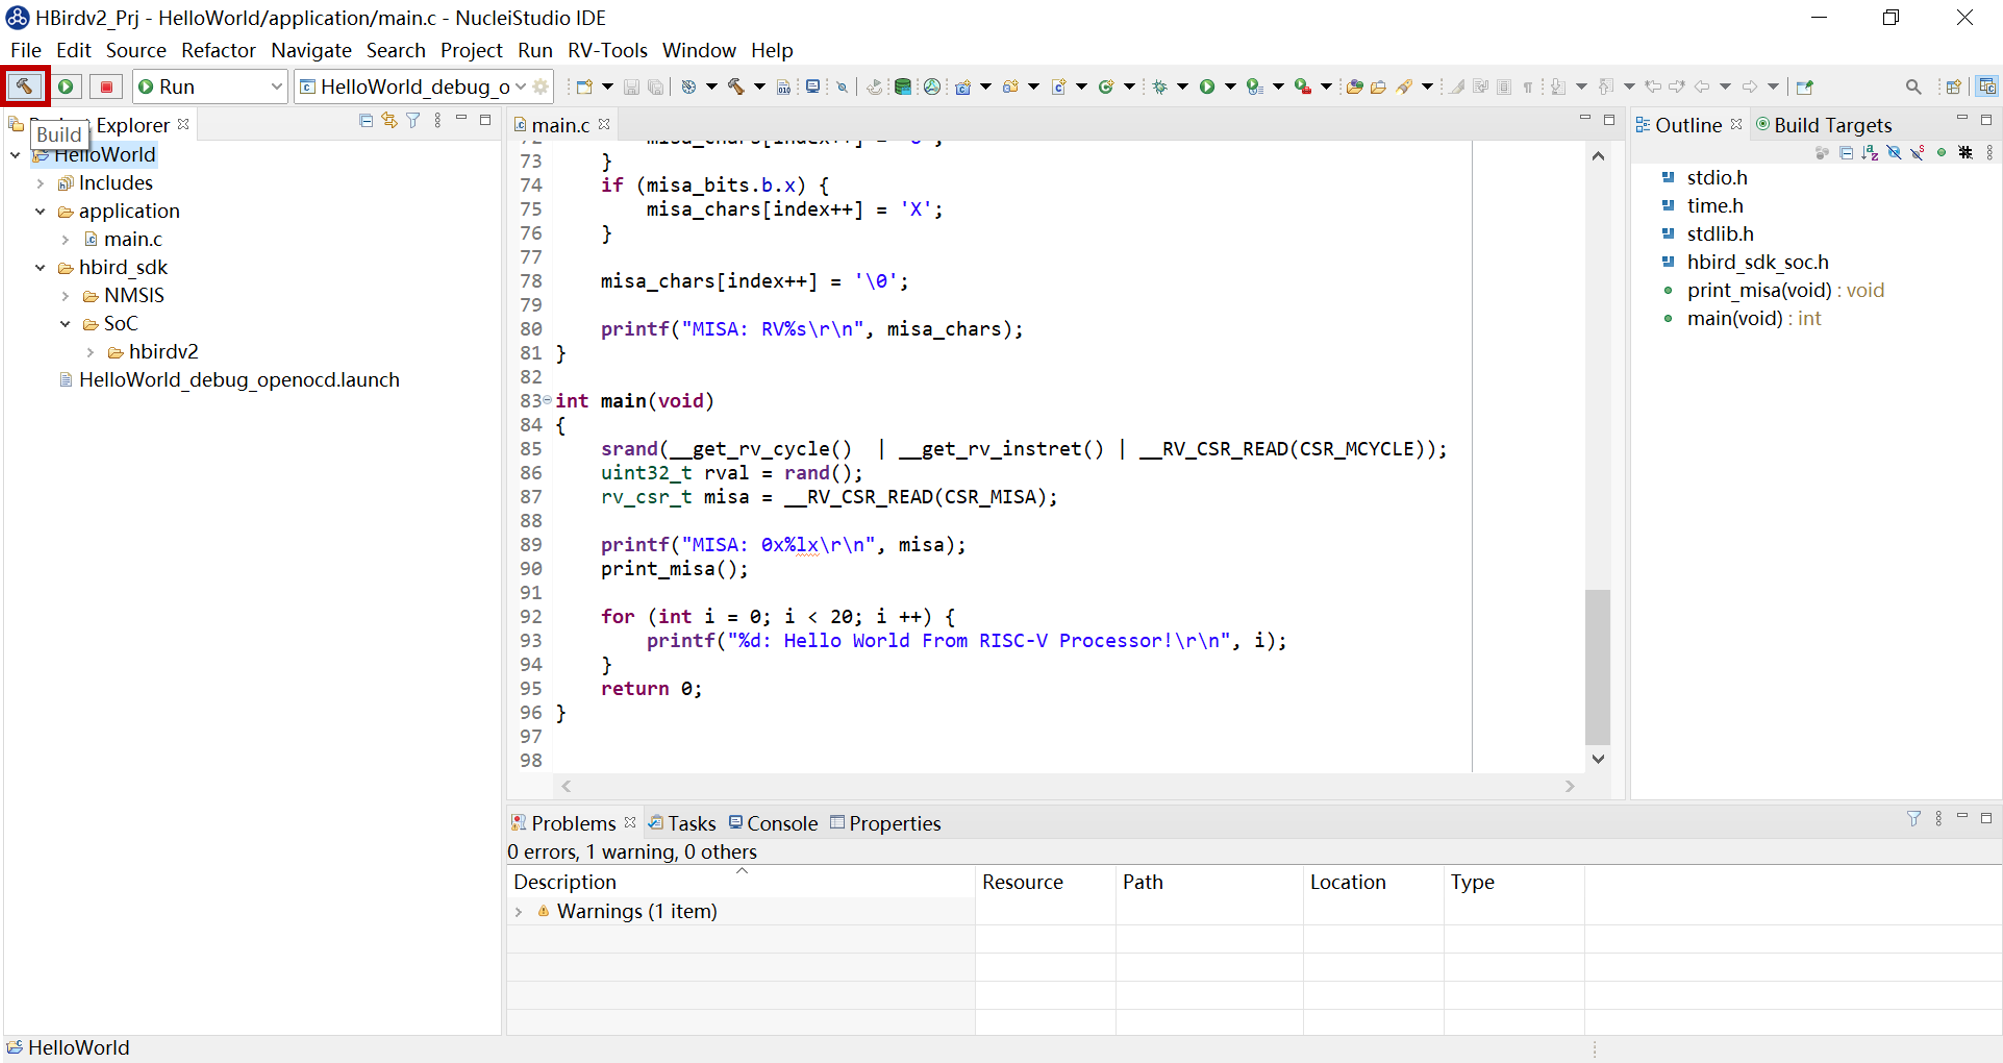
Fig. 4.73 Build Project
In the menu bar, select “Run -> Run Configuration”, shown in the figure below.
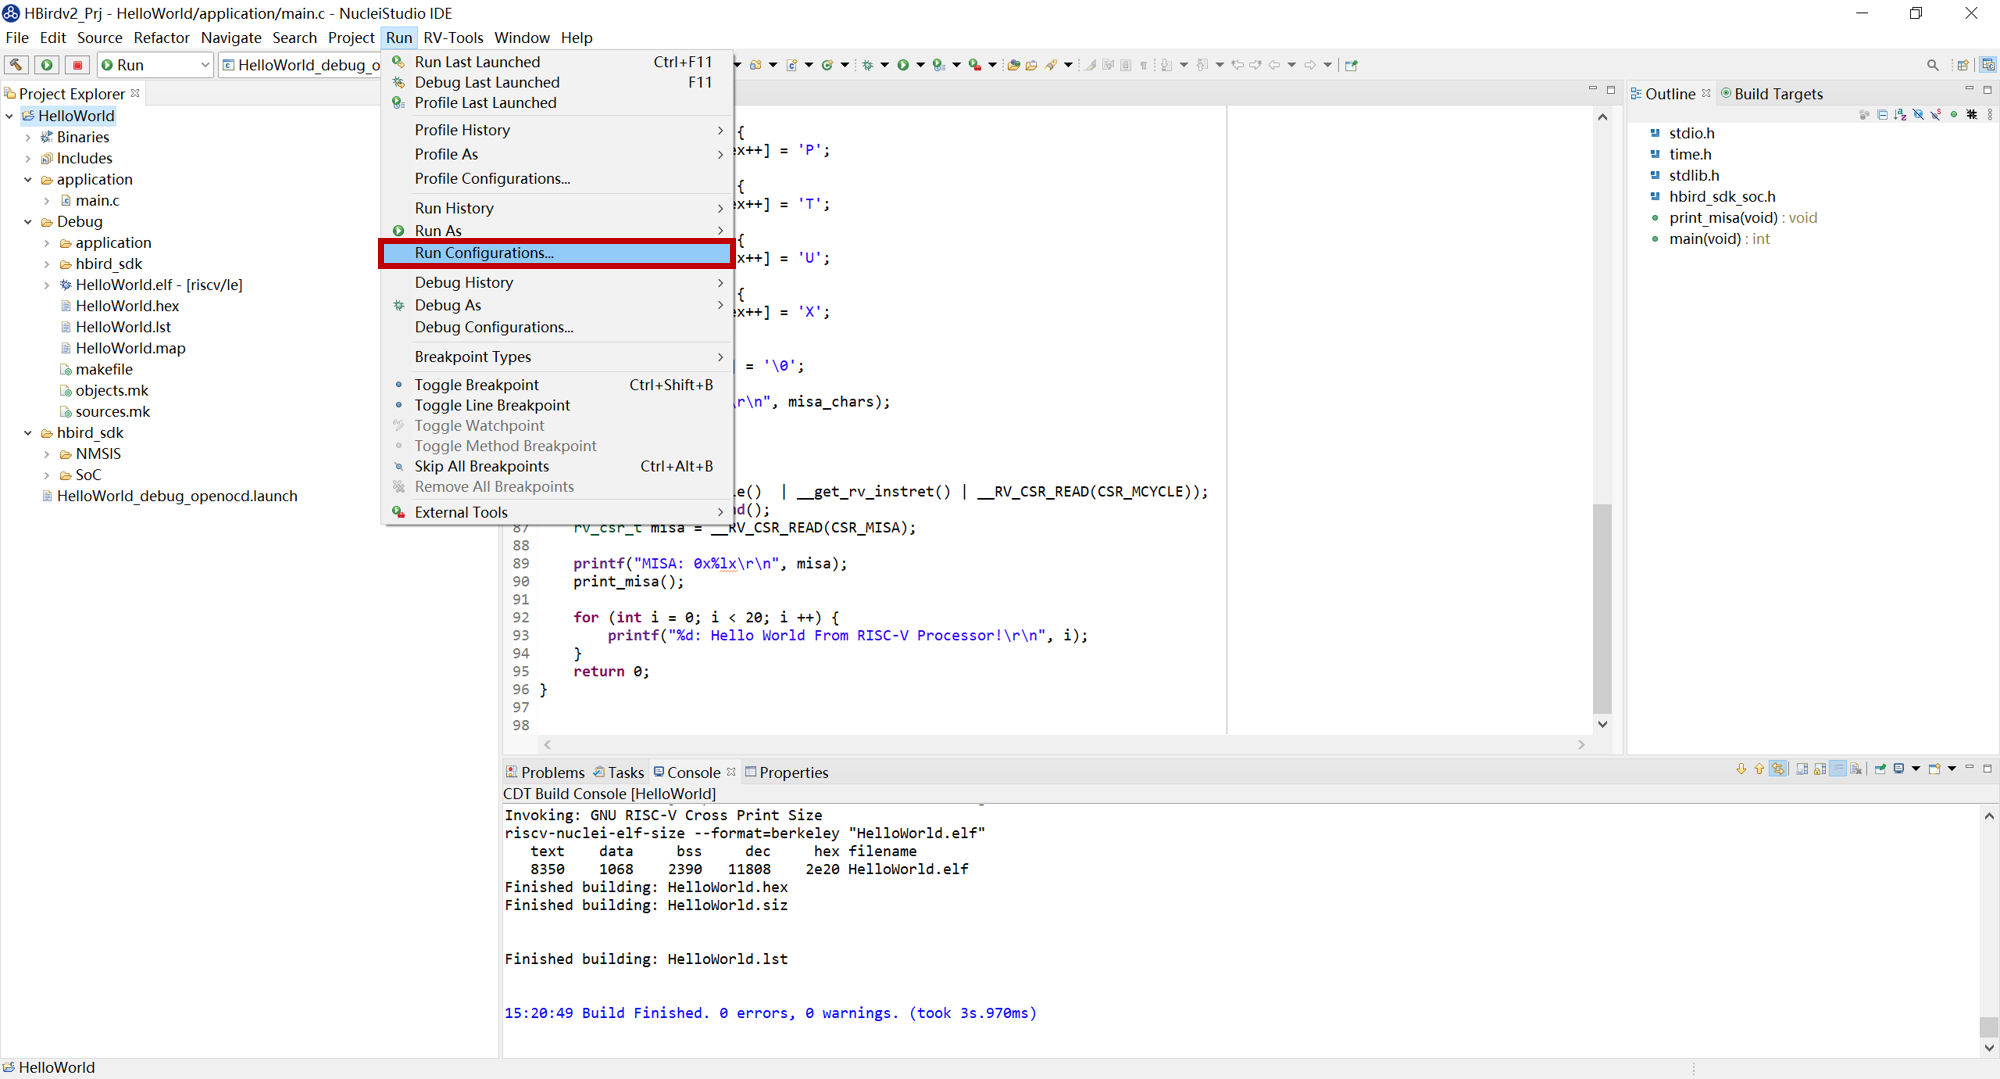
Fig. 4.74 Open Run Configuration
Double-click “GDB OpenOCD Debugging”, then a set configuration file used for debug/download named “HelloWorld Debug” will be generated automatically, finally click “Run” button, shown in the figure below.

Fig. 4.75 Run Configuration file
Note
If the Run/Debug Configuration file already exists, don’t need to generate again.
After the program uploaded successfully, it will shown as the figure below.
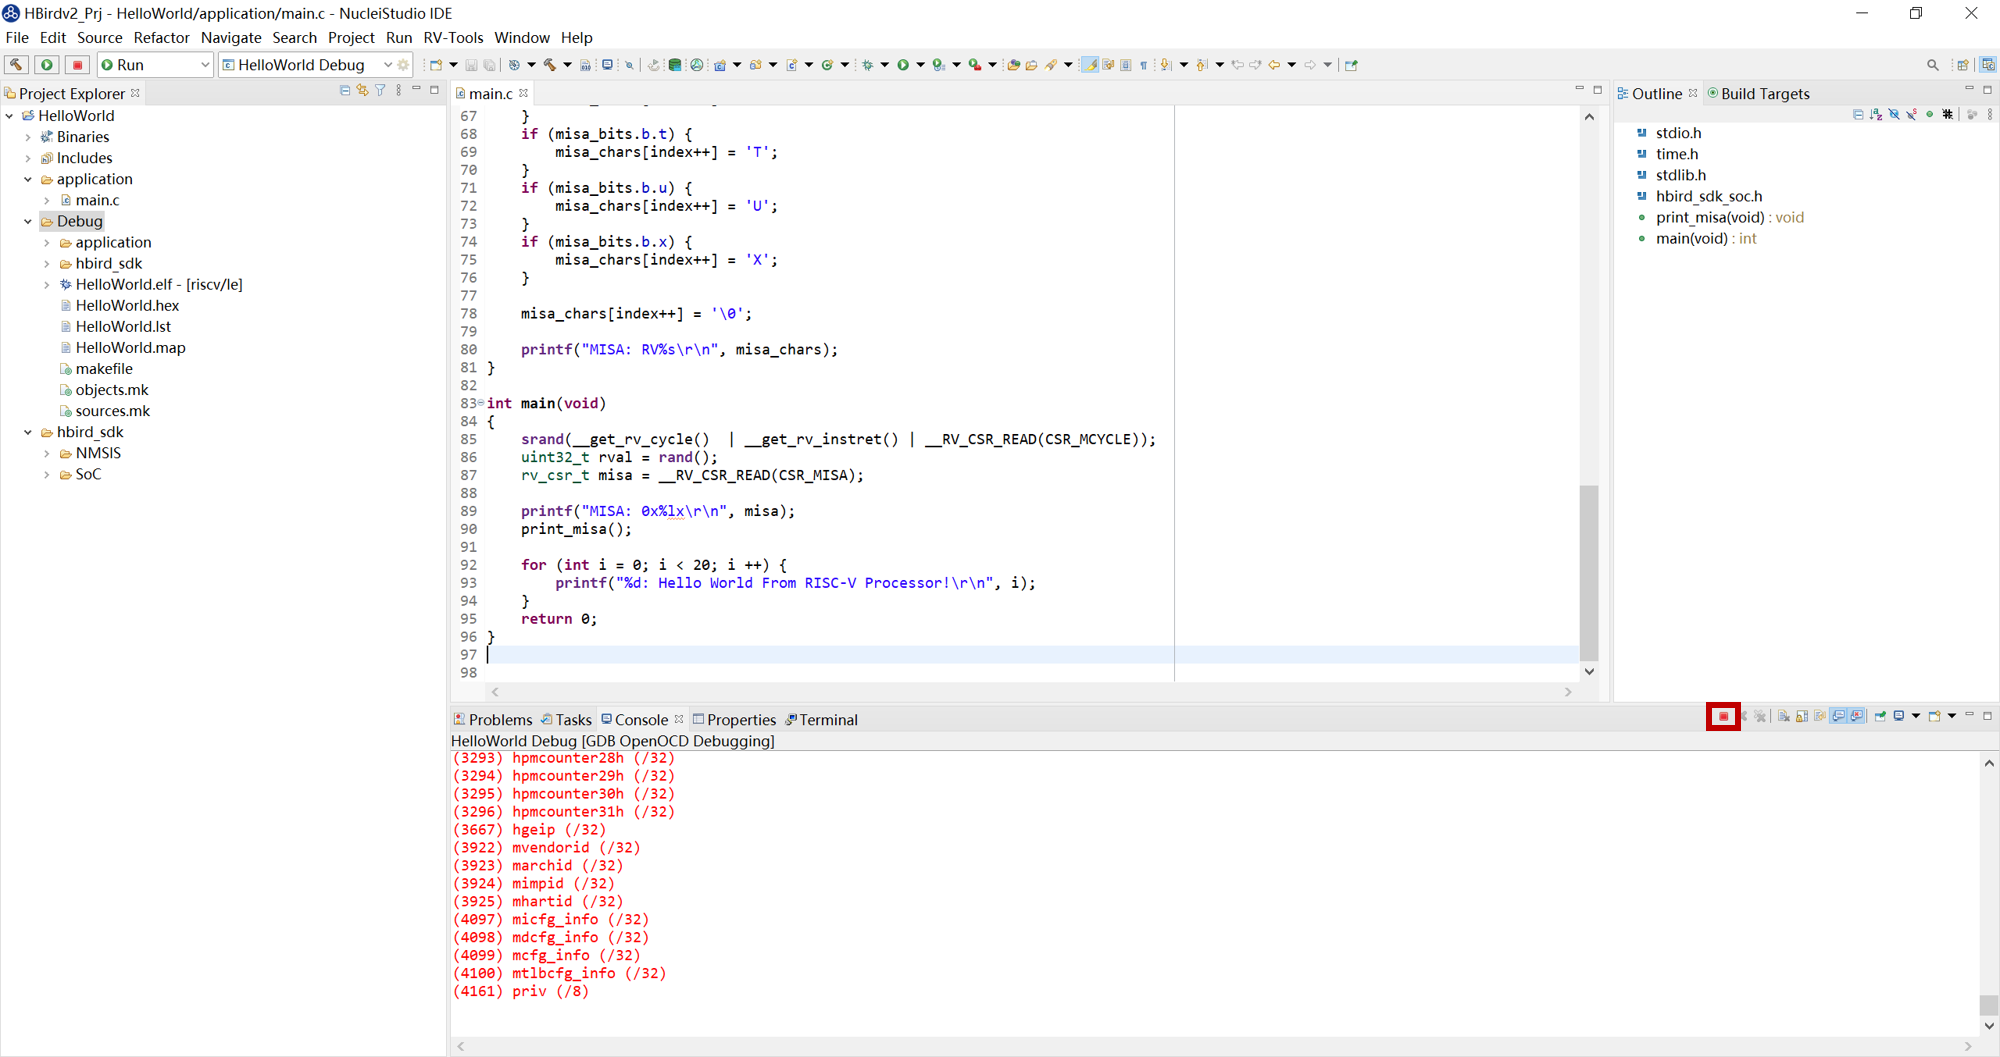
Fig. 4.76 Download Complete
4. Run result
In the menu bar, select “Window -> Show View -> Terminal”, then click the “Open a Terminal” button in Terminal window, the icon of this button is a monitor, shown in the figure below.

Fig. 4.77 Open Terminal
In the pop-up window, choose “Serial Terminal”, and set other parameters as following figure shown.
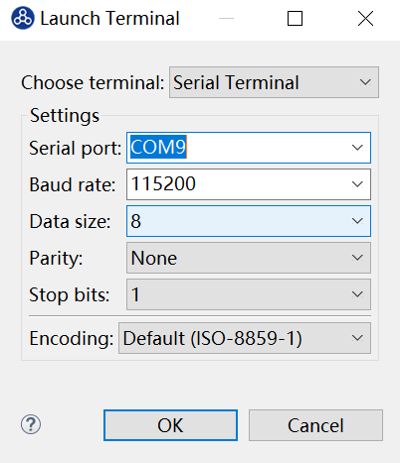
Fig. 4.78 Config Terminal
Note
The serial port number depends on your device.
After Serial Terminal opened, you can press the MCU_RESET button on Nuclei ddr200t development board to reset MCU and the Hello World program will be executed again, the result is shown in the figure below.
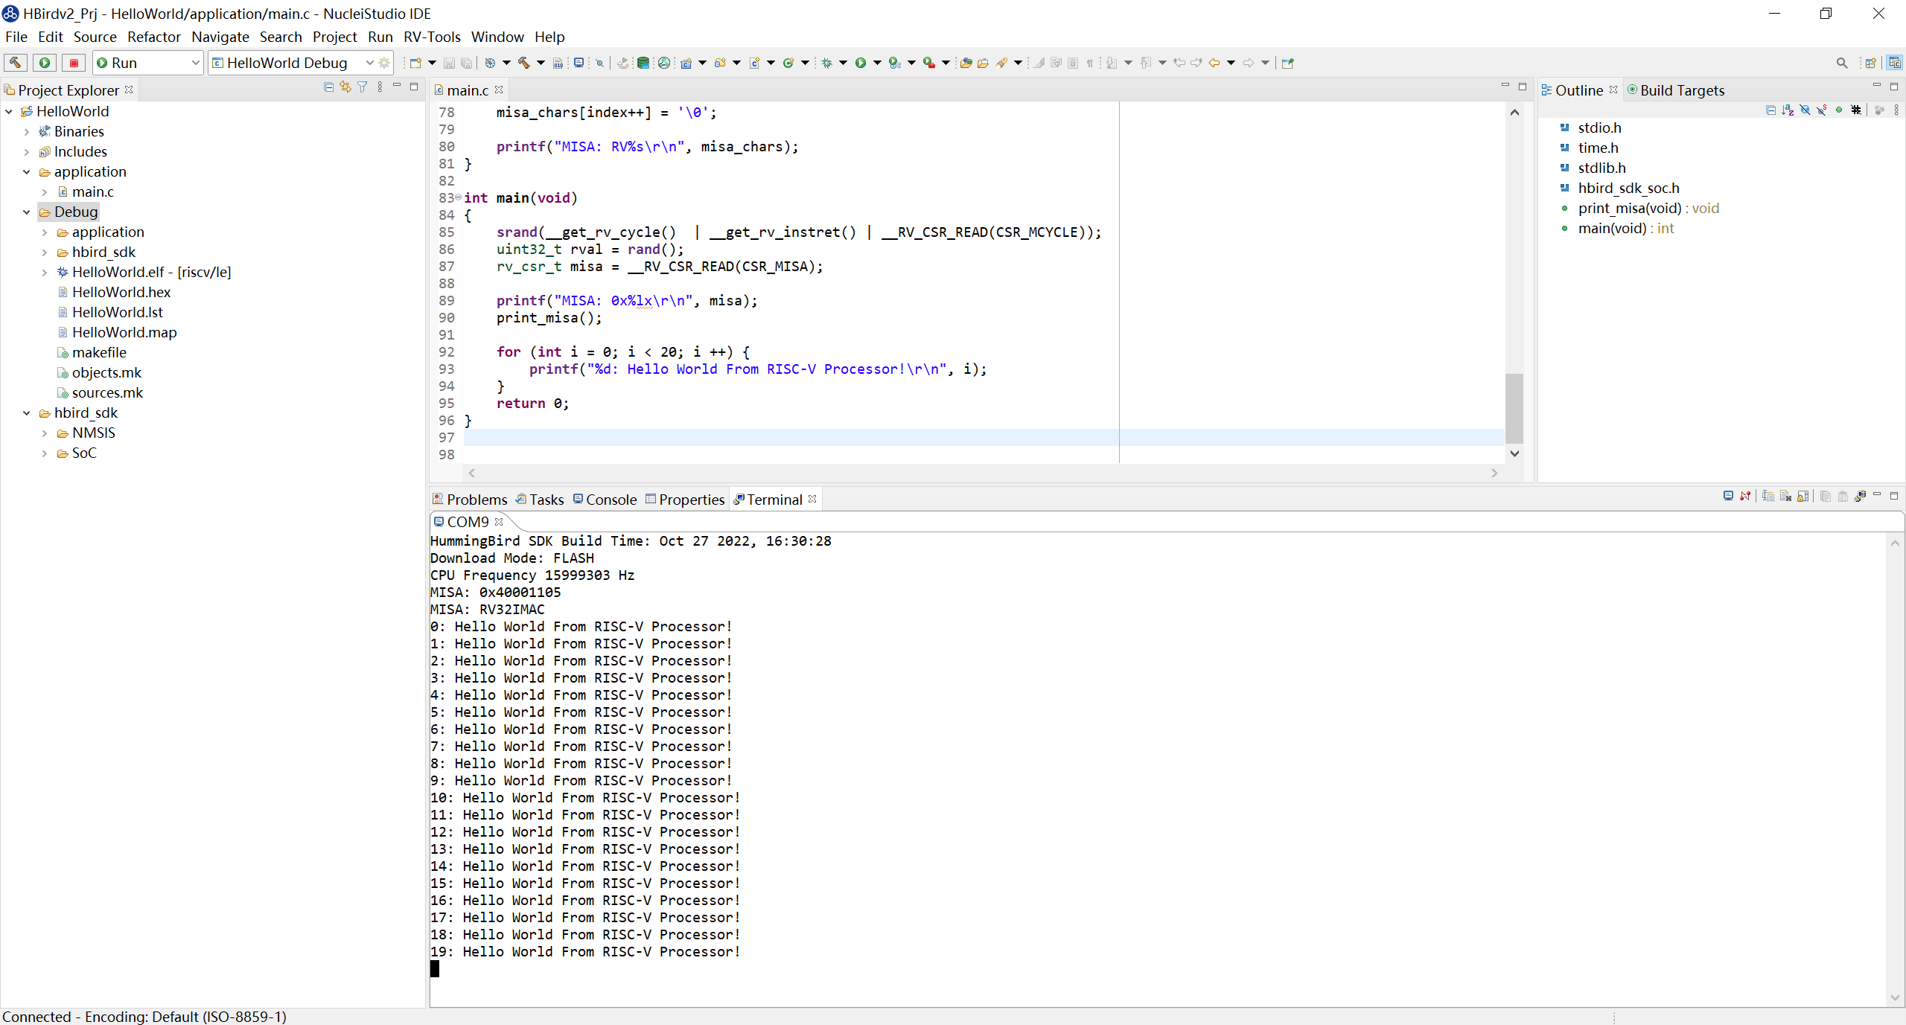
Fig. 4.79 Hello World Demo Result
4.5.7. Debug Hello World Project
1. Hardward connection
Same as Step1 in Run Hello World demo with HBird SDK.
2. Debugger driver install
Same as Step2 in Run Hello World demo with HBird SDK.
Note
If the Debugger driver has been installed successfully, don’t need to install it again.
3. Debug
Open the created Hello World project, click the “Build” button, compiling the project.
Note
Debugging program need to set download mode as “ILM”, since the newly created Hello World project already sets “ILM” as default download mode, so we don’t need to do any changes before compiling. If the download mode has been changed by yourself, please make sure it should be set to “ILM” when you want to debug program.
In the menu bar, select “Run -> Debug Configuration”, shown in the figure below.
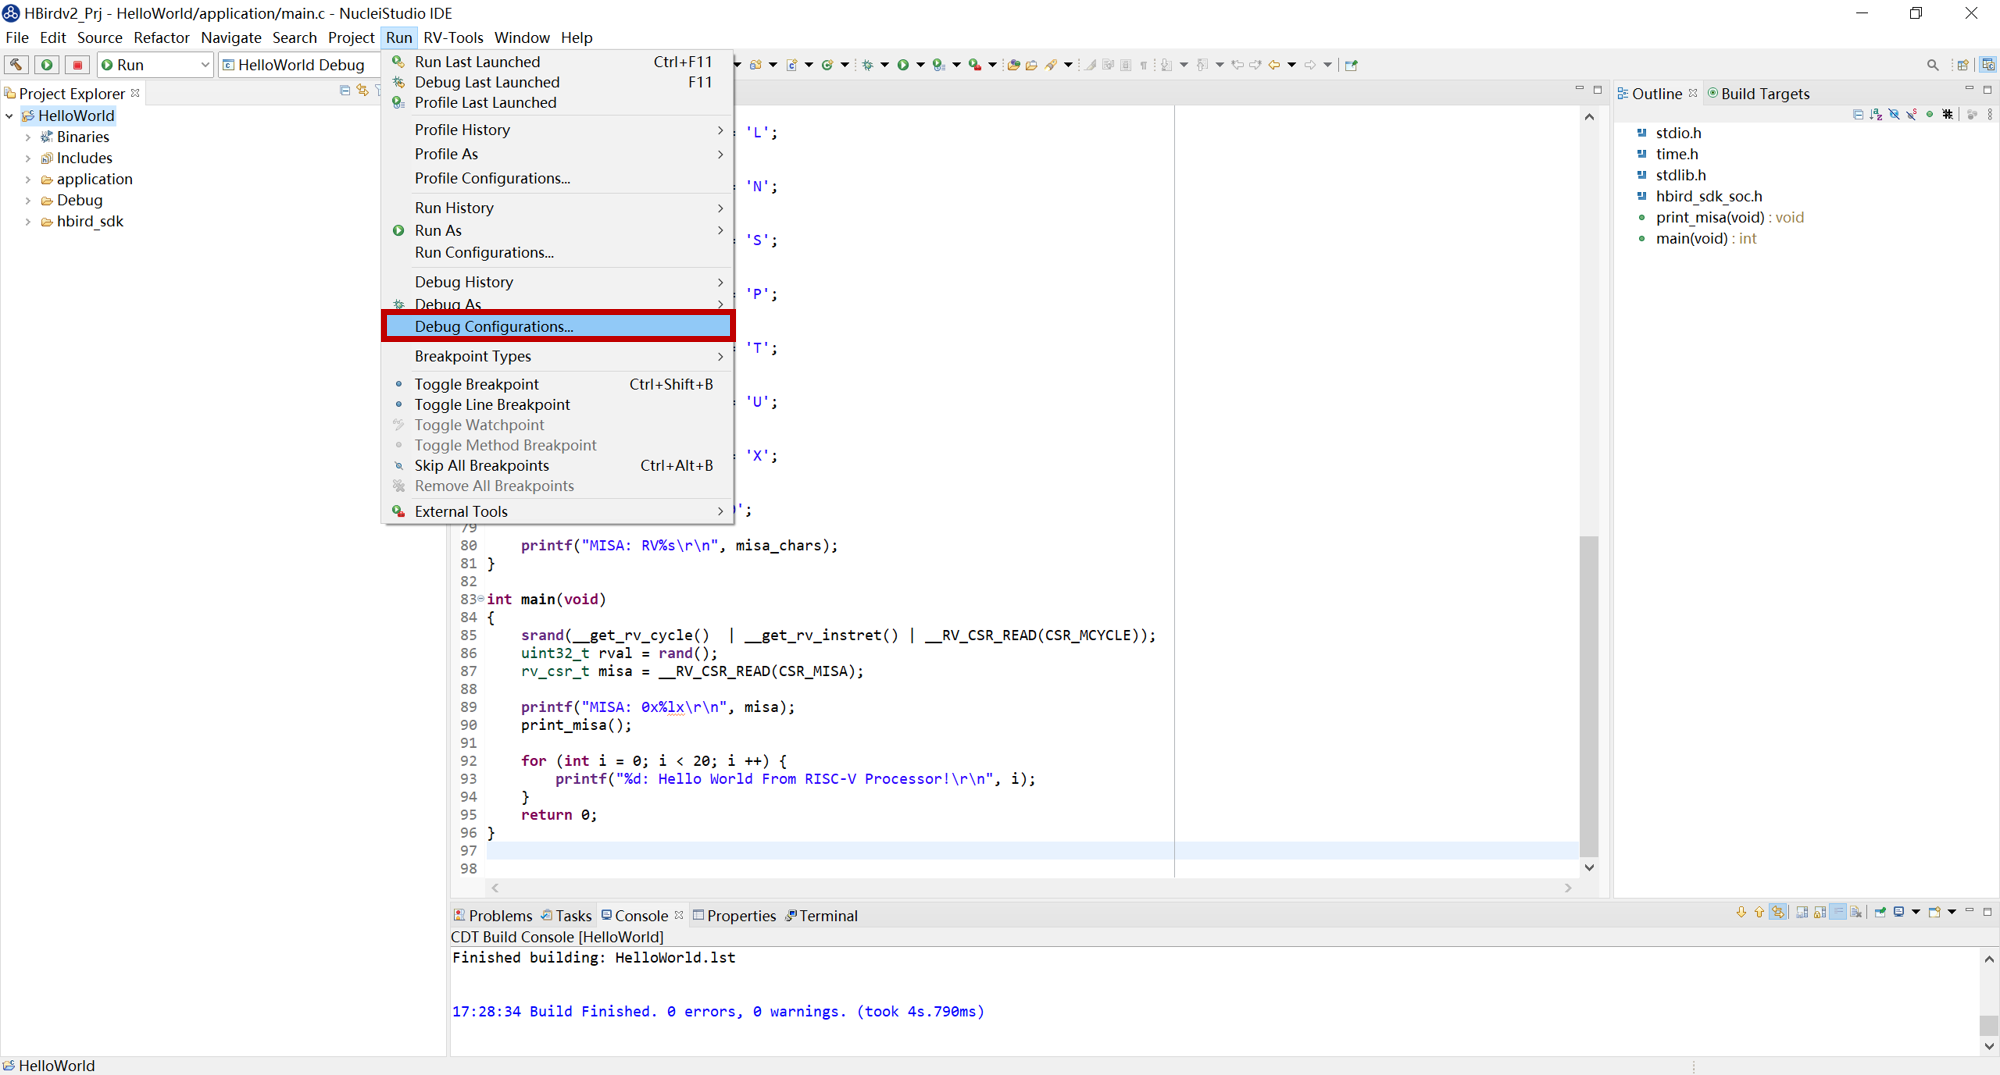
Fig. 4.80 Open Debug Configuration
Double-click “GDB OpenOCD Debugging”, then a set configuration file used for debug/download named “HelloWorld Debug” will be generated automatically, finally click “Debug” button, shown in the figure below.
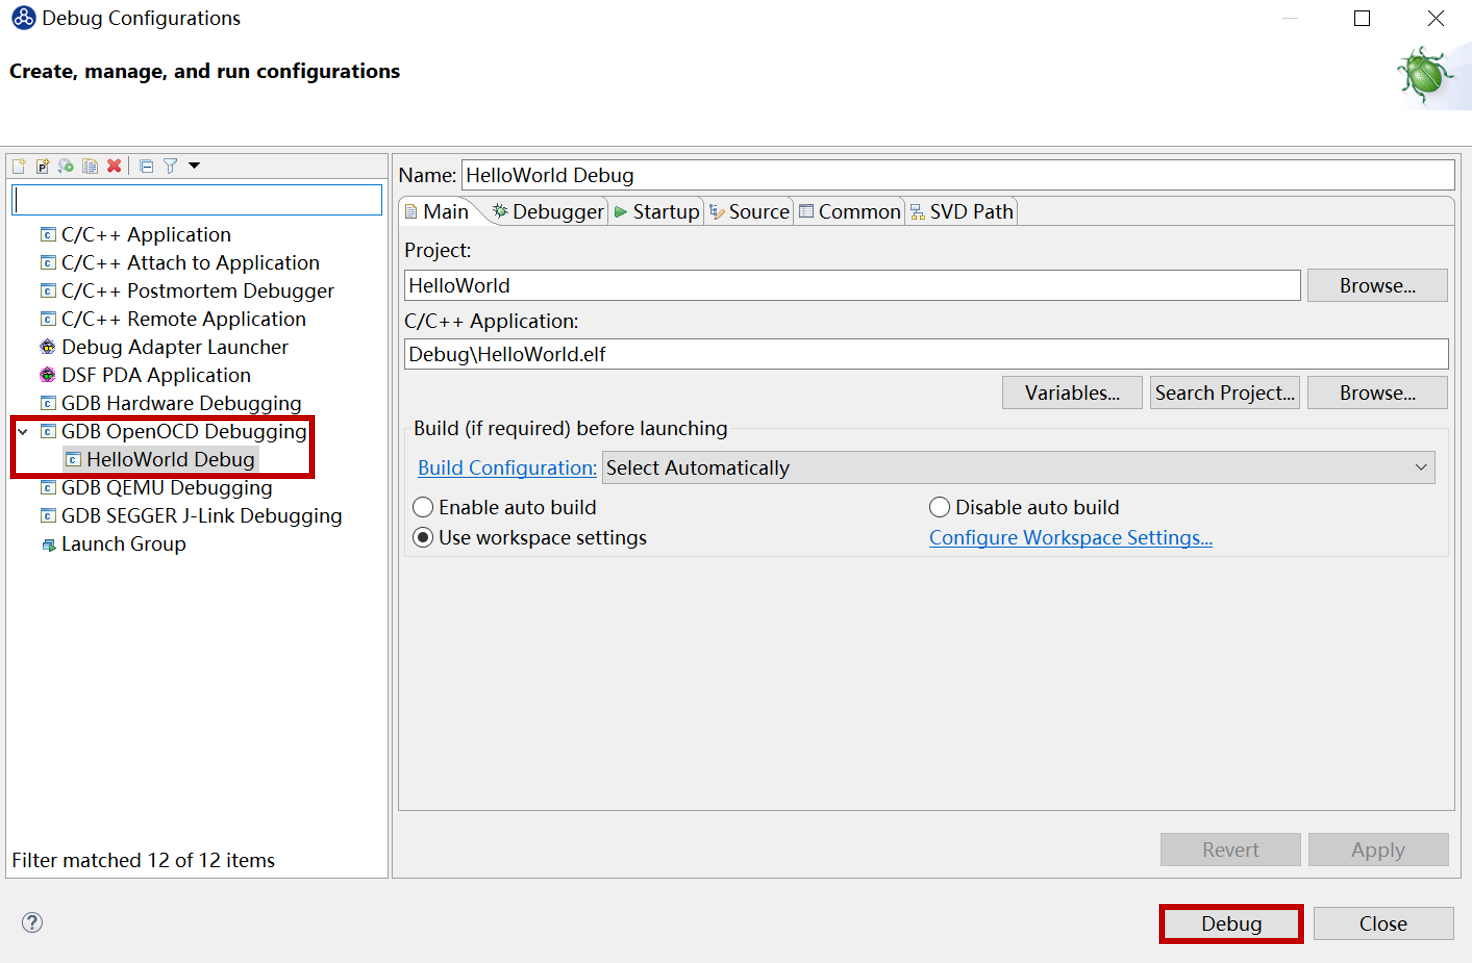
Fig. 4.81 Debug Configuration file
Note
If the Run/Debug Configuration file already exists, don’t need to generate again.
After entering debugging mode successfully, it will shown as the figure below.
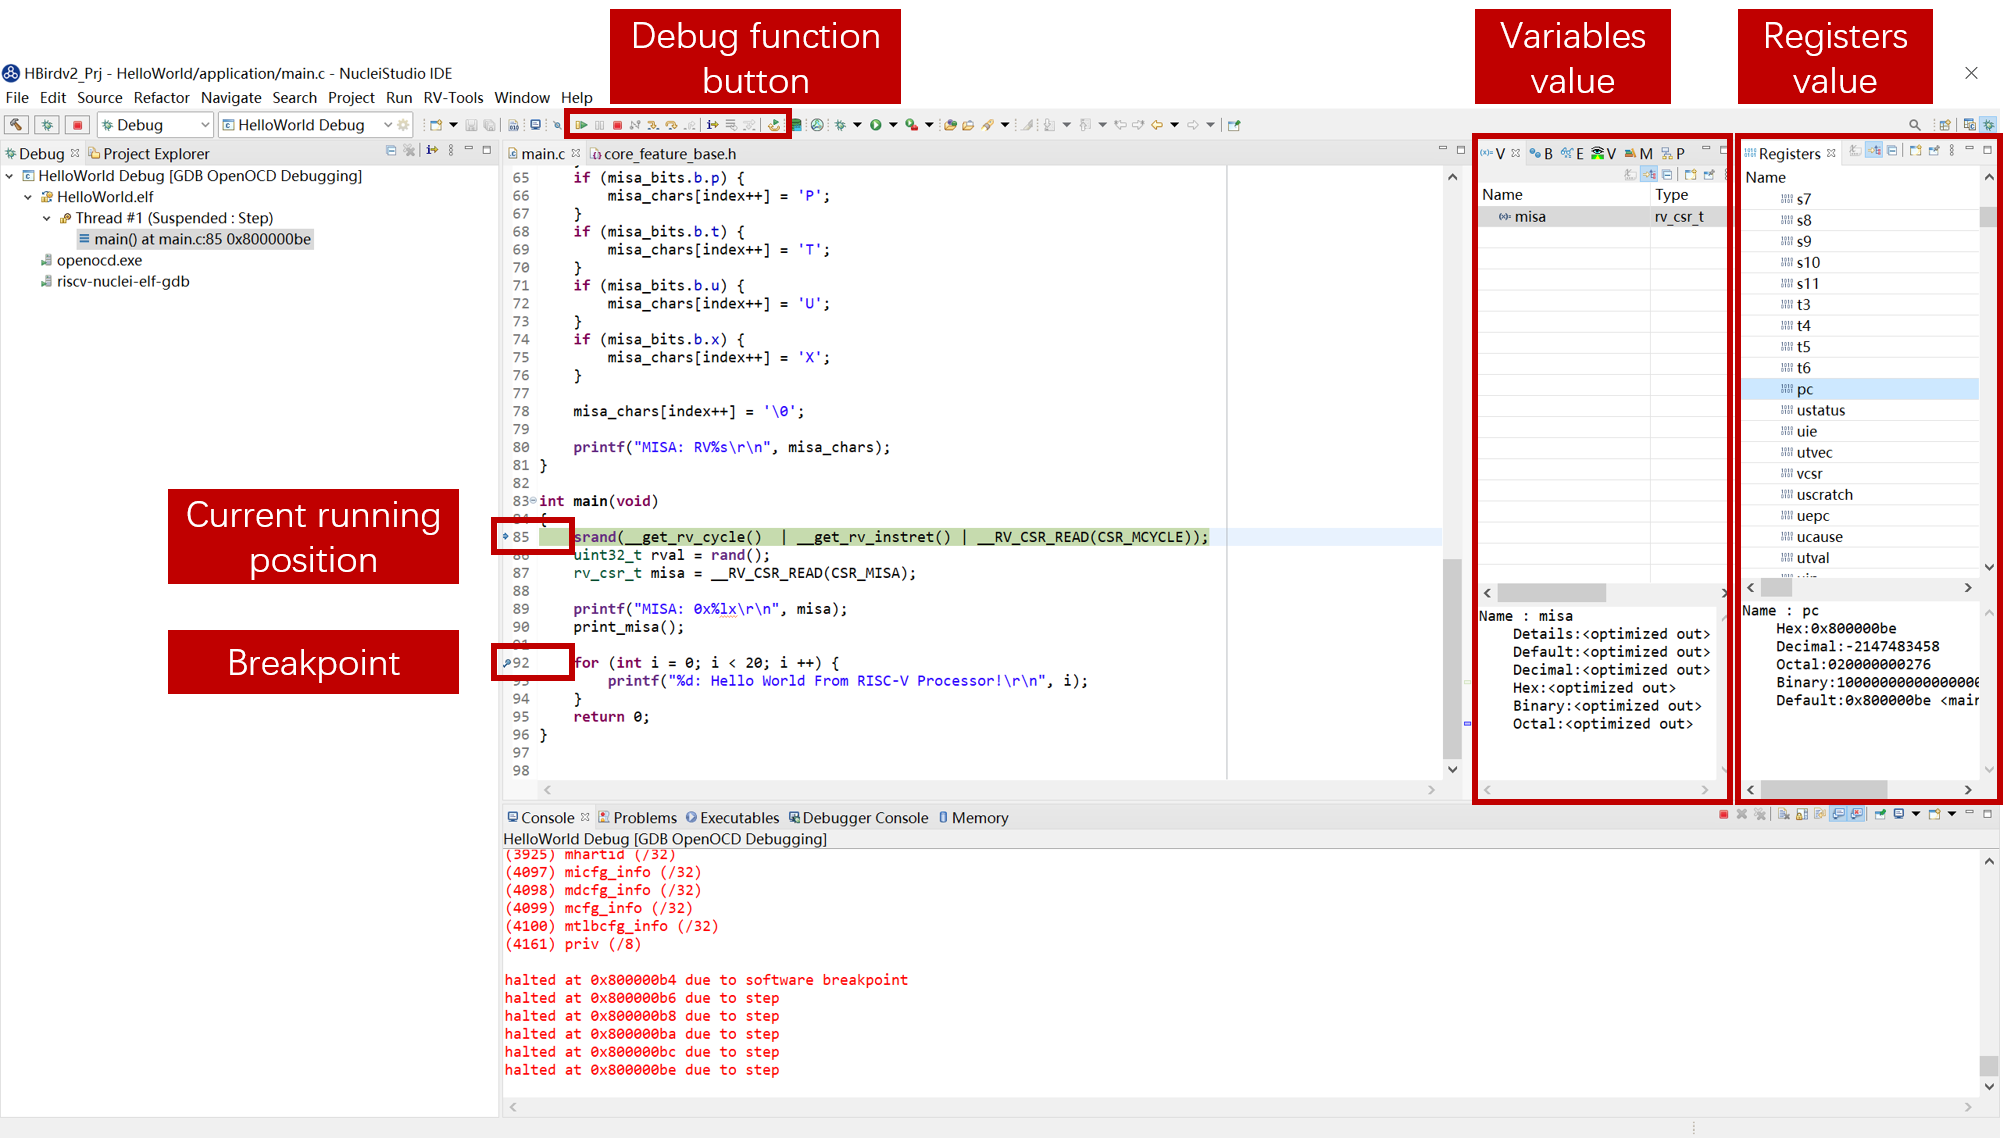
Fig. 4.82 Debugging Mode