How to Debug with Multiple Hummingbird Debuggers Simultaneously
Problem Description
Nuclei System Technology's Hummingbird Debugger uses the FTDI-FT2232H as its USB interface bridge chip. When multiple Hummingbird Debuggers are connected at the same time, how can you distinguish between different debuggers? How do you configure OpenOCD to recognize a specific Hummingbird Debugger?
Solution
The FT2232H provides a configurable Serial Number that can be used to distinguish between different debuggers.
Download FT_PROG
FT_PROG is a tool for programming the EEPROM inside the FT2232H. It can be used to view and modify the FT2232H's Serial Number.
FT_PROG download page: https://ftdichip.com/utilities/
You can find the download link on this page, as shown in the figure below:
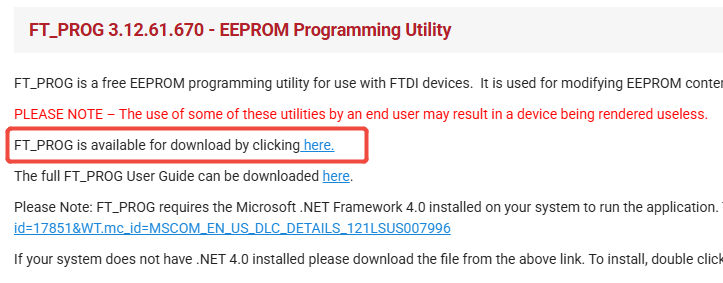
After downloading and installing, an FT_Prog tool icon will be created on the desktop.
View the Serial Number
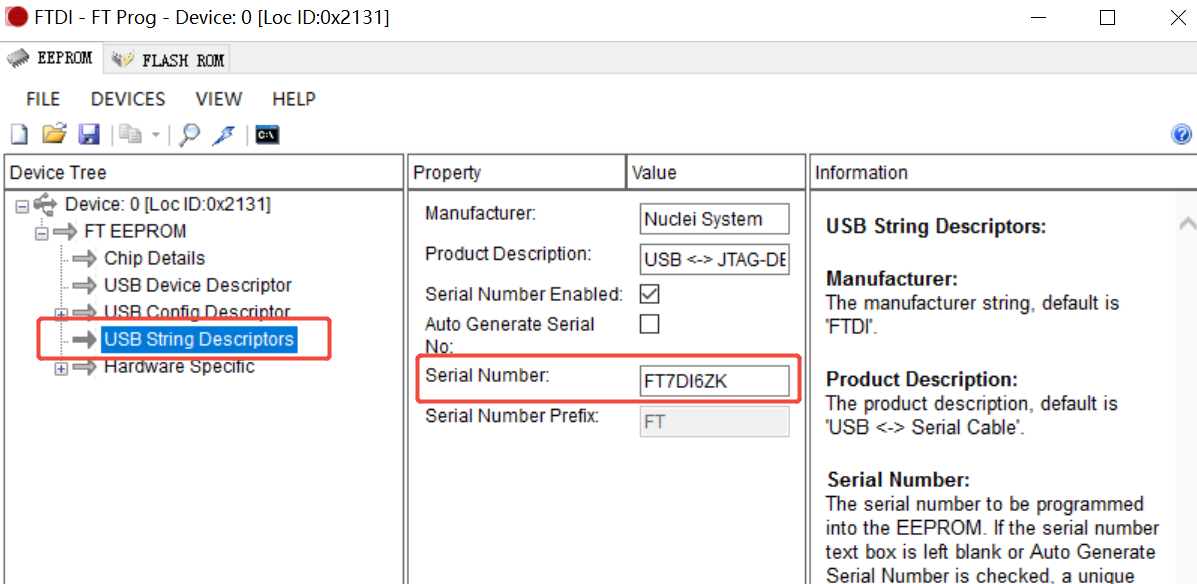
Using the FT_PROG tool, you can view the FT2232H's Serial Number.
- Connect the Hummingbird Debugger If you cannot distinguish between multiple Hummingbird Debuggers, it is recommended to connect only one Hummingbird Debugger first.
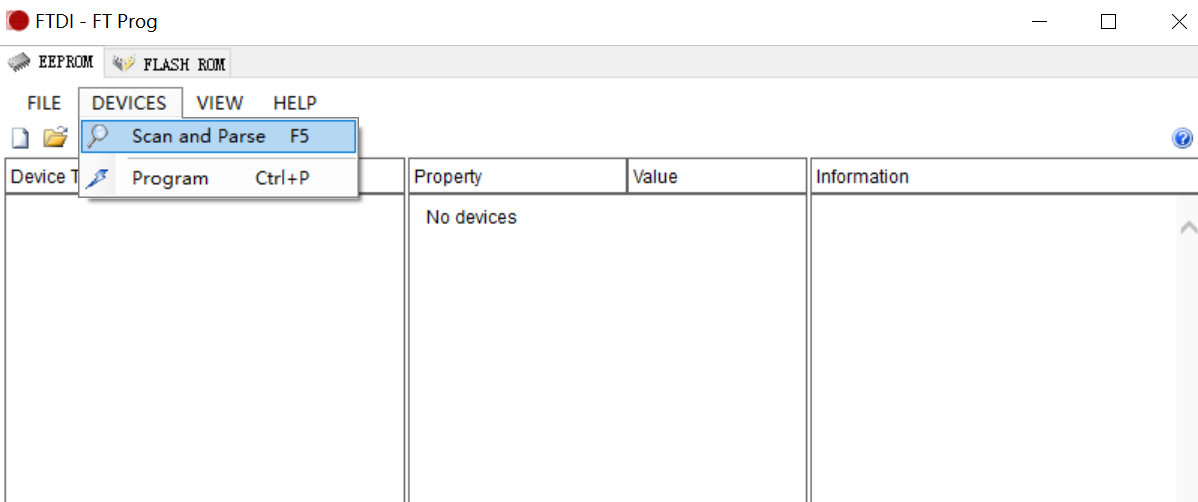
- Open the FT_PROG tool Click the FT_PROG icon to open the tool.
- Scan for devices Click
Scan and Parsein theDEVICESmenu to scan for connected Hummingbird Debuggers.
- View the Serial Number You can view the Hummingbird Debugger's Serial Number under
Serial Numberin theUSB String Descriptorssection.
Modify the Serial Number
You can modify the Hummingbird Debugger's Serial Number on the same page where you view it.
For example, in the figure below, I changed the original Serial Number FT7DI6ZK to FT7DI6ZB
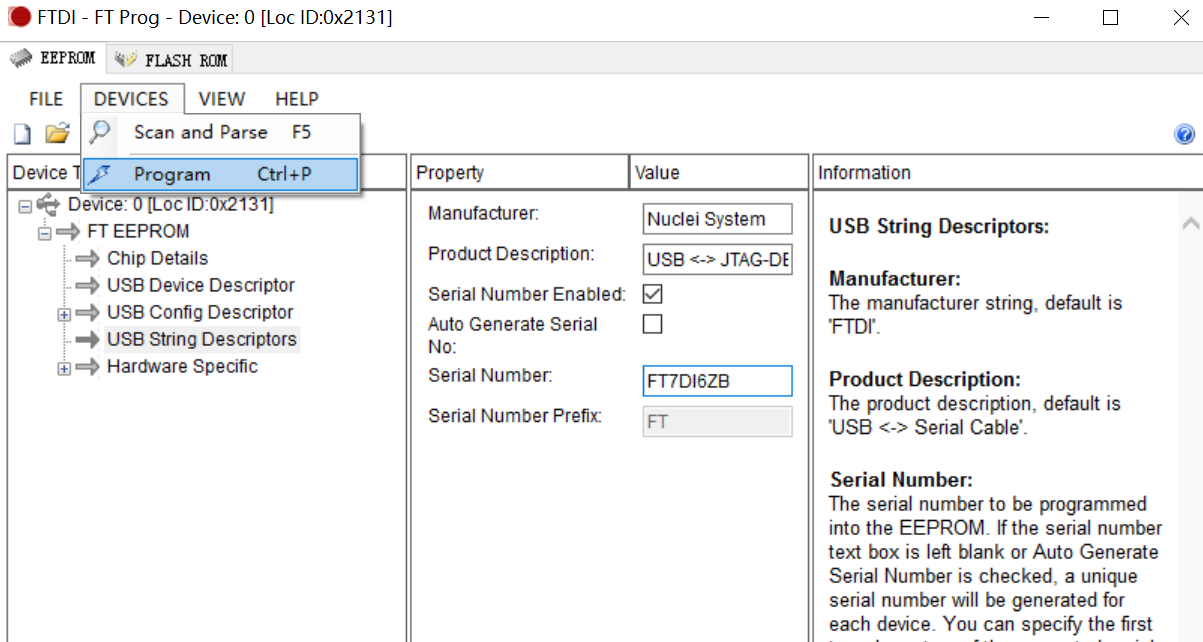
Then, using the Program option in the DEVICES menu, you can write the modified Serial Number into the FT2232H's EEPROM.
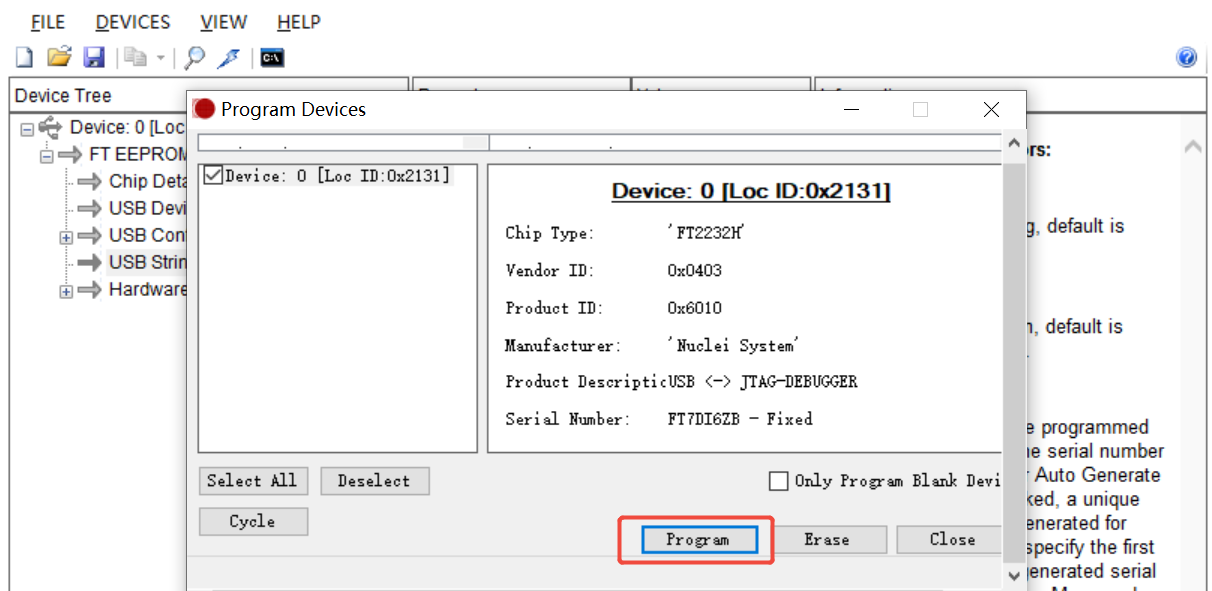
Note: Multiple Hummingbird Debuggers must be assigned different Serial Numbers to distinguish between them.
Update the OpenOCD Configuration
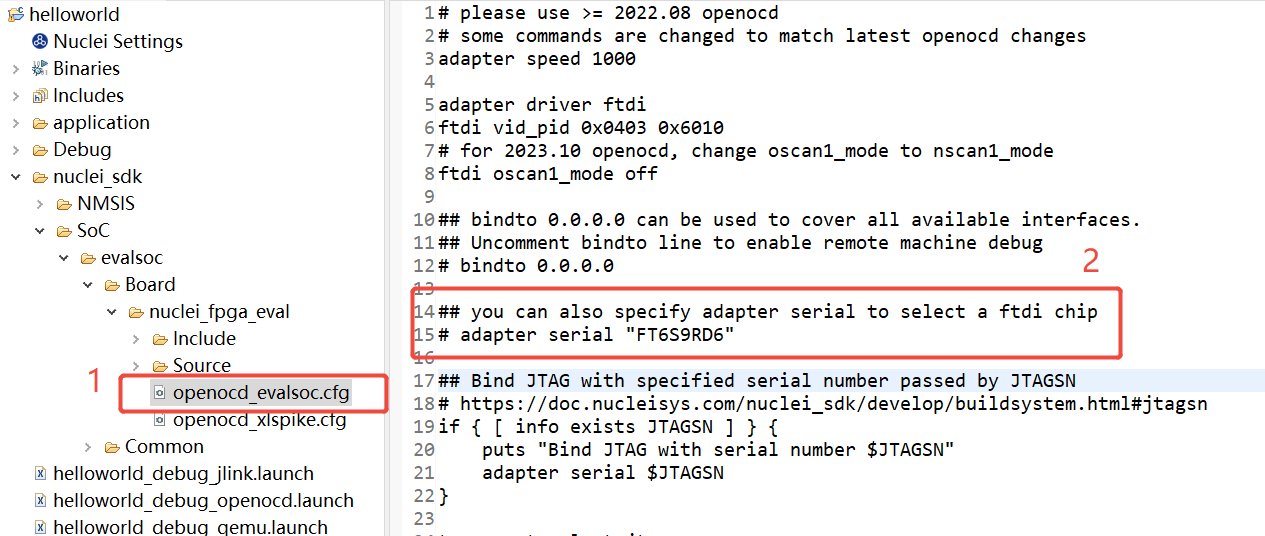
When using the Nuclei FPGA Evaluation Board, open the project's OpenOCD configuration file in Nuclei Studio, and you will see the following content:
Linux
Modify the openocd_evalsoc.cfg file according to the instructions in the red box in the figure:
# Note: remove the comment symbol # before adapter serial
adapter serial "<Serial Number>"
Replace <Serial Number> with the actual Serial Number.
Once modified, the project can be debugged using the Hummingbird Debugger with the specified Serial Number.
Windows
Note: On Windows, you need to append A to the actual Serial Number for the setting to be valid.
For example, if the actual Serial Number is FT7DI6ZB, the OpenOCD configuration file needs the following setting:
adapter serial "FT7DI6ZBA"